
Air Fryer Won’t Turn On? A 7-Step Troubleshooting Fix Before You Call Support
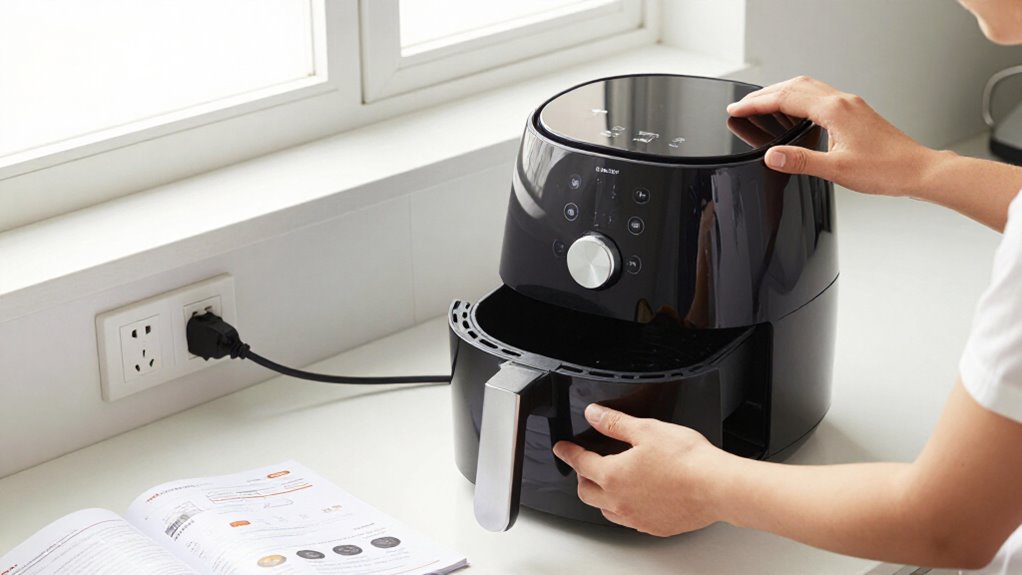
If your air fryer won’t turn on, unplug it and let it cool before checking it. Test the outlet with a lamp, reset the breaker or GFCI, and plug the fryer into a wall outlet.
Inspect the cord and plug for damage, then reseat the basket and clear the rails.
Set the timer above zero and check the display for error codes. Stop if you notice heat damage; the next steps can help you pinpoint the cause.
7 Checks Before Support
Before contacting support, run these seven quick checks: test the outlet with a lamp, check the breaker and GFCI, plug the fryer directly into a working wall outlet, inspect the cord and plug for damage, reseat the basket after clearing crumbs or grease, unplug the unit for 10 minutes, then try it again. If the lamp stays dark, try another outlet and reset the breaker or GFCI. Keep the fryer out of extension cords, power strips, and adapters.
Check for fraying, melting, scorch marks, or a burning smell; unplug it and stop using it if you find damage. Make sure the basket sits flush; crumbs or grease can block startup. After the 10-minute reset, test again. If it remains dead on multiple working outlets, don’t open the base; contact the manufacturer.
Gather Tools and Materials
If the seven checks haven’t restored power, gather the right tools and model-specific manual before doing anything more. Check your model and serial numbers, nameplate rating, and warranty terms; opening the housing may void coverage. Keep your workspace dry, well-lit, and clear. Use only tests you’re qualified to perform, and don’t bypass safety interlocks or probe live internals.
- Manual: Find troubleshooting steps and model-specific diagrams.
- Tester: Choose a three-prong outlet tester or rated multimeter for outlet checks.
- Tools: Keep insulated screwdrivers and needle-nose pliers for approved tasks.
- Cleaning supplies: Use a soft brush, lint-free cloth, and cotton swabs; don’t spray liquid.
- Records and PPE: Have a flashlight, notebook or phone, protective eyewear, and gloves available.
If you spot burning, melted plastic, or damaged wiring, stop and contact support.
Step 1: Unplug and Cool Fryer
Unplug the air fryer from the wall before resetting or inspecting it. If it shut down after overheating, leave it unplugged for about an hour so it can cool completely. Don’t try to restart it while it’s still hot; trapped heat can trigger its thermal protection again.
While it cools, place it on a clear, level surface and check that its air vents aren’t blocked by a wall, cloth, or nearby objects. Keep the area well ventilated during use to reduce the chance of another overheating shutdown.
Once the fryer has cooled, reconnect it firmly and try turning it on. If it remains unresponsive after cooling and a power reset, stop troubleshooting. Don’t open the housing or replace internal parts; contact the manufacturer for guidance.
Step 2: Verify the Outlet Works
To rule out a power problem, plug the air fryer directly into a wall outlet, bypassing power strips, extension cords, and multi-plug adapters.
Test the outlet with a lamp or another appliance that draws a meaningful load; a phone charger alone may not reveal a weak connection. If the test device stays off, check for a tripped GFCI or GFI outlet and press Reset. A reset outlet elsewhere may control nearby receptacles. Then check the circuit breaker. If it looks partly tripped, switch it fully OFF, then ON.
Retest the outlet. If it still fails, try a different working wall outlet. If the outlet feels warm, looks discolored, or smells hot, stop testing and contact a qualified electrician.
Step 3: Inspect the Power Cord
With the outlet ruled out, unplug the air fryer and inspect the entire cord for fraying, cracks, kinks, stiff spots, or separation. Check where the cord meets the appliance and plug; damage can hide at these stress points. Examine the plug for bent blades, melted plastic, scorch marks, or damage.
If you spot a defect, don’t plug the fryer back in or try a repair. A damaged cord can cause shock or fire. Stop using it if you notice a burnt smell or signs of overheating, and contact support. If the cord detaches, replace it only with a compatible cord. Have a fixed cord repaired by a qualified technician. If the cord and plug look intact, reconnect the plug securely, then test the unit.
Step 4: Confirm the Basket Interlock
If the air fryer still won’t start, check that the basket is engaging its safety interlock. Remove the drawer and inspect its rails and edges for crumbs, grease, or that could block closure. Wipe away residue, then slide the basket back in until it sits flush, with no gap. Check the edges for cracks or warping; damage can keep the interlock from engaging.
If the fryer remains unresponsive, remove and reseat the basket, making sure nothing obstructs it. Some models disable the fan and heater when you remove the pan, so confirm it’s inserted before starting a cycle. Don’t force or bypass the switch. If the basket seats but the unit still won’t respond, consult your manual or contact the manufacturer.
Step 5: Reset the Circuit Breaker
A tripped circuit breaker can cut power to your air fryer, even when the switch looks almost on. Check your home’s breaker panel and look for a switch that sits between ON and OFF or doesn’t line up with the others. Before you reset it, unplug the air fryer. This reduces risk while you restore power and helps you test the appliance safely.
If the breaker appears tripped, move it firmly all the way to OFF, then switch it fully back to ON. Reconnect the air fryer and plug it directly into a wall outlet. Try turning it on once. If the breaker trips again, stop testing the fryer; don’t keep resetting the switch. Contact a qualified electrician or the manufacturer to investigate a possible electrical fault.
Step 6: Wipe Exterior, Clear Vents
Before cleaning, unplug the air fryer and let it cool completely. Wipe the exterior with a damp cloth, then dry it thoroughly before reconnecting power. Keep the air vents clear of dust, grease, and debris; restricted airflow can contribute to overheating and may interfere with normal operation.
Use a soft brush to lift loose dust around each vent, but don’t push debris inside the appliance. Never spray water or cleaning products directly onto the control panel, vents, plug, or base.
As you clean, check for signs that point to an electrical hazard. If you notice a burnt smell, scorch marks, or a hot plug, stop using the fryer; don’t reconnect it or continue troubleshooting. Contact the manufacturer or a qualified repair professional for guidance instead.
Test the Heating Element
After clearing the vents, inspect the heating element for grease, food debris, or visible damage. First, unplug the air fryer and let it cool completely. Never touch or test the element while the appliance is plugged in, and don’t open the housing to reach internal parts.
Check the element for breaks, burn marks, or discoloration. Grease and stuck-on food can contribute to overheating or poor heating. If you find buildup, gently brush it away, then wipe the area with a damp cloth. Let everything dry fully before plugging the appliance back in.
If the element looks damaged, don’t use the air fryer. If it appears intact but the unit still won’t heat after cleaning, stop troubleshooting and contact the manufacturer or a qualified repair professional. Internal electrical testing requires proper training and tools.
Timer Dial Set to Zero
If your analog air fryer won’t start, check that the timer dial isn’t set to zero.
Turn the dial to your intended cooking time; a zero setting can keep the heater from starting, even when the plug is connected. For a run under 10 minutes, rotate it to about 15 minutes first, then turn it back to your shorter setting. This helps the mechanical timer engage.
| Check | What to do |
|---|---|
| Dial at zero | Turn above zero |
| Short cook | Set 15, then turn back |
| Ticking, no heat | Reseat plug; select time |
If it ticks but stays cold, confirm the plug sits firmly in the outlet and choose a real cooking time. Unplug before inspecting a damaged cord; don’t open the appliance.
Check Error Codes
Check the display for an error code, then consult your air fryer’s manual because meanings vary by model. Note the exact code or blinking pattern before you unplug the unit; a photo can help if you contact support.
An E1 or Error 1 often signals a temperature-sensor problem. Unplug the fryer, let it cool completely, and clear anything blocking airflow. E2 or Error 2 commonly means overheating protection has activated. Let the appliance cool, then follow the manual’s reset instructions.
If you see E3, remove the basket or drawer, clear crumbs or other obstructions, and slide it back in until it sits flush. E4 can point to restricted airflow or a fan fault. Clear visible vent blockages, but don’t open the housing. If any code persists, stop using the fryer and contact the manufacturer.
Conclusion
Before you call support, work through these seven checks: unplug and cool the fryer, confirm the outlet works, inspect the cord, clear the vents, test the heating element, check the timer dial, and note any error codes. Stop if you spot damage, smell burning, or suspect an internal fault, don’t open the appliance. If it still won’t turn on, keep your model and error details handy, then contact the manufacturer or a qualified repair technician for safe next steps.