
Replacing an Air Fryer Power Cord Safely: A Step-by-Step Guide
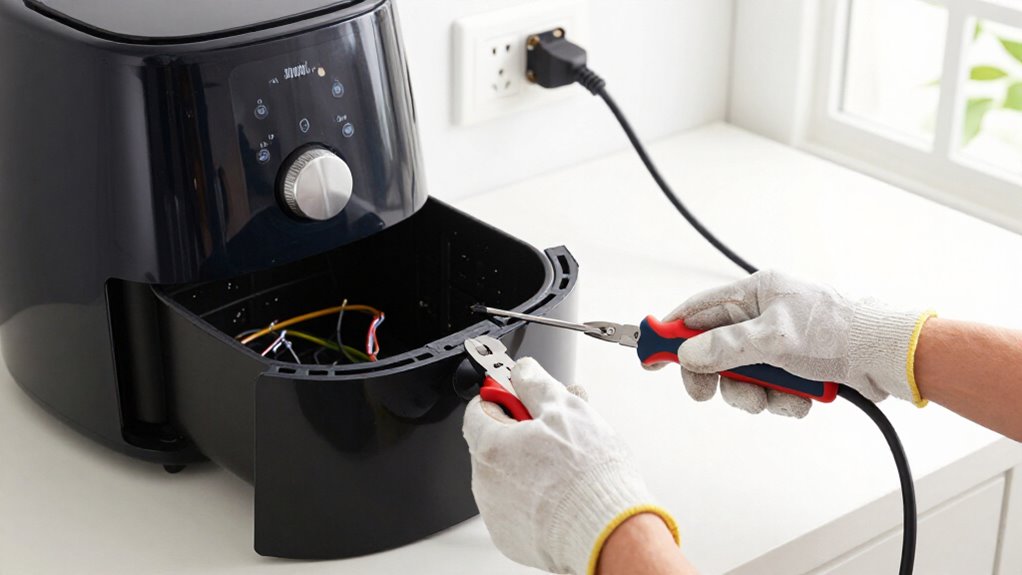
Before replacing an air fryer’s cord, check its label and manual, then choose a compatible cord with equal or higher ratings. Switch off, unplug by the plug, and let the fryer cool completely.
Inspect the cord and strain relief for damage; never energize or move a damaged cord.
Photograph wiring before opening the cover. Replace connections only if qualified; otherwise, use a repairer.
Reassemble securely before testing power and heating separately. The steps below clarify each stage safely.
Cord Compatibility and Ratings
Choose a replacement cord that meets or exceeds your air fryer’s specified wire gauge and amperage; never use one rated below the appliance’s requirements.
Check the appliance’s label and manual for its current and voltage ratings before selecting a cord. For a high-power model, choose a suitably heavy-duty conductor; 12 AWG suits demanding equipment, while 18 AWG is intended for lightweight devices.
Match the cord’s plug, length, and device-end connector to the original configuration. If your air fryer requires grounding, use a grounded three-prong cord; don’t replace it with a two-prong type. Select a UL- or ETL-certified cord with insulation rated for the appliance’s operating conditions. Don’t reuse a cord whose insulation is cracked, bulging, or overheated; replace it with a rated compatible cord.
Inspect the Strain Relief
Before replacing the cord, inspect the strain relief, the fitting that secures the cable where it enters the air fryer. Use your model’s service manual to locate the grommet, gland, clamp, or molded flange; don’t force the housing open. Check the fitting and cable entry for damage, looseness, or contamination.
- Look for cracks, splits, hardened rubber, missing clamp halves, loose screws, corrosion, or gaps in any sealing washer.
- Trace the cable path; note sharp edges, pinch points, heat discoloration, melted plastic, abrasion, or exposed conductors.
- With access per manual, gently move the cable and watch for movement inside; don’t pull hard or stress wires.
- If relief shifts, fails to grip, or shows heat or water damage, replace it with the specified part; document findings.
Step 1: Unplug and Cool the Air Fryer
Switch off the air fryer, unplug it from the wall, and let it cool completely before inspecting or repairing it; the heating element and internal parts can stay hot after use.
Keep the plug in view throughout the job, and tell others not to reconnect it; this reduces the chance that someone restores power while your hands are near the appliance. Don’t rely on the power button as isolation: only a wall disconnection removes the mains supply. If the cord has cracked, bulging, or overheated insulation, don’t touch or move it while it remains plugged in.
If you haven’t disconnected it yet, switch off the outlet if possible and unplug by gripping the plug body, not pulling the cord. Set the appliance on a stable, dry, nonconductive surface, and wait until all parts feel fully cool before proceeding. Prevent accidental power-up during work.
Step 2: Photograph the Wire Connections
With the air fryer unplugged and verified disconnected from power, photograph the wiring before opening the rear cover or removing any connections.
Use bright, even lighting and hold the camera steady so wire colors, terminal positions, and routing remain clear. Take close-up images of each Faston terminal, thermostat connection, and cable entry; include enough surrounding detail to distinguish adjacent points. Then take a wider interior photo showing how the wires sit relative to the resistance and nearby components.
Capture the connections from more than one angle if a wire obscures a terminal, but don’t touch or move the wiring to improve the view. Keep photos available during reassembly; compare each wire with its original terminal and route, and stop if uncertain.
Step 3: Remove the Rear Cover
Once the air fryer is unplugged, remove the six medium Phillips screws securing the rear cover and keep them together for reassembly. Place the screws in a tray so none get lost. Set the air fryer on a dry, stable surface and confirm it’s completely cool.
Use an insulated Phillips screwdriver and lift the cover slowly, keeping your fingers clear of sharp edges. Don’t pry against plastic tabs or force a panel that catches; set the cover aside on a clean surface.
With it removed, you’ll see internal components. The safety thermostat’s RESET button is semi-hidden underneath the thermostat area. Note its location, but don’t press it or disturb nearby parts. Avoid touching internal components. Stop if the cover resists; seek qualified service for guidance.
Step 4: Connect the Replacement Cord Wires
Before making any connections, confirm the air fryer is unplugged, then cut away the damaged cord section while preserving as much usable appliance-side wire as possible.
Inspect conductors and terminals for scorching, melted insulation, or deformation. If you find heat damage, stop; don’t reconnect compromised parts. Strip insulation to the length required by the terminal, without nicking copper. Crimp a correctly sized Faston terminal onto the appliance wire, then check that it grips the resistance terminal snugly; a loose fit can overheat.
Join replacement cord conductors to appliance wires with a rated terminal block. Match conductors when their identities are clear, and tighten the block’s screws to specified torque. Make sure connections are secure and insulated. Don’t guess at wire matching or force an ill-fitting terminal. If a conductor is scorched, a terminal won’t grip firmly, or wiring is uncertain, stop and have a qualified technician complete the repair.
Step 5: Confirm Heat-Safe Wire Routing
Route the replacement cord through the original cable gland, keeping it clear of the heating element, hot terminals, sharp edges, and moving parts. Follow the appliance’s original path; don’t improvise a shortcut near heat sources or pinch points.
Use a cord whose insulation temperature rating and current capacity meet the air fryer’s specifications; a general-purpose cord isn’t suitable unless its ratings match. Seat the cord fully in the gland and secure it so movement at the plug can’t pull on internal connections.
Inspect the route: keep insulation away from heat, sharp metal, and pinch points, and verify that no wire lies beneath the rear cover. Confirm connections remain insulated and secure. If the path or heat rating is unclear, stop and consult the manufacturer or a technician.
Step 6: Replace the Rear Cover Screws
With the air fryer unplugged, confirm all internal connections are secure, then position the rear cover without pinching the replacement cord or internal wires.
Align the cover with its screw holes and check that it sits flush against the housing. The safety thermostat’s RESET button is partly hidden beneath the cover, so don’t press or obstruct it while fitting the panel. Use the six medium Phillips screws removed during disassembly; start each screw by hand to reduce the chance of cross-threading.
Once all six are engaged, tighten them gradually in an alternating pattern so the cover seats evenly. Stop when each screw is snug and the cover is secure. Don’t overtighten: excessive force can strip or damage the screw holes and compromise the housing fit. If a screw won’t turn smoothly, back it out, realign the cover, and try again. Keep the appliance unplugged throughout reassembly.
Verify Indicator Light Operation
Once the rear cover is secure, plug in the air fryer and switch it on to check that the pilot indicator light illuminates.
If the light stays off, switch the appliance off and unplug it before inspecting anything. Check that the resistance sits correctly in the tank, and confirm the lid rim presses the switch into its activated position. Never reposition the resistance or adjust the switch while the unit is connected to mains.
Restore proper placement and alignment, then reassemble any parts you removed before restoring power. When the pilot light illuminates, it confirms that power is reaching the appliance; it doesn’t confirm that the heating element operates. Verify heating separately according to the manufacturer’s instructions, maintaining a safe distance from hot surfaces.
Test for Intermittent Power Loss
Does the air fryer lose power when its cord moves? With the fryer unplugged, move the cord near its entry point; don’t energize it during this check. If power cuts in and out as the cord moves, stop using the appliance: an intermittent connection or overheated terminal can cause shock or fire.
| Observation | Action |
|---|---|
| Power changes with movement | Keep fryer unplugged |
| Break or loose terminal | Don’t operate appliance |
| Fault unclear or inaccessible | Call qualified technician |
If you can open the appliance, inspect the cord-entry area and terminals for breaks, looseness, scorching, or melted insulation. A broken conductor at the cable gland or a loose, toasted Faston terminal can interrupt power. Leave the fryer unplugged until a technician identifies and corrects the fault.
Inspect Cord for Fraying
Before inspecting the cord, unplug the air fryer and check its full length for cracks, fraying, bulges, or melted insulation. Examine the plug and cable entry point closely; repeated bending near the cable gland can hide a break beneath intact-looking insulation. Don’t pull, twist, or sharply bend the cord. While it remains unplugged, gently move it and look for damage or looseness.
Consider whether the fryer has lost power when the cord moves. That symptom can indicate a damaged conductor even when you can’t see a break. Don’t use a cracked, bulging, overheated, or otherwise damaged cord, even if the appliance still works intermittently. Leave the fryer unplugged until a correctly rated replacement is installed or a qualified repairer assesses it. Avoid attempting repairs while the appliance is connected to mains power.
Conclusion
Replacing an air fryer power cord requires more than matching plugs. You must confirm the cord’s voltage and current ratings, inspect its strain relief, and document every connection before removing the cover. Keep the appliance unplugged and completely cool throughout the work.
After reassembly, check the indicator light and monitor for intermittent power loss or fraying. If anything seems damaged or uncertain, don’t energize it; ask a qualified technician to inspect the fryer first. Safety comes first.