
The Deep Fryer Maintenance Schedule: Oil Changes and Cleaning That Work
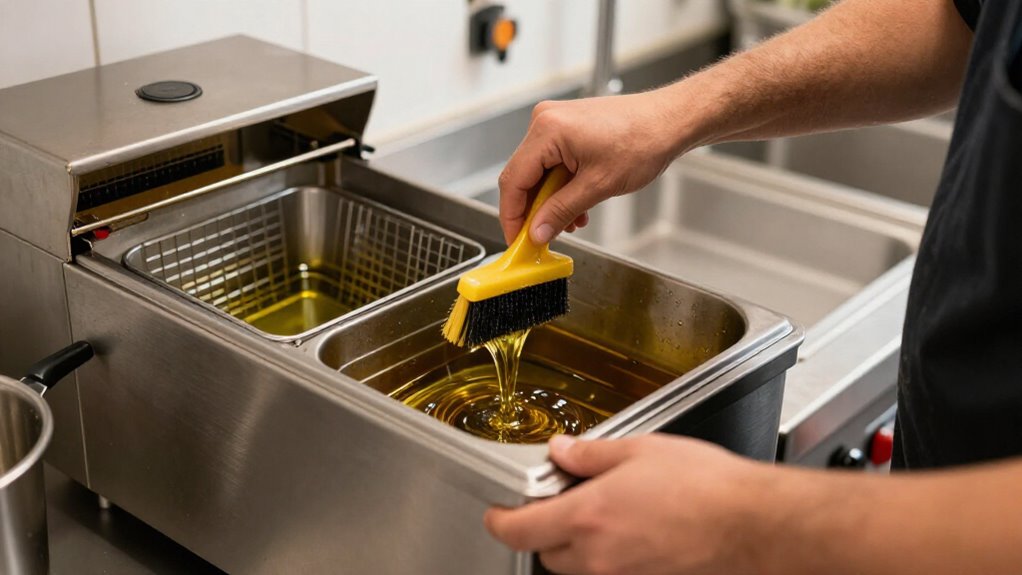
Keep your fryer reliable by skimming crumbs during service and filtering oil daily, whatever type you use.
Replace it when it darkens, thickens, smells burnt, foams persistently, affects flavor, or smokes at 350°F; use workload-based intervals only as starting points.
Clean sediment weekly and boil out monthly, following the manual.
Before draining, switch off the fryer, let oil cool 1½–2 hours, and verify handling temperature.
Track checks per shift; the schedule below helps you prevent breakdowns and burns.
Limit Oil Breakdown, Downtime
To limit oil breakdown and fryer downtime, filter the oil daily to remove crumbs and fine debris, which can extend its life by 25–40%.
Skim debris during service and keep frying temperatures at or below 375°F (190°C). Cover idle vats to reduce exposure to air and light. Set replacement intervals by workload: high-volume kitchens handling 100 or more orders daily typically need fresh oil every 2–3 days; daily filtration may extend intervals in lower-volume operations.
Replace degraded oil if it darkens, smells burnt or bitter, foams persistently, makes food greasy, or smokes at 350°F (175°C). These signs threaten food quality and increase fire risk. Clean the fryer regularly, inspect thermostats and filtration systems, and ask a technician to investigate rapid oil breakdown or slow heating.
Fryer-Specific Cleaning Tools
Regular filtration helps limit oil breakdown, while fryer-specific cleaning tools remove carbonized grease and debris that routine filtering leaves behind. You’ll need tools matched to each surface: a vat-sized nylon or stainless tank brush reaches corners, while a plastic or brass scraper lifts deposits without damaging coated interiors. Use a basket brush for mesh, and soak removable parts in a tray or optional ultrasonic cleaner. For deeper buildup, use a boil-out kit with approved alkaline cleaner, following the fryer’s fill, temperature, and dilution limits.
- Wear heat-resistant and chemical-resistant gloves, eye protection, and an apron; keep ventilation clear.
- Drain and cool the vat before rinsing; never add water to hot oil.
- Disconnect electric power and lock it out; shut gas off before burner work, as the manual directs.
Oil-Change Timing by Fryer Type
Because fryer workload affects how quickly oil breaks down, use volume-based intervals as a starting point: change oil every 2-3 days in high-volume fryers serving 100 or more orders daily, every 4-5 days in medium-volume fryers serving 50-100 orders, and every 6-7 days in low-volume fryers serving fewer than 50 orders.
| Fryer type | Orders daily | Starting interval |
|---|---|---|
| High-volume | 100+ | Every 2-3 days |
| Medium-volume | 50-100 | Every 4-5 days |
| Low-volume | Under 50 | Every 6-7 days |
Treat these intervals as guidelines. Check oil daily; menu, volume, and filtration affect degradation. Breaded or battered foods leave debris, so filter more often and shorten intervals.
Replace oil if it darkens, thickens, foams, smells burnt, or alters food flavor. Follow local rules and your fryer manual, and keep a change log.
Cool Oil Before Draining
Turn off your fryer and let the oil cool for about 1½–2 hours before draining. Check that it’s at a safe temperature; hot oil can cause severe burns and splashes. Drain it carefully into a heat-safe container, and follow local disposal rules—never pour oil down drains or put it in regular trash.
Allow Oil to Cool
Before draining the fryer, switch it off and let the oil cool to a safe temperature, which typically takes 1½–2 hours. Don’t drain hot oil: it can splash during transfer and cause severe burns.
Keep the fryer undisturbed while it cools; post a warning if needed, and keep staff and walkways clear of the unit. Don’t leave the area cluttered with hoses or containers that could create trip hazards.
Once the oil has cooled, prepare a suitable disposal container that can hold the full volume without tipping or leaking. Follow your fryer’s draining procedure and safe handling practices, using a pour and keeping your hands and body out of the oil’s path. Don’t carry an open vessel through busy work areas.
Seal the container and arrange disposal according to your site’s approved process. Never pour used oil into a drain. This cooling pause protects everyone.
Check Safe Temperatures
Once the disposal container is ready, switch off the fryer and let the oil cool for about 1½–2 hours before draining. Check temperature rather than relying on elapsed time alone; fryer size, oil volume, and room conditions can affect cooling. Use an appropriate thermometer if you need to verify the oil has reached a safe handling temperature. Never drain hot oil; it can splash or cause severe burns.
Keep people clear of the draining area and use a stable, heat-safe container rated for oil. Pour slowly and carefully to limit splashes, and don’t overfill the container. Follow its handling instructions and local disposal requirements. If the oil still feels hot or gives off heat, wait longer and check again before you begin draining.
Turn Off the Fryer
Switch off the fryer using the manufacturer’s shutdown instructions, then let the oil cool for about 1½–2 hours before draining. The exact cooling time can vary with fryer size, oil volume, and room conditions, so follow the manufacturer’s guidance and verify the oil has reached a safe temperature before you proceed. Never drain hot oil: it can cause severe burns and splashes, and the fryer may retain heat after you turn it off.
Keep staff clear of the unit while the oil cools, and don’t begin maintenance until the cooling period is complete. If you’re responsible for a commercial kitchen, communicate the shutdown and cooling status to your team so nobody restarts or handles the fryer prematurely. Once the oil is safe to handle, continue with the draining procedure in your fryer’s manual.
Prevent Burns and Spills
After confirming the oil has cooled to a safe temperature, typically 1½ to 2 hours, set a stable, suitable container beneath the drain and open the valve slowly to prevent splashes. Even after cooling, treat used oil as a burn hazard: residual heat can remain in the vat, valve, and fittings. Put on heat-resistant gloves and a heavy-duty apron before handling the fryer.
Keep coworkers and other traffic clear of the work area, and follow the manufacturer’s draining instructions and your kitchen’s procedures. Stay alert throughout. Once the oil is contained, train staff to move and dispose of it using approved methods and local requirements. Never pour used oil into a sink or floor drain, or place it in regular trash. Use designated collection or recycling arrangements.
Drain Oil Carefully
Before draining, turn off the fryer and let the oil cool for about 1½ to 2 hours; never drain hot oil.
Once it reaches a safe temperature, position a suitable used-oil container beneath the drain outlet. Check that the container is stable and large enough for the volume. Open the valve slowly; a controlled flow limits splashes and burn risk.
Keep staff and bystanders clear, and don’t leave the transfer unattended. Close the valve fully when draining ends, then secure the container’s lid to prevent leaks and spills. Follow local disposal rules: don’t pour oil down a drain or place it in regular trash. Store sealed oil until collection. If you can’t handle or dispose of it safely, arrange pickup or recycling through a professional used-oil service.
Filtering Frequency by Oil Type
Your oil type affects stability, but it doesn’t remove the need to filter daily. Filter more often when you fry breaded or battered foods, and fully filter at least weekly to catch fine debris. Filter sooner if you see crumbs, darkening, or persistent foam.
Oil Type Differences
Choose a high-stability commercial oil, such as canola, high-oleic sunflower, or peanut oil, to help resist breakdown during frying. Stability varies by oil, but no type is immune to heat, oxygen, or food residue. Don’t treat a more stable oil as permission to skip filtration or condition checks.
Filter every oil type daily to remove crumbs and particles; consistent daily filtration can extend oil life by 25–40%. Fully filter it weekly to capture finer debris that routine filtering may leave behind. When you fry breaded or battered foods, their shed particles accelerate breakdown, so filter more often during service, regardless of oil type.
Track each oil’s condition and change it if it darkens, develops burnt or bitter odors, smokes at 350°F (175°C), or produces persistent foam. Stop using oil that smokes or foams persistently; handle it safely.
Filtering Frequency Guidelines
Filter fryer oil daily, regardless of type, to remove crumbs and fine particles that accelerate breakdown and can shorten oil life. Consistent filtration can preserve flavor and extend usable life by an estimated 25–40%. Skim debris between batches, especially when you’re frying breaded or battered foods; their loose particles can degrade oil faster.
Oil type doesn’t set a different filtering schedule. Canola, high-oleic sunflower, and peanut oils offer good stability, but you still need to filter them regularly. Fully filter the oil at least weekly to remove fine debris, and filter daily after busy service.
Check your fryer’s manual for equipment-specific instructions, and monitor oil condition every day to guide handling. Let oil cool to a safe temperature before filtering, use the approved system, and protect yourself from splashes and burns.
Signs Oil Needs Filtering
Even with a regular filtering schedule, oil’s condition can signal when it needs attention sooner. Watch for darkening, persistent foam when no food is cooking, smoky or burnt odors, and greasy or unevenly browned food. These signs can indicate that crumbs and fine particles are degrading the oil or that the oil itself is breaking down.
Skim debris throughout service, especially after frying breaded or battered foods. Filter daily, after busy service, and fully at least once a week to remove fine particles. Consistent filtering can extend oil life by 25–40%, but it can’t restore degraded oil. If oil smokes at 350°F (175°C), or remains dark and off-smelling after filtering, stop using it and change it. Handle hot oil carefully, following your fryer’s instructions and local disposal rules.
Fewer Unexpected Service Calls
Routine fryer care can prevent many avoidable service calls. Filter oil daily and skim crumbs to keep debris from accelerating oil breakdown. Check color, odor, smoke, and foam each day; dark oil, burnt smells, smoke at 350°F, or persistent foam mean you should replace it.
Keep temperatures at or below 375°F (190°C), and calibrate the thermostat to limit oil stress and temperature-related faults. Clean the fryer on schedule, inspect sediment areas weekly, and boil out the unit monthly to remove carbon that can impair heating and filtration.
If fresh oil degrades unusually quickly or the fryer heats slowly, don’t keep compensating by changing oil more often. Have a technician check the thermostat, burners, and filtration system before the problem worsens.
Pilot Light Troubleshooting
If your fryer’s pilot light keeps going out, a soiled pilot tube may be the cause. During routine inspections, check that the pilot lights reliably and note any irregular operation. If it repeatedly goes out, switch off the fryer and let it cool completely before you inspect or clean it. Follow the manufacturer’s instructions; hot components can cause burns, and incorrect maintenance can damage the appliance.
Clean the pilot tube only as directed in the manual. Don’t use improvised tools or attempt adjustments you can’t verify. After cleaning, follow the specified relighting procedure and confirm the pilot stays lit.
If the problem continues, stop using the fryer and contact a qualified technician. Don’t dismantle gas controls or troubleshoot uncertain faults yourself. Report recurring failures.
Oil Disposal Safety Errors
To prevent burns and spills, let used fryer oil cool to a safe temperature before draining it, then transfer it carefully into a sealed, leak-proof container. Never pour it down a drain or place it in regular trash; either choice can cause plumbing damage and compliance problems. While it awaits collection, keep the container closed, upright, and away from traffic so it can’t leak or become contaminated.
- In California, use a hauler registered with the California Department of Food and Agriculture (CDFA).
- Don’t let spent oil remain on-site longer than 48 hours.
- Coordinate draining with scheduled pickups; confirm the container is suitable and secured for transport.
If a spill occurs, restrict access and follow site’s cleanup procedure; never rinse oil into a floor drain.
Track Oil Changes by Shift
After used oil has been handled safely, track its condition and treatment at every shift close. Record its color, clarity, odor, and smoke, foam, or off-flavors so you can spot deterioration. Log filtration, top-ups, and replacements alongside the menu and service volume; breaded foods and heavy use break oil down faster. Assign a staff member to check and filter oil every shift, and include the task on the shift-close checklist.
Record fryer temperature and thermostat or filtration problems. Keep oil below 375°F (190°C), and investigate unusually fast degradation. Use shift logs with oil checks to guide changes, not a calendar. High-volume kitchens may need replacement every 2–3 days; lower-volume kitchens may reach 6–7 days with daily filtration. Replace oil sooner when checks show decline.
Conclusion
Keep a shift-by-shift log of filtering, oil changes, and cleaning so you can spot breakdown early and plan service before downtime hits. Use fryer-specific tools, follow the schedule for your fryer type and oil, and let oil cool before draining. Check pilot-light problems safely rather than forcing a restart, and dispose of used oil in approved containers, never down a drain. A consistent routine helps you protect staff, equipment, and food quality while avoiding preventable service calls.