The Countertop Appliance Cleaning Schedule That Keeps Everything Running
The Countertop Appliance Cleaning Schedule That Keeps Everything Running
Keep countertop appliances running with a routine that follows each maker’s instructions. Daily, rinse single-serve pod holders, reservoirs, and drip trays; wipe exteriors with a damp cloth. Weekly, wash removable parts and brew baskets, clean carafes, and empty toaster crumb trays. Descale coffee makers at the recommended interval, especially with hard water, then run the instructed rinse cycles. Use approved cleaners, dry parts fully, and adjust seasonal routines. The tips ahead make upkeep easier.
Coffee Maker Owners’ Needs
How often should you clean your coffee maker? You should follow the schedule in your machine’s manual, since models differ. Build coffee-maker care into your regular appliance routine instead of waiting for stale odors, visible residue, or a change in taste.
Routine cleaning helps limit bacteria around the brew basket and keeps old coffee oils from affecting each cup. If your home has hard water, clean the machine regularly to address mineral buildup in the reservoir, hoses, and pump; don’t wait for brewing to slow. Use the self-cleaning function or coffee-maker cleaning tablets only as the manufacturer directs. Check the manual for the recommended frequency and procedure, and set a recurring reminder if needed. A consistent schedule takes little effort and helps your coffee maker work reliably between deeper cleanings over time.
Water, Vinegar, and Soft Cloths
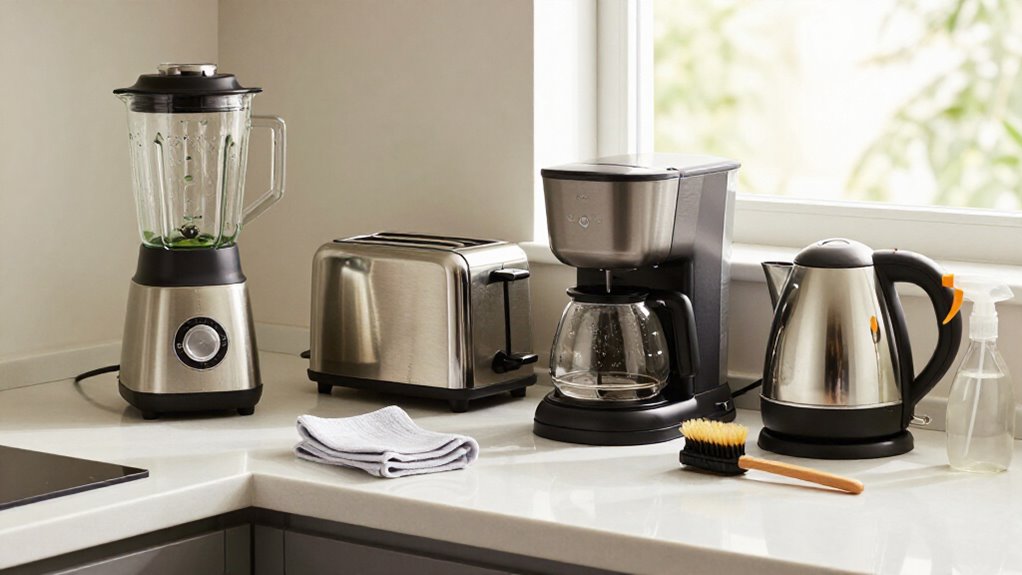
For routine appliance care, start with warm water and a soft microfiber cloth to lift loose debris without scratching surfaces. Wring it well, then wipe toaster shells, microwave doors, and coffee maker exteriors; use a clean damp side for spills and a dry lint-free cloth to prevent streaks.
For crevices, use a soft toothbrush, and keep moisture away from plugs, vents, and controls. When odors or light residue linger, mix equal parts white distilled vinegar and water, then test a hidden spot first.
- Use the solution on suitable surfaces; don’t leave it sitting.
- Avoid vinegar on stainless exteriors; follow maker guidance.
- Rinse cloths often so grit won’t scratch finishes.
- Dry seams and polished areas promptly to limit spots between wipe-downs.
Keep this kit within easy reach.
Monthly Descaling Reminder
Set a monthly reminder to descale your coffee maker, especially if you have hard water, which can leave mineral deposits in the reservoir, pump, and hoses. That buildup can slow brewing and leave you waiting for a cup. Check your manual for the correct interval and procedure; some machines need more frequent care.
Use the self-cleaning function or a coffee-maker descaler, and follow the manufacturer’s directions exactly. Don’t substitute a stronger dose or mix cleaners. Clean the brew basket regularly, too, because residue there can encourage bacterial growth.
| Reminder | What you gain |
|---|---|
| Scale cleared | Smoother brewing, less frustration |
| Basket cleaned | A fresher, safer cup |
Mark the task on your calendar and keep the approved descaler nearby, so a busy week won’t push maintenance aside.
Rinse the Carafe First
Empty the carafe after each brew, then rinse it with warm water to remove leftover coffee. Check for stains, and soak stubborn residue in warm, soapy water. Let the carafe air-dry completely before reuse.
Empty the Carafe
After brewing, pour out any leftover coffee so it doesn’t develop stale odors. Empty the carafe as soon as you finish serving, rather than letting the remaining coffee sit on the counter or in the coffee maker. Pour unused coffee into the sink or a storage vessel if you plan to drink it later; don’t leave it in the carafe while you clean up.
Handle a glass carafe gently, especially when it’s hot, and set it on a stable surface before emptying. Check that you’ve removed all liquid, including coffee pooled near the base, so residue doesn’t linger or create an unpleasant smell. Once empty, keep the carafe separate from the brewer while you prepare to clean it. Follow the manufacturer’s instructions for safe handling and cleaning.
Rinse With Warm Water
Once the carafe has cooled, rinse it with warm water to loosen coffee grounds and residue before cleaning the rest of the coffeemaker.
Keep the rinse gentle and use water that’s warm, not hot; a sudden temperature change can stress glass. If the carafe feels hot, wait until it cools before you run water over it. For a removable carafe, follow the rinse with warm, soapy water, then rinse thoroughly so no soap remains.
Set it aside to dry completely before placing it back on the coffeemaker. This first step prepares the carafe while you move on to the machine, but it won’t clear mineral buildup inside water paths. Use the coffeemaker’s self-cleaning function or cleaning tablets for that task, following the manufacturer’s directions.
Remove Coffee Residue
Rinse the carafe soon after brewing so leftover coffee doesn’t dry onto the glass. Pour out any remaining coffee, then swish warm water around the inside to loosen residue. Don’t leave the carafe sitting with coffee in it; a quick rinse takes only a moment and makes washing easier.
When you’re ready to clean it, wash the carafe with warm, soapy water and a soft sponge. Reach the bottom and shoulder where coffee oils can cling, but handle glass gently. Rinse thoroughly so soap doesn’t affect the next pot’s flavor, then let the carafe drain or dry before returning it to the coffee maker. Keep the brew basket clean, too: rinse it regularly to remove grounds and moisture that can contribute to buildup.
Check for Stains
Before checking the carafe for stains, rinse it to clear away loose coffee residue that could hide discoloration. Inspect the inside and outside under good light. Look for dried coffee along the walls, cloudy discoloration, and sticky spots that remain after rinsing. Turn the carafe so you can check every surface, especially around the base, handle, and rim; drips often collect in these areas.
If you find residue or stains, wash the carafe with warm, soapy water and a sponge, reaching into corners without scrubbing roughly. Rinse it thoroughly to remove soap and loosened debris. For persistent stains, use a coffeemaker-cleaning tablet according to its instructions. Check the carafe again afterward to confirm the marks have lifted. Regular inspection helps you catch buildup early and keeps coffee residue from masking changes in the glass before the next brewing cycle starts each morning.
Air-Dry Before Reuse
After brewing, rinse the carafe promptly to remove coffee residue before it dries. Wash it with warm, soapy water, then rinse thoroughly to clear soap and loosened residue.
Let it air-dry completely before you return it to the coffee maker or brew again. Leaving it uncovered allows air to circulate inside and helps prevent lingering moisture and odors. Before reuse, check that the carafe is fully dry, and follow the appliance manufacturer’s care instructions.
If the carafe has a lid, keep it off during drying rather than trapping damp air inside. Set the carafe on a clean, stable surface where it won’t collect dust or get knocked over. This brief pause after washing helps keep the carafe fresh and ready for your next brew.
Single-Serve Brewer Care
Rinse the brew basket and wipe removable parts and the exterior daily, then let parts dry before reassembly. Each week, clean the brewer as the manufacturer directs, using its cleaning function or coffeemaker tablets if recommended. Descale it on the manufacturer’s schedule, especially if you have hard water.
Daily Brewer Care
To keep a single-serve brewer fresh, empty and rinse the used-pod holder each day to clear grounds and moisture that can cause odors.
Also rinse the removable reservoir and drip tray daily, then let them drain before replacing them. This clears standing water and coffee residue. Wipe the brewer’s exterior with a damp cloth to remove splashes and fingerprints.
Clean around the pod-puncture area gently, keeping your cloth clear of sharp needles. Don’t immerse the machine or pour water over its housing. If your model has a removable water filter, check the manual for rinsing or replacement instructions and follow them.
This simple routine keeps your brewer tidy daily. Remember that rinsing removes residue, not mineral scale; descale the brewer on the schedule in its manufacturer’s instructions. A consistent routine takes only a few minutes and helps prevent odors and keeps your brewer ready for its next cup.
Weekly Deep Cleaning
A weekly cleaning cycle removes coffee residue and helps keep your single-serve brewer’s brew basket fresh. Set aside time each week to clean the brewer’s removable parts and run its cleaning cycle, if available. Check your manual first, since parts and steps vary by model.
Remove the water reservoir and drip tray. Wash both in warm, soapy water, rinse them well, and dry them thoroughly before putting them back. Clean the brew basket according to the manufacturer’s directions, removing any trapped grounds or residue.
If your brewer uses a cleaning tablet, place it in the designated spot and run the cleaning cycle as directed. Don’t substitute a tablet or cleaner the manufacturer hasn’t approved. Follow each step carefully. Finish by wiping the exterior with a damp cloth, then leave components properly seated so your brewer’s ready for the next cup.
Descaling Schedule
Regular descaling removes hard-water mineral buildup from your single-serve brewer’s reservoir and internal water lines.
Follow your brewer’s recommended descaling interval; frequency varies by model and water hardness. Use the brewer’s descaling cycle or a product approved for your machine. Follow both the appliance instructions and product label; don’t substitute an unapproved cleaner.
After the cycle, run the number of fresh-water rinse cycles the manufacturer directs to flush out remaining solution. Don’t skip rinsing, since residue can affect taste. Descaling won’t remove all residue from removable parts, so wash the reservoir and brew basket routinely according to your manual. Mark the next due date on your calendar, and adjust only as the manufacturer recommends for your water conditions. Use reminders to stay on schedule.
Steady Brewing Temperature
For steady brewing temperatures, keep your coffee maker’s water pathways clear of hard-water mineral buildup, which can interfere with consistent heating.
Use the self-cleaning function or cleaning tablets made for your model, following the manufacturer’s directions. Run the cycle at the recommended intervals, rather than waiting for slower brewing or uneven results. If your machine doesn’t have an automated cycle, follow its care guide for the approved cleaning method and frequency.
Remove the brew basket after use when practical, and wash it routinely to clear coffee residue that can affect flavor and encourage bacterial growth. Let removable parts dry fully before you reinstall them. Keep a simple calendar reminder for routine cleaning, and note the date of each cycle. Consistent care helps your brewer maintain reliable heat and perform as expected. Check your model’s manual before using any cleaner, since unsuitable products may damage components.
Mineral Buildup in Water Lines
Hard water can leave mineral deposits in appliance water lines, hoses, pumps, and reservoirs, gradually restricting flow. If your coffee maker brews slowly or dispenses unevenly, scale may be narrowing its water path. Descale it on the schedule in your manual; hard water may require more frequent cleaning.
Use the machine’s self-cleaning function or approved cleaning tablets, and follow each step exactly. Don’t substitute cleaners unless the manufacturer permits them.
For ice machines, mineral buildup can affect ice taste. Check your model’s instructions and clean the machine at the recommended interval; many manufacturers suggest about every nine months. Don’t assume every appliance needs the same schedule.
Water hardness and model design both affect how often you should descale. Always check manual instructions before cleaning.
Empty Toaster Crumb Tray
Water-line buildup calls for model-specific care; toaster crumbs need a simple routine. After each use, give the toaster time to cool, and empty its tray at least weekly if you use it often.
Follow these steps:
- Unplug the toaster and let it cool completely before you remove the tray.
- Slide out the tray and tip crumbs into the trash; don’t shake the toaster upside down, since jostling can damage its heating elements.
- Wash the removable tray with warm, soapy water, then dry it fully.
- Brush remaining crumbs away with a soft, dry brush. Keep water away from the interior and electrical parts.
Return the tray only when it’s completely dry. Regular emptying helps prevent burnt odors and reduces the chance that crumbs will scorch inside your toaster.
Seasonal Drink Preference Check
At the start of each season, note which drinks you make most, such as iced coffee in summer or hot drinks in winter, to plan how you use and clean your countertop appliances.
Use that check to adjust your routine: if you brew coffee more often, rinse the basket and removable filter after each cycle, and wash the reservoir and carafe weekly. Hard water can leave mineral buildup in the hoses, pump, and reservoir, so descale as often as your manufacturer recommends.
Use the machine’s self-cleaning function or approved tablets to address deposits and brew-basket residue. Check care instructions when routines change; needs vary by model. Use an ice machine more in warm months? Follow its manual; many recommend cleaning every nine months and around holidays. Clean it before, during, and after the holiday period if use increases, as needed.
Conclusion
Keep your countertop appliances clean with a simple routine: rinse the carafe, descale the coffee maker monthly, care for your single-serve brewer, and empty the toaster’s crumb tray. Use water, vinegar, and soft cloths as your appliance manual allows.
Check for mineral buildup that could disrupt steady brewing temperatures, and adjust seasonal drink settings when needed. Add these tasks to your calendar, and you’ll help your appliances run reliably, brew consistently, and stay ready for daily use.