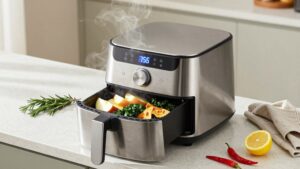
Air Fryer Replacement Parts Glossary: Heating Element, Basket, and Tray Explained
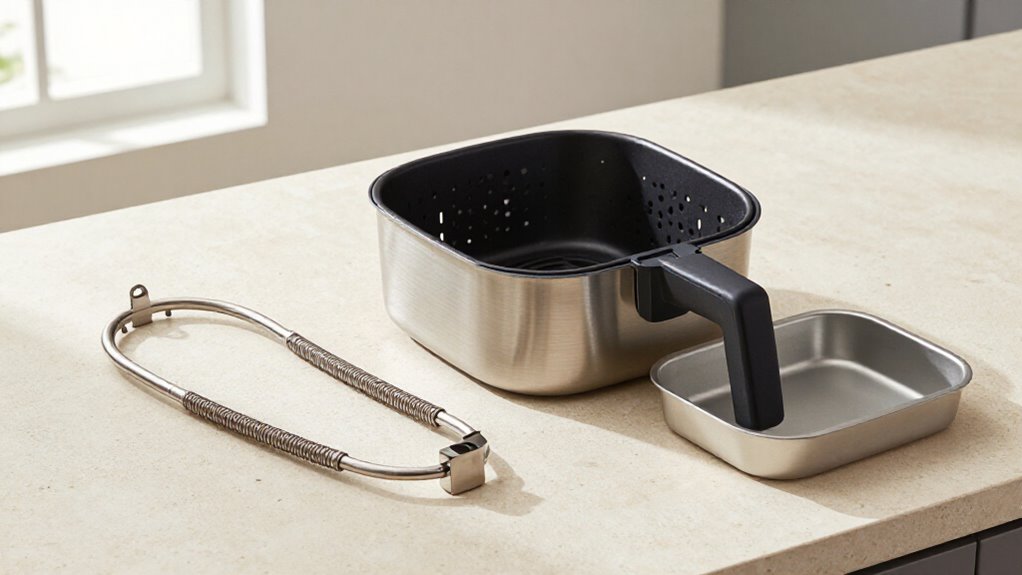
Match every air fryer replacement part to your exact brand and model number; similar-looking parts may not fit safely.
The heating element generates heat, while the basket holds food and the perforated crisper plate lifts it for airflow and drainage. A tray must match the cooking chamber’s dimensions and leave clearance around food and heating elements.
Check compatibility, attachment points, and condition before ordering.
You’ll also find practical checks for drawer buttons, loose handles, tray fit, and counterfeit heating elements.
Check Your Model Number
Before ordering, check the exact brand and model number on your air fryer’s identification label or in its manual. Use that number to identify parts listed for your specific appliance; replacement components aren’t universal, even when they look similar.
For an LG oven replacement set, compare your range model with the seller’s compatibility list, then verify the rack, basket, and tray dimensions before you buy. The Anniparts LRAL302S set lists compatibility with part numbers including LG LRAL303S, MHL63411403, and MHL63531403. Confirm that one of those numbers matches your appliance; don’t rely on appearance or a partial name match.
If the label is worn or the manual is unavailable, check the manufacturer’s website or contact the seller. Provide your model number before ordering.
Heating Element, Basket, and Tray
Once you’ve confirmed your air fryer’s model number, check that replacement heating elements, baskets, and trays match its specifications. The element generates heat; its wattage, voltage, and mounting must match the unit. Unplug and cool the fryer before service; leave wiring work to a qualified technician.
A basket holds food while perforations let hot air circulate. Replace a coated basket if its surface flakes, bubbles, or turns patchy; confirm dimensions and handle orientation. A tray supports airflow beneath food and catches crumbs. Match its rim and perforation pattern, and wash coated parts without abrasive pads.
| Part | Check |
|---|---|
| Element | Electrical rating and fit |
| Basket | Coating condition and dimensions |
| Tray | Rim, perforations, and material |
Use manufacturer service information; wrong parts can overheat or damage controls or the unit.
Drawer Release Button
The drawer release button releases the cooking drawer or basket, and some models require you to lift or slide a safety cover before pressing it. Support the hot, heavy drawer on a stable, heat-safe surface, and don’t force the button or let it release accidentally. If it’s cracked, jammed, or won’t latch securely, stop using the fryer and contact the manufacturer for a compatible replacement.
Drawer Release Button Purpose
Press the drawer release button to disengage the basket or drawer from the air fryer’s housing for serving, shaking, or cleaning. When your model has a separate inner basket, the button may release that basket from the outer drawer; consult your appliance manual for the correct operation.
Hold the drawer securely before pressing, because the drawer, basket, and food can be hot or heavy. Keep your grip stable as you remove the assembly, and set it on a heat-resistant surface. If the button sticks, don’t force it or use it as a lifting point; let the appliance cool and follow the manual’s guidance. Clean the button and surrounding area regularly to prevent food residue from interfering with release, as part of regular care, too.
How The Button Works
How does the drawer release button work? When you press it, the button disengages the drawer’s retaining catch, allowing the cooking drawer to slide free of its seated position. It doesn’t control the heating element, interrupt the cooking cycle, or shut down the fryer.
Pause or switch off the appliance before using the release, and press only when the drawer is fully seated and the fryer isn’t being moved. Keep a firm hold on the basket handle as you press; the hot basket could otherwise drop when the drawer is released. If the button sticks, feels damaged, or won’t release the catch, don’t force it. Stop using the fryer and consult the model’s manual for troubleshooting or approved service. Its function is only drawer release.
Safe Drawer Removal
Before removing the drawer, check your air fryer’s manual for the release button’s location and the correct removal method, since designs vary by model. Switch off and unplug the fryer, then let the drawer and basket cool completely before handling them. Hold the drawer securely and press the release button as directed. If your manual specifies a different grip or sequence, follow it; don’t pull by the basket handle alone.
Keep your fingers clear of the release mechanism, and support the drawer as it separates so it can’t drop or tilt unexpectedly. If the drawer resists movement, stop rather than forcing it. Check whether a safety lock remains engaged, and consult the manufacturer for model-specific instructions before trying again. Set it down flat, safely.
Preventing Accidental Release
To prevent accidental release, keep the drawer-release button covered or press it only when you intend to separate the basket from the outer drawer. Before pressing it, hold the drawer firmly by its handle and support the basket with your other hand. This prevents the basket from dropping and spilling hot food as the latch disengages.
Keep your fingers clear of the release mechanism, particularly while the drawer and basket are hot. After reassembling the two parts, check that the basket sits fully in the drawer and locks into place. Lift or return the drawer to the air fryer only after confirming the connection. Use the release button deliberately, rather than gripping or moving the assembly in a way that could depress it unintentionally.
Common Button Problems
If the drawer-release button sticks or won’t latch, unplug the air fryer and check around the button and drawer catch for crumbs or grease. Residue can obstruct the release mechanism or prevent the catch from engaging fully. Don’t force the drawer open or press a jammed button repeatedly; either action can damage the latch or let a hot basket come loose.
Wipe the button and catch area with a soft, damp cloth and mild soap, then dry them completely before testing the mechanism. Avoid abrasive tools, which can damage or wear the release parts. If the button remains loose, cracked, or unresponsive, stop using the fryer. Check your manual for model-specific guidance, then contact the manufacturer about a compatible replacement or repair. Release mechanisms vary, so don’t assume a button from another model will fit.
Cleaning The Release Button
Once the air fryer and drawer-release button have cooled completely, unplug the unit before cleaning.
Wipe the button and its surrounding area with a soft, damp cloth to remove grease and food residue. Keep the cloth damp, not dripping, and work around the button without forcing moisture into its edges.
If residue remains, apply a small amount of mild dish soap to the cloth, then wipe the area again with a clean damp cloth to remove soap traces. Don’t soak the button or spray liquid directly into its mechanism; moisture can damage electrical or moving parts.
Dry the button and surrounding area thoroughly with a clean cloth before reassembling the drawer or using the air fryer. Check that no moisture remains around the button.
Checking Button Compatibility
Before ordering a replacement drawer-release button, confirm it’s listed for your air fryer’s exact brand and model. You should compare the part’s shape and dimensions with the original button, then check that its attachment points align and its release mechanism operates the same way. Check the product listing or your manual for compatible model numbers; a similar-looking button may not fit your drawer or engage its latch safely.
Before you buy, confirm that the button’s mounting arrangement and travel match the original part. If the listing omits compatibility details, don’t assume the part will work. Contact the manufacturer or seller with your air fryer’s model number and ask them to verify fit. Keep the model number and product information together so you can check the match before ordering. This check helps verify the release button fits the appliance and latches correctly.
When To Replace It
Replace the drawer release button if it’s cracked, loose, stuck, or no longer releases the drawer reliably. If the button won’t latch the drawer securely, stop using the air fryer; the drawer could come loose during handling and expose hot food or surfaces. Unplug the appliance and let it cool completely before you inspect or replace the button.
Check your manual for the model-specific part number and replacement instructions. Button shapes and retaining mechanisms vary by brand and model, so don’t assume a universal part will fit or engage the latch. Inspect the handle and drawer for cracks or damage that could prevent locking. If the button forms part of an integrated handle or drawer assembly, contact the manufacturer or an authorized repair service.
Basket vs. Crisper Plate
Your basket holds food, while the crisper plate elevates it so hot air can circulate underneath and excess oil can drain through its perforations. Don’t overcrowd either part, since the basket’s raised or perforated sides also support airflow. Before replacing either component, check your air fryer’s model; baskets and crisper plates aren’t universal.
Basket Design
Although they sit together in the drawer, the basket and crisper plate serve different functions: the basket holds food, while the perforated plate raises it so hot air can circulate underneath and excess oil can drain away.
When you replace a basket or plate, match the part to your fryer’s model and drawer dimensions; check the manual to confirm whether the plate lifts out. The basket serves the Air Fryer function, so its shape, handle, and locking points must align with the drawer and safety interlock.
Don’t crowd either component: leave space around food, then shake the basket or turn pieces midway for even browning. Wash both parts with warm, soapy water and a soft sponge or cloth. Avoid abrasive scrubbers, which can wear protective coatings and shorten service life. Inspect coated surfaces before use, and replace parts if damage affects fit or safe handling. Before ordering, compare the replacement’s rim profile and perforation pattern with the original part you removed.
Crisper Plate Purpose
What’s the difference between the basket and the crisper plate? The basket holds your food and slides into the air fryer. The crisper plate sits inside the basket, creating a raised surface that keeps food above the basket’s bottom.
That gap supports airflow beneath your ingredients. Hot air passes through the plate’s perforations, helping cook food more evenly across its surface. The raised position also lets excess oil drain away rather than pool around the food. For best results, use the basket and crisper plate as your model’s instructions specify; designs and fitting methods can vary.
After cooking, remove both parts and wash them with warm, soapy water. Use a soft sponge or cloth to clean their surfaces without causing damage. Dry them before returning them to the appliance.
Key Differences
The basket is the removable container that holds food, while the crisper plate is a perforated insert that sits inside it. It forms the cooking compartment and keeps food contained when you pull out the drawer. The plate rests above its bottom, creating a gap beneath food.
Hot air can move through the plate’s openings and around lower surfaces, supporting more even cooking. Those openings also let oil and drippings fall away from food and collect below.
You handle them as parts during cleanup: wash both with warm water and mild soap, using a soft sponge or cloth. Check your appliance manual for instructions, since methods can vary by model. The basket contains the food; the plate supports it and manages airflow and drainage.
Choosing The Right Part
When replacing a basket or crisper plate, choose the part your air fryer’s design uses: a basket holds food in a removable container, while a perforated plate lifts food to improve airflow and let oil drain below. Before ordering, check your appliance’s exact brand and model; these parts aren’t universal. Compare the replacement with the original’s shape, dimensions, and attachment points.
Confirm compatibility in your manual or with the manufacturer; similar-looking parts may not fit your fryer’s design. Make sure the basket locks securely or the plate sits properly in the basket without obstructing airflow. After fitting it, check that the drawer closes normally. Clean either part with warm, soapy water and a soft sponge or cloth. Avoid abrasive scrubbers, which can damage non-stick surfaces.
Spotting a Loose Handle
Before each use, check whether the basket handle wobbles, shifts, or feels detached; if it does, stop using the fryer until it’s secure. A loose handle can make a hot, loaded basket difficult to lift and can cause spills or burns.
Let the basket cool completely before inspecting its screws, clips, and attachment points. Tighten fasteners only as your appliance manual directs; don’t improvise with substitute screws or adhesives.
If the handle or mounting points look cracked, warped, or remain loose after tightening, replace the basket. Before ordering, confirm that the replacement matches your exact fryer model and fits its drawer and locking mechanism. Contact your manufacturer.
Avoiding Counterfeit Heating Elements
For a heating-element replacement, buy from the fryer’s manufacturer or an authorized service provider and match the exact brand, model, and part number. Heating elements aren’t universal, so verify the part number against your appliance manual or the manufacturer’s website. If a listing omits this identifier or claims broad compatibility without model-specific evidence, don’t assume it will work.
Be cautious of unusually low prices, vague fit statements, and sellers that don’t identify their business clearly. Compare packaging, labeling, and warranty details with the manufacturer’s published information. If anything seems inconsistent, contact the manufacturer before ordering.
Because the element combines electrical connections with high operating temperatures, have the manufacturer or a qualified repair professional confirm the part and handle installation, particularly if you’re under warranty.
Tray Fit and Food Clearance
To maintain airflow and even cooking, match the replacement tray’s length, width, and height to your air fryer’s interior, and confirm the exact model and compatible part number since trays aren’t universal.
Measure the cooking chamber, not just a similar-looking tray. For example, the Anniparts LG tray measures 23 3/5 × 15 4/5 × 1 4/5 inches; use it only if those dimensions suit your oven.
- Leave clearance around the tray; don’t force it into a crowded chamber.
- Face the sloped-up side toward the oven’s back when installing the Anniparts tray.
- Keep food clear of the element and avoid blocking circulation paths.
Slide the tray into place without disturbing its orientation. Clearance lets hot air circulate around food for even browning and prevents contact with the heating element.
Conclusion
Before buying any replacement part, check your fryer’s model number and compare the part’s shape, dimensions, and attachment points. Identify whether you need the heating element, basket, tray, or crisper plate; don’t rely on similar names alone. Test handle and release fit before cooking.
Choose a genuine, compatible element, and maintain proper food clearance. These checks help you avoid unsafe installation, poor airflow, and wasted money while keeping your appliance working as designed daily.