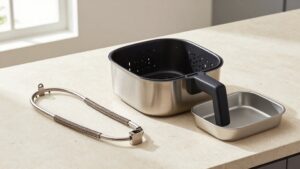
The Air Fryer Maintenance Schedule That Doubles Your Parts’ Lifespan
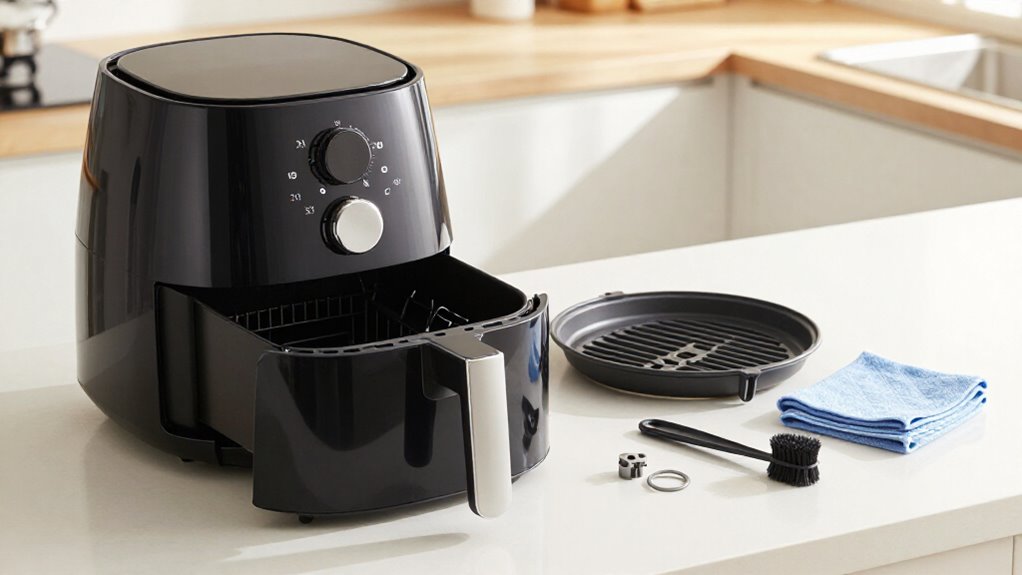
To help your air fryer parts last longer, unplug it and let it cool for 30 minutes.
After each use, wash the basket and crisper plate with warm, soapy water and a soft sponge; soak residue instead of scraping. Dry parts fully.
Monthly, inspect the coating and tighten handle screws as directed.
Use heat carefully, avoid aerosol sprays, and stop if you smell burning wiring or see sparks. These checks help you catch wear before it worsens.
Why Basket Coatings Wear
Your air fryer basket’s nonstick coating wears faster when you scrub it with steel wool, metal brushes, or scouring pads. These abrasives leave scratches that expose the surface beneath and let damage spread with use. Harsh dishwasher detergents and repeated high-heat cycles can break down the coating, even when your basket is labeled dishwasher-safe. Aerosol cooking sprays may leave residue that builds up and becomes harder to remove.
If food sticks, don’t scrape it off; soak the basket for 10 to 15 minutes, then lift residue gently with a soft brush. Cooking at excessive heat or continuing to use a basket with deep scratches can worsen deterioration. Check the surface. When the coating flakes or has substantially deteriorated, replace the basket to avoid wear.
Nonabrasive Cleaning Tools
To prevent the scratches that wear down a basket’s coating, clean it with a soft sponge, a nylon-bristled brush, or a silicone scrub pad and mild dish soap.
Unplug your fryer, let it cool fully, and wash removable parts by hand in warm, soapy water.
- Use a soft nylon toothbrush to lift trapped crumbs from edges and crevices.
- Loosen baked-on bits with a flexible plastic scraper; never reach for metal.
- For stubborn spots, apply baking-soda paste briefly, rub gently, then rinse thoroughly.
- Wipe the interior with a damp microfiber cloth; keep water away from electrical parts.
If residue won’t lift, soak the basket instead of scrubbing harder. Dry parts fully before reassembly; hand-wash to preserve the finish, and avoid prolonged vinegar contact with coatings.
Basket Coating Inspection Intervals
Inspect the basket coating monthly for scratches, peeling, bubbling, or other signs of wear; check it more often if you cook daily or use abrasive tools frequently. After each inspection, note where damage appears and whether it’s spreading. Wash the basket with warm, soapy water and a soft sponge or nylon brush; steel wool and abrasive scrubbers can scratch the surface. Handwashing is gentler, but check your manual before using a dishwasher.
| Sign | What you do |
|---|---|
| Scratches | Recheck after cleaning |
| Peeling or bubbling | Replace if significant |
| Warping or permanent stains | Replace the basket |
Don’t keep using a basket with severely degraded coating; it may no longer release food. If wear is minor, avoid abrasives and inspect sooner after heavy use. Record the date to track changes.
Basket-Coating Renewal Steps
Inspect the coating for cracks or peeling, then hand-wash the basket with warm, soapy water and a soft sponge; use baking soda paste for stubborn residue. Once it’s completely dry, wipe on a few drops of neutral oil if your manual allows, and skip aerosol sprays. If the coating is cracked, peeling, or badly worn, replace the basket with an approved model-specific part.
Inspect the Coating
Check the basket’s nonstick coating regularly for scratches, peeling, bubbling, or other damage, which can worsen with continued use. After cooling, inspect corners and edges under light. Look for flakes, missing patches, bubbles, or exposed metal.
Stop using the basket if coating peels or sheds particles; replace significant deterioration with a manufacturer-approved basket for your model. Don’t try to repair peeling coating or season PTFE- or ceramic-coated baskets like cast iron; they generally need no seasoning. To refresh intact coating after washing, dry it completely. About once a month, wipe a few drops of neutral oil, such as avocado oil, over the surface with a paper towel. Avoid aerosol sprays, steel wool, and abrasive scrubbers, which can damage the finish or leave buildup.
Clean the Basket Gently
After each use, unplug the air fryer and let it cool for about 30 minutes before washing the basket in warm, soapy water with a soft sponge or silicone brush.
Avoid steel wool, metal brushes, abrasive pads, and harsh cleaners, even when the coating looks sound. They can create scratches that make food stick more readily and shorten the basket’s service life. Hand-washing is gentler than repeated dishwasher cycles, so use the dishwasher only when your manufacturer confirms the basket is dishwasher-safe. About once a month, after the basket is fully dry, spread a few drops of neutral oil, such as avocado oil, in a thin layer with a paper towel. If coating flakes or scratches appear, stop using the basket and replace it.
Remove Stubborn Residue
When soaking doesn’t loosen stuck-on food, use a baking soda paste to lift residue without harsh scrubbing. Unplug the air fryer, let it cool completely, then remove the basket and crisper plate. If you haven’t soaked them yet, place coated parts in warm, soapy water for 10–20 minutes; this often loosens residue and reduces scrubbing. Mix baking soda with enough water to make a spreadable paste.
Apply it to stubborn grease and leave it for 15–20 minutes. Gently work the area with a soft nylon or silicone brush. If residue remains, repeat the paste treatment rather than pressing harder. Never use steel wool, metal brushes, or abrasive pads; they can scratch the nonstick coating. Rinse thoroughly, then dry every part completely before careful reassembly.
Restore the Nonstick Surface
Restore the basket’s nonstick performance with gentle cleaning, not abrasive scrubbing. Wash it in warm, soapy water using a soft sponge or silicone brush. Steel wool, abrasive pads, and harsh cleaners can scratch or weaken the coating, so keep them away.
If residue clings, soak the basket for 10-20 minutes, then scrub gently; don’t scrape it loose. Rinse thoroughly and dry the basket completely before you reinstall it. When it’s dry, spread a few drops of neutral oil, such as avocado oil, in a thin film with a paper towel. This may help maintain release.
Avoid aerosol sprays: they can leave sticky buildup that makes food cling. Use an oil mister if you need added oil. Check your manual before using a dishwasher; repeated high-heat cycles and strong detergents can wear the coating. If food still sticks, repeat the soak-and-wash routine rather than increasing scrubbing pressure. If the basket feels tacky, wash again to remove spray residue, rinse well, and dry fully before cooking again.
Know When to Replace
If the basket’s coating is scratched, peeling, or flaking, replace it rather than trying to renew it.
Inspect the basket regularly. Marks that expose the underlying surface, spreading flakes, or rough patches signal coating failure; don’t keep cooking in a deteriorated basket. Replace it if it’s warped or permanent stains remain after gentle cleaning.
Don’t season the coating: modern PTFE- and ceramic-coated baskets don’t need cast-iron-style treatment, and seasoning won’t repair damage.
Preserve an intact surface by hand-washing with warm, soapy water and a soft sponge or nylon brush. Avoid steel wool, abrasive pads, and harsh cleaners. If replacement is needed, select the manufacturer-recommended basket for your model and check the manual before putting it in the dishwasher; hand-washing is gentler.
High-Heat Cooking Adjustments
Match the temperature to your food and avoid running the fryer at high heat longer than needed. If oil smokes, check its smoke point; avocado oil tolerates high heat, while extra-virgin olive oil can smoke at 400°F. Use an oil mister instead of aerosol spray to protect the basket’s coating.
Match Heat To Food
For high-heat cooking, use a high-smoke-point oil such as avocado oil, avoid aerosol sprays that can leave sticky residue on nonstick parts, and don’t overcrowd the basket.
These steps help hot air circulate and reduce sticking, burning, and coating residue. If food browns unevenly, cook smaller batches to restore airflow.
At 400°F, skip extra-virgin olive oil; it may smoke. Use an oil mister for controlled coverage. Follow your model’s preheating guidance and use approved accessories only.
After greasy food, promptly wash the basket and tray. When cool, check the heating element for grease and clean it as directed; residue can carbonize and smoke. If smoke appears, stop cooking, let the unit cool, then inspect and remove buildup before restarting per your manual carefully.
Avoid Prolonged High Heat
Use the lowest temperature that safely cooks your food, and don’t run the air fryer at 400°F or higher longer than the recipe requires. Follow the recipe’s time and temperature instead of adding extra high-heat minutes to brown or crisp food. Every unnecessary stretch at high heat can carbonize grease on the heating element, leading to smoke, burnt odors, and added wear.
If food needs more cooking, check it first, then add a short interval at the recommended setting rather than extending a 400°F cycle.
If smoke or a burning smell appears, switch the fryer off and unplug it. Let it cool completely before you inspect and clean the chamber and heating element; remove grease and food residue before cooking again. Don’t restart it while residue remains, because it can smoke or burn during the next high-heat cycle. Clean residue promptly when needed.
Check Oil Smoke Points
Choose an oil with a smoke point above your cooking temperature to reduce smoke and residue during high-heat air frying. Before you set the fryer, check the oil label and match its smoke point to the recipe temperature; a small margin helps prevent visible smoke, bitter odors, and baked-on film.
At 400°F, skip extra-virgin olive oil, which may smoke and leave residue. Choose avocado oil instead; its roughly 520°F smoke point suits high-heat cooking. Refined coconut oil and light olive oil also work.
Apply a thin coating with an oil mister, not aerosol cooking spray; propellants can build sticky deposits on your nonstick basket. If smoke appears, stop the cycle, ventilate, and check the oil choice and basket for old grease before cooking again.
Wipe residue after cooling, then reassess temperature if the problem persists; don’t keep reheating a smoky, greasy basket; check it carefully.
Coating Stays Smooth Longer
To keep the nonstick coating smooth, hand-wash the basket and crisper plate with warm, soapy water and a soft sponge or silicone brush.
After cooking, soak stuck-on food for 10–15 minutes, then scrub gently. Never use steel wool, metal brushes, or abrasive scouring pads; they can scratch the surface. Skip aerosol cooking sprays such as Pam, because propellants may leave sticky buildup that traps crumbs. Use a refillable oil mister instead.
If food still clings, check whether you’ve overcrowded the basket; cook in batches to reduce sticking and burnt-on residue. Dry the basket and crisper plate completely before reassembling. Don’t assume a part is dishwasher-safe: check your manual first, and avoid repeated dishwasher cycles even when allowed, since hand-washing is gentler on the coating.
Burnt-Wiring Odor and Sparks
A smooth basket won’t prevent electrical faults: if you smell burning wiring or see sparks, switch off the air fryer, unplug it if safe, and stop using it.
Don’t restart it to test whether the warning returns; a burnt-wiring odor can signal internal electrical damage, and sparks need prompt attention. Once you’ve unplugged the unit and it’s completely cool, inspect the cord and plug for cuts, melting, or heat discoloration.
Don’t open the housing or touch internal components. If the cord or plug looks damaged or feels overheated, don’t use the fryer again. Contact the manufacturer or a qualified repair professional and describe exactly what you noticed. If wiring or another electrical part is damaged, replace the appliance rather than risk another test run.
Skipping Post-Cook Residue Removal
After each use, unplug the air fryer and let it cool for about 30 minutes, then remove crumbs and wash the basket and tray with warm, soapy water. Skipping this step lets grease harden, so later cleanup takes more effort and residue may smoke during cooking. Use this quick routine to prevent repeat odors and protect the nonstick surface:
- Empty the crumb tray after cooking; trapped crumbs can burn, smell unpleasant, and add to smoke.
- Wipe the cool chamber and interior walls with a damp microfiber cloth before splatter hardens.
- Soak stubborn residue on removable parts for 10–15 minutes, then loosen it with a soft sponge or silicone brush.
- Dry every part fully before reassembly; moisture left with residue can undermine cleanup and safety.
Check Handle Screws Monthly
Once the basket and tray are clean, check the handle screws monthly to catch looseness or damage before it makes the basket unstable. Unplug the fryer and let it cool completely. Inspect the handle, screws, and attachment points for movement, worn threads, cracks, or damage.
If a screw is loose, tighten it gently with the correct screwdriver, following your model’s instructions. Don’t overtighten; you could crack the handle or damage its mounting points.
If the handle remains unstable, or a fastener is cracked or stripped, don’t use the basket. Contact the manufacturer for model-approved replacement parts; don’t improvise.
Recheck the attachment before carrying hot food, since a failing handle can cause spills or burns. Checks help you catch problems before the basket becomes unsafe.
Conclusion
Follow this maintenance schedule to protect your air fryer’s basket and extend its service life. Clean residue after every cook with nonabrasive tools, inspect the coating at regular intervals, and check handle screws monthly. Adjust high-heat cooking when food or coating shows excessive wear. If you spot peeling, stop using the basket and follow the manufacturer’s replacement guidance. Unplug the appliance if you notice a burnt-wiring odor or sparks; don’t use it again until it’s inspected.