Round or Square Liner? How to Match the Shape to Your Air Fryer Basket
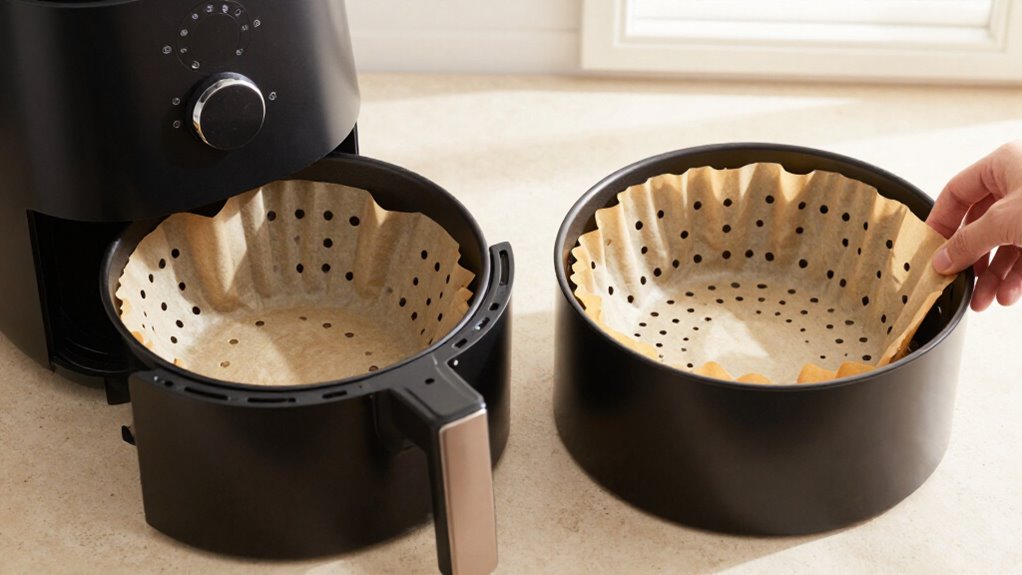
Choose a liner that matches your basket’s shape, but don’t rely on capacity alone. Measure the base, then check the opening, depth, walls, corners, and handle clearance; a liner should sit flat without crowding.
Round liners suit round baskets, while square or rectangular liners fit when dimensions agree.
Pick perforations for airflow and crispness, or solid liners to catch drips. Keep food uncrowded, follow temperature guidance, and use the checks below to choose well.
Round vs. Square Fit Decision
Start with the basket’s shape: choose a round liner for a circular basket and a square liner for a square one. Then measure the basket’s flat internal base, not its widest top section, and compare those dimensions with the liner’s measurements. The liner should sit flat without folding or forcing it into place.
Don’t choose by capacity alone: baskets with the same quart rating can have different shapes and dimensions. For reference, a 7-inch round silicone liner suits many 4–5.3-quart air fryers, while an 8.5-inch square liner fits many 5–6.5-quart models. Some 7-inch round liners also fit square baskets, including the standard 5.5-quart Ninja Max XL. Treat these sizes as starting points, not guarantees. Check your basket’s base measurements before buying to confirm fit.
Check Basket Wall Taper
Even with the right shape, a liner can bunch if the basket walls taper outward. The opening may look roomy, but the usable base is narrower. Measure the basket’s flat internal base, not the rim, before choosing a round or square liner.
A liner sized to the widest opening can extend beyond the base, then fold, buckle, or press against sloping sides. Choose one that rests flat on the floor without being forced up the walls. Check the basket’s shape and base dimensions directly; capacity labels and external measurements won’t tell you how much flat area the liner must cover. Place a liner in the empty basket to check for overhang or wrinkles; trim it only if product instructions allow and it remains safely seated.
Basket Interior Measurements
Measure the basket’s usable interior—not its advertised quart capacity—so your liner fits flat without bunching, blocking airflow, or approaching the heating element. Measure the top opening and cooking floor; tapered walls can make their dimensions differ. Check depth, too, so tall liner sides won’t interfere with the rim or element.
| Measurement | What to check |
|---|---|
| Top opening | Inner width or diameter |
| Cooking floor | Usable width or diameter |
| Interior depth | Floor to rim or element |
| Clearances | Notches, corners, handles |
Use a ruler or flexible tape; a paper template can confirm the fit. Leave 2–5 mm of clearance at the top for easy placement and removal. For silicone inserts, allow a snug fit, but avoid interference near the heating element.
Measure each compartment separately in a divided or multi-basket fryer. Compare dimensions—not capacity—when choosing between round, square, or rectangular liners.
Perforated vs. Solid Liners
Perforated liners let more hot air reach food, which can help you crisp foods that benefit from browning. Choose a solid liner for sticky or messy dishes when catching grease and crumbs matters more, though it may soften results. Whichever you use, leave room around the food for air to circulate.
Airflow and Crispiness
Because airflow beneath food helps it brown, perforated liners generally allow more hot air through than solid liners, which cover part of the basket base. That advantage doesn’t guarantee a crisper result: side-by-side tests found perforated liners performed no better than grooved silicone liners, and their holes may let oil reach the crisper plate. Solid parchment can slightly soften browning underneath because it limits airflow.
To improve results, leave space between pieces and don’t overcrowd the basket. Turn or shake food when appropriate so hot air reaches more surfaces. If maximum crispness matters, cook directly on the crisper plate; you’ll sacrifice some cleanup convenience.
Choose a liner when easier cleanup matters more, and check that it sits flat without blocking circulation. Even a perforated liner can’t compensate for a crowded basket or poor placement. Match your priority to the trade-off: airflow supports browning, while liners simplify cleanup.
Best Foods for Perforations
Choose a perforated liner for fries, breaded foods, nuggets, fish cakes, or vegetables such as broccoli and carrots: the holes let hot air circulate and help food crisp. Toss vegetables with oil and seasoning, then spread them out so air can move around pieces.
Perforations also suit chicken and foods with a breaded coating, where airflow helps the surface brown. They’re less useful for sticky marinades, melted cheese, or chocolate: drips can pass through and soil the crisper plate. If you’re cooking chips or wings and want the crunchiest result, cook them directly on the basket or crisper plate. Use a perforated liner when you want easier cleanup without sacrificing airflow; make sure food weighs it down before you start the air fryer.
When Solid Liners Work
When sticky, greasy, or marinated foods are on the menu, a solid liner can catch juices, crumbs, and oil for easier cleanup. It’s especially useful when you’d rather contain drips than scrub the crisper plate after cooking.
That coverage has a trade-off: a solid liner can restrict airflow beneath your food, so the underside may turn out less crisp. Perforated liners let more hot air circulate and support browning, though oil and crumbs can fall through onto the plate.
For fries or wings, cook directly on the basket when crispness matters most. Use a liner when containing mess is the priority, and leave space around the food. Don’t overcrowd the basket; open gaps help air move around the food, whether you use a solid liner, a perforated one, or none at all.
Choosing the Right Liner
The choice between perforated and solid liners comes down to airflow versus mess control. Choose a perforated liner when crispness matters: its holes let hot air circulate around food, though oil and crumbs can reach the crisper plate. A solid liner catches more grease, crumbs, and cooking juices, so it suits sticky or marinated foods. However, it can restrict airflow and leave food less crisp.
For fries and breaded foods, grooved silicone liners performed well in testing; flat paper liners without airflow features underperformed. Whichever type you choose, match its shape and size to your basket’s flat interior base. Check that it sits flat without folding or forcing it into place.
Preheat the air fryer first, then add the liner beneath the food. The food’s weight keeps it from shifting toward the heating element.
Basket Shape and Food Type
Match a round basket with a round liner and a square basket with a square liner, measuring the flat base for a better fit. Choose a liner that suits your food and portion size, but don’t force it into place or cover the airflow space. For fries or breaded foods that need crisp undersides, cooking directly in the basket may work better.
Round Baskets, Round Foods
For a round basket, choose a round liner that lies flat on the base without folding or being forced into place. Measure the basket’s flat interior, rather than relying on its stated capacity, and compare those dimensions with the liner. For example, a 7-inch round silicone liner fits many 4- to 5.3-quart air fryers, but check your model before buying.
A round liner can also work in some square baskets if its diameter matches the usable base. Round liners suit round foods, too: use one for a cake or single-serve bake only inside a heat-safe dish or mold sized to fit your fryer. Keep space around the food so hot air can circulate. For fries and other foods that need crisping, skip the liner when possible; cooking directly in the basket can give you better airflow and browning.
Square Baskets, Larger Portions
Square baskets pair best with square liners that lie flat on the base without folding or being forced into place.
Measure the flat internal base before buying; the basket’s widest top section may not reflect the usable footprint. A square liner measuring 8.5 inches fits many 5–6.5-quart air fryers, but check your basket’s dimensions rather than relying on capacity alone.
Square baskets can accommodate larger portions, yet don’t pack food tightly. Leave space around each piece so hot air can circulate and cook. For crispier undersides, especially with fries or wings, cook directly in the basket; a liner can soften browning underneath. Choose one when sticky or greasy foods make easier cleanup a priority. Confirm it remains flat and doesn’t interfere with basket removal.
Match Liner to Food
Choose a liner that fits your basket and suits the food: use a round liner in a circular basket or a square one in a square basket, as long as it lies flat without folding.
For fries, nuggets, and fish cakes, a grooved silicone liner can channel away oil; cooking on the crisper plate may give you crispier undersides. For sticky or marinated foods, such as chicken tikka, glazed wings, or honey-mustard sausages, choose solid parchment to catch drips and residue. When you cook vegetables, use a perforated liner and arrange pieces in one layer.
For individual baked portions, place eggs or cake batter in an oven-safe ramekin or silicone mold sized to your basket. Check the liner or dish’s temperature limit before cooking, and make sure its shape and dimensions suit the basket. If your basket is rectangular, select a liner that matches its footprint rather than forcing a round one into place for the portion you’re cooking.
Leave Room for Airflow
Leave room around the food so hot air can circulate, and shake or turn pieces when needed to evenly cook.
Choose a liner that matches the basket’s shape: round for round, square for square. It should lie flat without folding or crowding the edges. In rectangular dual-drawer baskets, fit each drawer with its own correctly sized rectangular liner; don’t force a round or square liner into it.
Keep food in a single, uncrowded layer where possible, leaving gaps for air to move. For the crispest undersides, cook chips or wings directly in the basket, since a liner can restrict airflow beneath them. Use a liner for greasy, sticky, or marinated foods to contain mess, but don’t let it crowd the food or block circulation.
Handle Clearance and Airflow
For a secure fit, set the liner flat on the basket’s base without folding it around the sides or handle. Measure the base before choosing a size. A 20-centimetre round liner suits a circular base; a 20-by-20-centimetre square liner fits a square base.
Leave clearance so the liner won’t catch on the handle or interfere with basket movement.
Place the liner on the crisper plate, then add food immediately to hold it in place and keep it from shifting toward the heating element. Arrange food in a single layer with space between pieces, so hot air can circulate. A solid liner may restrict airflow beneath food and reduce underside crispness. For chips or wings, cook on the crisper plate for better underside crispness.
Silicone Liner Dishwasher Care
Most silicone air fryer liners are dishwasher-safe, but check the care instructions first because suitability varies by product. Once cooking’s done, let your liner cool for a couple of minutes before you pick it up. Its handles can stay hot, so use care even when the liner feels ready to move.
Scrape off any loose food, then place the liner in the dishwasher if its instructions allow. Grooved designs may need extra attention: residue can settle into channels, so scrub those areas by hand if a cycle doesn’t remove it. Don’t assume the liner has taken care of every mess, either. Grease or crumbs can still reach the basket, so wash the basket as needed.
Regular cleaning keeps both pieces ready for your next meal and helps prevent buildup from lingering between uses.
Avoid Unrated Materials
Because air fryers run at high temperatures, use only liners with a stated rating suitable for your appliance.
Check the liner’s maximum temperature against your air fryer’s instructions; ordinary baking paper may not share a verified heat limit. Use these checks before cooking:
- Choose parchment labeled for air-fryer use; AHM Electronics lists 220°C (428°F), while Reynolds Kitchens lists 400°F.
- Skip any liner with no stated temperature rating; you can’t verify it’s suitable for the appliance’s heat.
- Preheat the fryer without paper, then add the liner and enough food to keep it from lifting.
- Follow the liner’s directions; don’t use it over an open flame or in another appliance.
That keeps your choice grounded in a clear rating and the intended cooking conditions, not guesswork.
Basket-Specific Liner Measurements
How do you choose a liner that fits? Measure the basket’s flat internal base, not its widest top or the appliance’s exterior. Match both the shape and dimensions, choosing a liner that lies flat without folding or forcing it into place.
- AHM Electronics square liners measure 20 × 20 cm; round liners measure 20 cm across.
- Pintaur’s 8.5-inch square liner suits many 5–6.5-quart baskets.
- Its 7-inch round liner is designed for 4–5.3-quart models.
- Pintaur’s 8.67 × 5.9-inch rectangular liner suits many 8–10-quart dual-drawer baskets.
Use these measurements as guides, since basket interiors vary by model. Check your base dimensions and compartment shape before ordering; measure each dual-drawer basket separately. A flat fit keeps the liner seated and won’t obstruct drawer movement without guesswork.
Conclusion
Choose a liner that matches your basket’s shape and interior dimensions, not just its advertised size. Check wall taper, handle clearance, and airflow so the liner sits securely without blocking circulation. Match perforations or a solid base to the foods you cook, and confirm the material is rated for your air fryer’s temperatures.
If you’re using silicone, check its dishwasher instructions. Measure before buying, and you’ll avoid poor fit, uneven cooking, and unnecessary cleanup later.