Countertop Oven Cleaning and Maintenance: A Routine That Keeps It Running
Measure your countertop oven and preserve the manufacturer’s vent clearances before use.
Unplug it and let it cool before cleaning; use mild soap, soft cloths, and a dry brush, keeping liquids away from elements and controls. Empty the crumb tray after use, wash it when greasy, and dry it.
Wipe spills, clean glass gently, and never remove knobs. Inspect elements for damage, and stop if smoke persists. A maintenance log helps you follow the routine below.
Countertop Fit and Capacity
Before placing a countertop oven, measure its width, depth, and height and compare them with the space available. Check the manual for required clearance around the unit, especially at vents, so hot air can escape safely.
Set the oven on a counter that can support its weight, and keep it clear of curtains, paper, and other combustibles. Before you commit to a location, open the door fully and confirm you can slide racks and trays out without striking cabinets or another appliance.
Next, match the interior capacity to your cookware and portion sizes. Verify that your largest baking pan fits before buying; check its width, depth, and handle clearance, not just the oven’s listed capacity. Don’t overfill it. Crowding blocks airflow and causes uneven cooking.
What to Gather First
Gathering your supplies first keeps cleaning efficient and helps prevent damage or unsafe interruptions.
Before you begin, unplug the oven and let it cool completely. Check its manual for approved cleaners; harsh oven products can damage coatings or heating elements.
- Choose two or three microfiber cloths, a soft sponge, and a soft-bristled brush for gentle wiping and crevices.
- Keep a plastic scraper handy to lift softened residue without scratching; skip steel wool and abrasive pads.
- Mix warm water with mild dish soap. Add baking soda for a paste only if needed, and use vinegar only when the finish permits.
- Wear gloves, and set out a basin for removable parts. A spray bottle and paper towels are optional; ventilate if a permitted cleaner requires it.
Crumb Tray Cleaning Schedule
Once the oven has cooled completely, remove and empty the crumb tray after each use. Brush or wipe away loose crumbs regularly; buildup can burn and cause odors during later cooking. Check your manual for tray-specific instructions, and avoid abrasive cleaners that may damage its finish.
| Task | Timing |
|---|---|
| Empty and clear crumbs | After each use |
| Wash, rinse, dry | When grease or stuck food builds up |
Wash the tray with warm, soapy water when residue sticks. Rinse it thoroughly, then dry it completely before reinstalling. Never run your oven with a wet tray; moisture can create a hazard and interfere with safe operation.
Seat it correctly before cooking. Make this quick check part of your after-use routine, after greasy or crumbly foods. That keeps it ready.
Heating-Element Care
Unplug your oven and let it cool completely before you inspect its heating elements. Brush away crumbs gently with a soft, dry cloth, and don’t use abrasive cleaners or spray liquid on the elements. Check for damage or unusually bright spots during use; stop using the oven if an element sparks, flames, or looks damaged.
Inspect Elements Regularly
Check the heating elements regularly for crumbs, visible damage, or uneven glowing, such as one spot shining much brighter than the rest. Let your countertop oven cool and unplug it before you inspect near any element. Use lighting to compare the element’s appearance across its length, and look for bends, cracks, blistering, or discoloration.
Don’t touch or test an element while it’s hot or connected to power. Avoid scraping, bending, or soaking the element, since damage can create an electrical or fire hazard. If you see damage, notice sparks, or observe a flame, stop using the oven and arrange for element replacement. Don’t attempt repairs unless the manufacturer specifically authorizes them. Follow your manual’s inspection and care instructions, because designs and permitted methods vary.
Remove Crumbs Carefully
After inspecting the heating elements, clear crumbs only when the countertop oven is unplugged and completely cool. Remove the crumb tray and empty it over a bin. Wash the tray separately, then dry it fully before reinstalling it; trapped moisture shouldn’t reach the oven’s electrical or heating components.
If your manual permits, turn the oven carefully as directed to dislodge loose crumbs. Keep debris away from the elements. Use a soft, dry brush to gently clear crumbs from around them. Don’t bend, scrape, or touch the elements with liquid or cleaner, since damage can affect heating and create a safety hazard.
Before you finish, check near the elements and vents for remaining debris. Crumbs left there can smoke or burn during the next heating cycle. Reassemble only when everything’s dry.
Avoid Abrasive Cleaners
To protect the oven’s interior and heating elements, avoid abrasive cleaners and scouring pads, which can scratch surfaces or cause damage. Choose mild dish soap diluted in water for stubborn residue on approved interior surfaces; follow your manufacturer’s instructions for each product you select. Keep cleaner and excess water away from heating elements, since moisture or chemical residue can damage them or create an electrical hazard.
Don’t use steel wool, metal pads, or gritty powders; these can wear coatings and expose underlying material. After cleaning nearby areas, remove remaining residue with a clean damp cloth, keeping liquid clear of elements. If an element looks bent, damaged, or glows unevenly, stop using the oven and arrange repair or replacement.
Let Elements Cool
Before cleaning or inspecting the heating elements, unplug the countertop oven and let them cool completely. Hot elements can burn you, and contact with water or cleaner may damage them or release hazardous fumes. Don’t wipe or spray a heating element while it’s hot, even if you see fresh residue.
Once the elements are fully cool, check them carefully for food debris, deformities, or spots that appear damaged. Keep liquids and cleaning paste off the elements; moisture can reach electrical parts. To clean nearby interior surfaces, use a lightly damp cloth and avoid dragging it across the elements. Let those surfaces dry before plugging in the oven again.
If an element is damaged, sparks, or glows unevenly, stop using the oven. Arrange for repair or replacement according to the manufacturer’s instructions before operating it again.
Spot Signs of Damage
With the elements fully cool, inspect them regularly for debris, warping, or other visible damage. Check around each element and remove loose crumbs only with a soft, dry brush; don’t bend or scrape the tubing.
Look for cracks, blistering, sagging, corrosion, or sections that appear misshapen. During normal operation, watch whether one area glows much brighter than the rest; uneven brightness can indicate a failing element.
If you see damage, notice unusual discoloration, or observe sparks or flames, switch the oven off and unplug it if you can do so safely. Don’t use it again until a qualified technician replaces the faulty element. Avoid touching elements or attempting repairs yourself, even after unplugging, because components may remain hot or hazardous.
Door Glass Cleaning
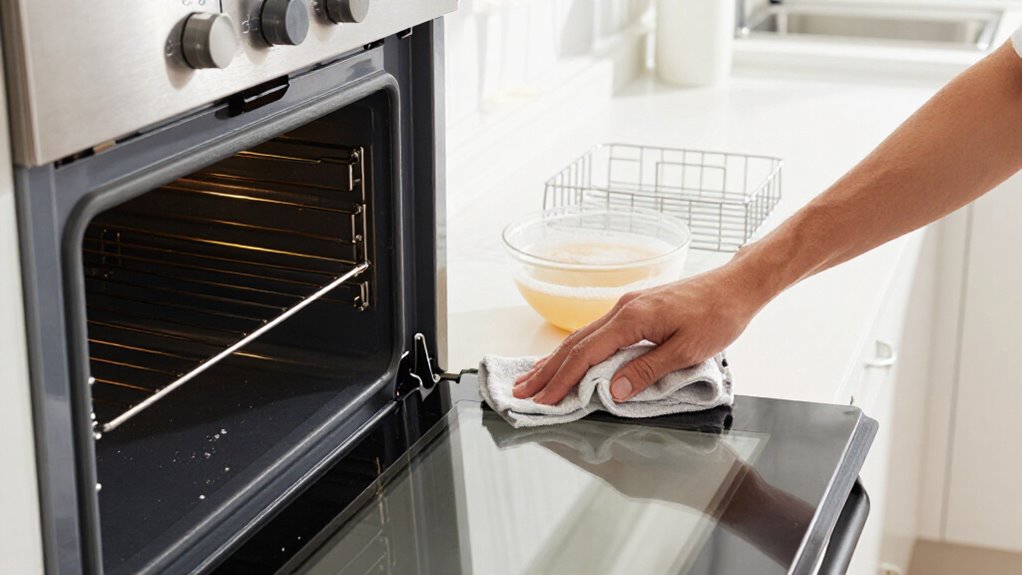
Let the oven cool, then choose a damp cloth or cleaner approved by the manufacturer. Wipe both accessible glass surfaces gently, keeping cleaner away from the controls. Dry the glass with a soft, lint-free cloth to prevent streaks.
Choose a Gentle Cleaner
Choose a gentle cleaner to protect the door glass and nearby finishes.
Once the oven has cooled completely, inspect the glass for splatters and select a cleaner suited to its surface. Diluted vinegar offers a mild option for routine soil; use it sparingly and avoid oversaturating edges, seams, or adjacent trim.
Choose a soft, lint-free cloth or sponge as your applicator. Rough pads, scouring powders, and harsh chemical cleaners can scratch glass or damage nearby finishes, even when a mark looks difficult to remove. Don’t mix products, and check your oven manual before using any cleaner.
For stubborn grease, use a compatible degreaser sparingly, and follow its label and your oven manual. Test it in an inconspicuous spot if guidance allows before full use.
Wipe Both Glass Surfaces
Wipe the inside and outside of the door glass regularly to remove splatters before heat bakes them on.
Before you clean the inner pane, switch off, unplug the oven, and let it cool completely. Use a soft, damp cloth with a small amount of mild soap or light-duty cleaner on both surfaces. Work gently across the glass; abrasive pads and gritty tools can leave scratches that weaken visibility and mar the finish.
For stubborn grease, apply a suitable degreaser sparingly, and follow your oven manufacturer’s instructions for approved products and contact time. Keep liquid away from door edges, hinges, controls, and electrical openings so it can’t seep into components. Wipe any cleaner residue with a clean, damp cloth before plugging the oven back in.
Dry to Prevent Streaks
Once the glass is clean, dry it with a clean microfiber cloth to prevent streaks. Use overlapping strokes across the pane so you lift moisture evenly. As the cloth becomes damp, turn it to a fresh section; a saturated area can redistribute water and leave marks.
Dry the glass edges and door frame as well, where trapped moisture can dry into visible lines. Buff any remaining streaks with a second dry, lint-free cloth. Avoid abrasive pads and cleaners that could scratch the glass or leave residue that clouds visibility. Keep the oven cool and unplugged before you handle the door, and don’t apply excess liquid near seams or electrical components. This helps you cook with a clear view.
Consistent Toasting Results
Consistent toasting depends on clean surfaces and unobstructed airflow.
Brush crumbs from the crumb tray and oven floor, then wipe spills after the oven has cooled. Baked-on residue can disrupt heat distribution and produce uneven browning. Keep heating elements and the surrounding area free of crumbs and grease so heat circulates evenly; don’t scrape elements or use abrasive tools.
Check that the door closes and clean its seal to limit heat loss. If the seal looks damaged, follow the manufacturer’s replacement guidance. Wash racks and trays with a mild cleaner, rinse as directed, and dry them before use. Moisture or leftover residue can transfer to bread and affect browning.
Arrange bread with clearance around it, and use the same rack position for repeatable results.
Smoke or Burning Odors
If smoke or a burning odor appears, switch off and unplug the oven, then let it cool completely before checking for crumbs, grease, or spills. Remove loose debris, and wipe cooled interior surfaces with a damp cloth.
For stubborn residue, apply a baking-soda-and-water paste, keeping it away from heating elements and electrical parts; wipe it away when clean. Check beneath and around the oven for crumbs or grease, and clean the crumb tray according to the manufacturer’s instructions.
Never use water or liquid cleaner while the oven is plugged in. If smoke or a burning smell continues after cleaning, stop using the oven. Don’t leave it unattended while you investigate; consult the manual or contact the manufacturer, since a damaged heating element or fault could be responsible.
Avoiding Knob Removal
Leave the knobs in place while cleaning; they connect to the oven’s control system, and removing them can damage the controls or create an electrocution risk. Before you begin, unplug the oven and let it cool. Clean around each knob with a lightly damp cloth and mild soap or a light-duty cleaner.
Keep moisture controlled; liquid can seep behind the panel and reach electrical parts. Don’t spray cleaner directly onto knobs or controls. Use this careful sequence:
- Wring out the cloth so it’s damp, not dripping.
- Wipe the knob’s base gently; don’t twist or pull it.
- Lift residue with another clean, damp cloth.
- Dry the panel with a soft cloth before plugging in.
Avoid abrasives and harsh cleaners; they can scratch or fade markings.
Record Cleaning Dates
Record each thorough cleaning in a calendar or maintenance log so you’ll know when the countertop oven is due for another. Note the date, any problems you found, and parts that may need attention. Add brief entries for spills you clean between deep cleans; tracking them helps you spot recurring messes and prevent burnt-on residue, smoke, and odors.
Set the interval according to how you use the oven. If you cook in it daily, plan a thorough cleaning every couple of months. With lighter use, clean it at least twice a year.
Check your log before holiday cooking, then schedule cleaning well in advance so you can finish safely and let surfaces dry before use. Keep the record accessible, and update it promptly after each cleaning or inspection. This simple schedule helps you maintain consistent care.
Conclusion
Keep your countertop oven reliable by matching its capacity to your counter space, gathering supplies before cleaning, and following a regular crumb-tray schedule. Let the oven cool and unplug it before you clean; protect heating elements, use suitable methods on door glass, and avoid removing knobs. Check toast for even results, and investigate smoke or burning odors promptly. Record cleaning dates so you can spot missed maintenance and keep your routine consistent, safe, and effective.