Measure Once, Buy Right: How to Size Your Air Fryer Basket for Accessories
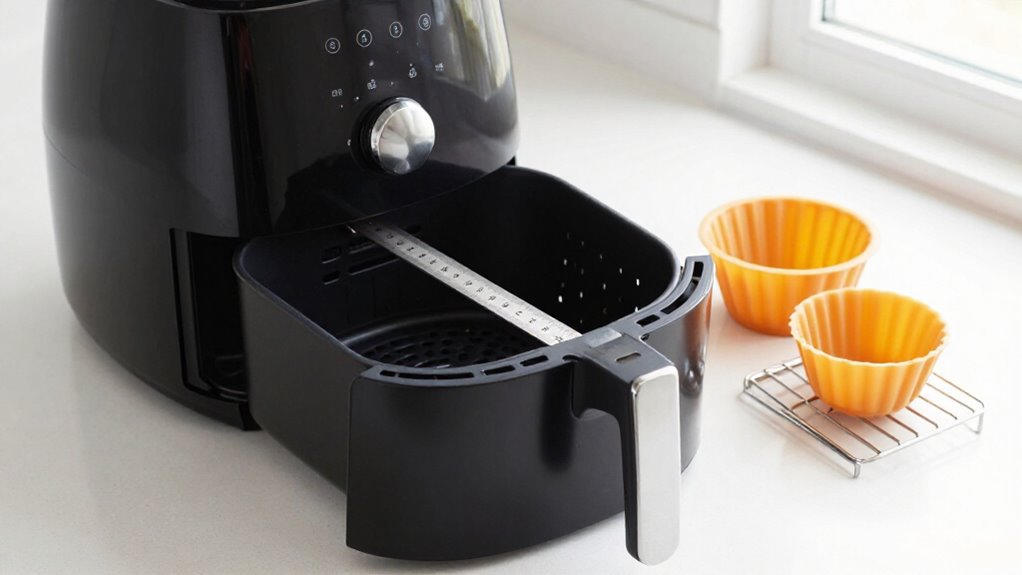
Unplug your air fryer and let it cool before measuring. Use a ruler for the basket’s flat floor and a flexible tape for curves and vertical clearance.
Record the basket’s shape, width, depth, and height at the accessory’s resting point.
Check crisper plate lips, handles, and sloped corners. Compare the accessory’s widest edges, leaving about half an inch per side for airflow.
Test-fit it level without pressure. More checks help protect coating and prevent slippage.
Measure Basket Floor and Height
Before choosing an accessory, measure the basket’s flat floor width and depth, not its wider opening, since flared sides can leave less room at the bottom. Use those floor dimensions to judge the accessory’s footprint; the usable cooking area is the base, not the basket’s advertised quart capacity. A roomy-looking basket can narrow enough near the floor to reject a pan or tray.
Check the floor’s shape, too. For a round basket, use its floor diameter; a diagonal span won’t guarantee a rectangular pan’s corners can sit flat. Then compare the accessory’s height with the distance from the basket floor to the rim. It must sit below the edge so you can insert and remove the basket without catching it. Don’t assume two baskets with identical capacity have identical interiors: their dimensions may vary by about half an inch. Treat product listings as estimates, and verify your specific model carefully.
Gather a Ruler and Tape Measure
Once you’ve identified the basket floor and height to check, gather a rigid ruler for straight measurements and a flexible tape measure for curved or longer spans. Choose tools with clear inch and centimeter markings so you can compare your results directly with accessory specifications.
- Use a 12–36-inch ruler to measure flat floor width, straight edges, or rack spans without bending the tool.
- Choose a flexible tape at least 2 meters long for curved interiors, round-basket diameters, or longer clearances.
- Keep a notebook or measurement template nearby; record each dimension, its unit, and where you measured it.
- Use calipers for narrow slots, lips, or other details where a few millimeters could affect fit.
A straight edge or square can help you check vertical clearance accurately. Photograph measurement points and basket orientation to verify details when shopping.
Step 1: Unplug and Cool Fryer
For safe, accurate measurements, unplug the air fryer and let it cool completely before removing the basket or test-fitting an accessory. You won’t risk an accidental startup while your hands are inside the appliance, and a fully cooled basket lowers the chance of burns from hot metal or nearby heating components.
You don’t need to touch or measure near the heating element; it can stay hot after cooking, so wait until the entire unit has cooled. Once cool, remove the basket and keep the fryer unplugged as you check whether an accessory sits securely. Measure only with the appliance disconnected; remove the test piece before you plug the fryer back in. This sequence protects you and keeps the fit check controlled and safe.
Step 2: Record Basket Shape and Corners
With the fryer unplugged and cool, note whether the basket is round, square, or rectangular; its shape determines which accessories can sit flat.
Look past the rim and inspect the basket’s flat floor; flared walls can make the opening look larger than the surface an accessory can use. For a square or rectangular basket, note whether floor corners stay sharp or curve into the walls. In round baskets, check whether the floor remains circular and unobstructed.
Tapered sides or rounded corners can prevent a pan from sitting level, even when its outline seems compatible. Allow about half an inch of clearance around an accessory so air can circulate. Don’t judge fit by the basket’s widest point; record the shape and corner details for comparison when shopping. A paper template cut to match the flat floor can reveal corners before you order and keep it with your notes.
Step 3: Measure Interior Basket Width
Measure the flat interior floor from side to side, not the basket’s wider opening, since flared walls can make it seem roomier than it is. Measure at the narrowest point, keeping the tape level from inside wall to inside wall. Compare the result with the accessory’s widest outer edge, including rims or handles, and leave about ½ inch on each side for airflow.
Don’t rely on quart capacity or a diagonal measurement alone: equal-capacity baskets can differ in width by roughly ½ inch. As a guide, a 4-quart basket may fit a 6-inch pan; a 5–6-quart model may fit a 7-inch pan. Verify first. For dual-basket fryers, measure each drawer; many are about 6 inches wide and fit no more than a 6-inch round pan inside.
Step 4: Measure Basket Interior Depth
Check the basket’s usable interior depth from its flat floor to the rim where the accessory will sit; don’t measure at the wider opening, since flared walls can overstate the available space.
Measure the depth at the exact spot where your pan or rack will rest. Baskets with the same capacity can differ internally by about half an inch, enough to make an accessory sit too high or fail to fit. Use a ruler or tape measure, and treat published dimensions as a starting point rather than a guarantee.
For a pan or rack, choose a footprint that leaves roughly ½ inch between its sides and the basket walls, preserving room for hot air to circulate. If you’re baking, also leave about 1¼ inches between the accessory’s rim and the heating element so batter can rise safely. Recheck your basket before buying; a close fit can still restrict airflow or leave inadequate room above the accessory.
Step 5: Check Handle Clearance
Even if an accessory fits the basket’s depth, an inward-projecting handle can narrow the usable space. Measure from the basket floor to the handle and any hardware that projects into the cavity; don’t rely on the opening width alone. When you shop for a pan or insert, check its widest point and confirm it clears the handle as you lower it in.
A piece that fits once seated may catch during insertion. For round pans in dual-zone drawers, measure drawer width; about six inches can leave little room for a handle or protrusion. Keep roughly ½ inch clear around the accessory, including beside the handle, for airflow. Compare its height with the basket rim and leave about 1¼ inches beneath the heating element.
Step 6: Measure Crisper Plate Thickness
A crisper plate can reduce the clearance available for accessories, so measure its full height at the edge, including any raised lip or feet.
Check whether the plate sits on the basket floor or rests on a ledge; that position changes how much vertical room remains. Include the plate’s height when you calculate clearance beneath a pan or rack.
Then compare the remaining space with the accessory’s height and the basket’s height. For a baking pan, leave about 1¼ inches between its rim and the heating element. Don’t rely on quart capacity or another model’s specifications: plates can differ in thickness even when fryers share the same advertised capacity. Measure the specific plate before you buy, and record the dimension for future accessory checks.
Test-Fit Your Silicone Liner
Because basket walls often flare outward, measure the flat floor’s width and depth—not the wider opening—before choosing a silicone liner. Compare those measurements with the liner’s base, leaving about ½ inch of clearance on each side so hot air can circulate. A liner that matches the basket’s widest point may overhang or sit unevenly on the narrower floor.
Check the liner’s height, too. Leave roughly 1¼ inches between its rim and the heating element; measure the usable space above the basket floor to confirm. Then test-fit the liner in your actual basket before buying.
Air fryers with the same quart capacity can differ internally by about ½ inch. Make sure the liner sits flat and doesn’t cover airflow openings. Physical fit alone isn’t enough: blocked openings can disrupt even cooking.
Accessory Scratching Basket Coating
To protect your basket’s nonstick coating, use silicone tongs or spatulas and choose accessories that fit without pressing against the walls. Lift racks, trays, and pans carefully; don’t drag them across the surface. Silicone liners or parchment can add protection, but fit them securely and leave airflow unobstructed. When cleaning, skip abrasive scrubbers and wash removable baskets gently.
Before buying, compare the accessory’s footprint with your basket’s internal measurements; a close fit shouldn’t require pressure. Check corners and handles, too. If a piece catches, stop and reassess rather than forcing it. Habits preserve the coating and help your basket last.
| Item | Risk | Better practice |
|---|---|---|
| Utensils | Scratches | Use silicone tools |
| Accessory edges | Wall contact | Match internal dimensions |
| Removal | Dragging | Lift straight out |
| Cleaning | Abrasion | Wash gently |
Preventing Accessory Slippage
Even when an accessory fits through the basket opening, flared walls can leave it unstable on the floor. Measure the basket’s flat floor width and depth, not its wider opening; sloped sides can fool you into buying an insert that rocks or wedges. Check the interior dimensions rather than trusting quart capacity, since two baskets with the same rating may differ by half an inch.
Choose an accessory that leaves ½ inch of clearance on every side. That gap helps it sit securely without pressing against the walls or restricting airflow.
For a dual-drawer fryer, measure each drawer separately; a round accessory shouldn’t exceed about 6 inches. Before cooking, set the accessory on the basket floor or rack and confirm it rests level. A diagonal measurement isn’t enough: corners may catch on sloped sides, leaving the piece tilted and prone to shifting.
Conclusion
Before you buy an air-fryer accessory, measure the basket, not just its capacity. Unplug the fryer and let it cool, then use a ruler and tape measure to record the floor’s width, shape, corners, and height. Check crisper-plate thickness, too, and test-fit any silicone liner without forcing it. A close, stable fit helps prevent slipping and protects the basket’s coating from scratches. These checks help you choose accessories that fit and work as intended. For a step-by-step approach to getting these dimensions right, see the Air Fryer Basket Size Measurements Guide.