Universal or Brand-Specific? The Truth About Air Fryer Accessory Fit
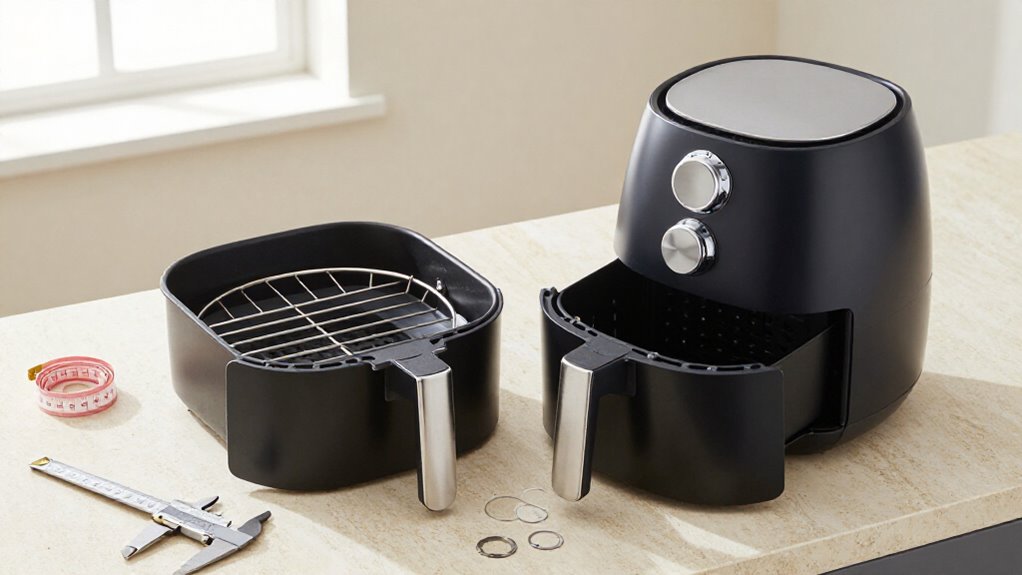
“Universal” accessories don’t guarantee fit. Measure your basket’s usable length, width, and height below the heating element, then compare them with the accessory’s dimensions.
Check basket shape, taper, handle and pull-pin clearance, plus your manual’s exact model guidance; quart capacity and brand labels aren’t proof.
Choose liners, racks, or pans that preserve airflow and keep food and accessories at least 1 inch from the element.
The details below can help you avoid poor fit, too.
Measure Basket Interior First
Before buying an accessory, measure your basket’s interior length, width, and usable height; quart capacity alone won’t confirm a fit. Use a ruler to record the usable space below the heating element, not just the basket’s outer dimensions. Check whether the floor is round or square and note any tapered sides that affect fit. This lets you compare the accessory’s outside dimensions with the space it must occupy.
Shape matters: a square-basket set may not sit in a round basket, and basket inserts won’t suit flat-tray models.
Check clearance before loading food: oversized two-tier racks brought food into contact with heating elements in six of ten test cycles. Skewers longer than four inches were linked to clearance violations in eight of ten. A 5.8-quart liner may leave dead space in a 4-quart basket or be crushed in a 6-quart one.
Brand Labels Aren’t Guarantees
A “for Philips,” “fits Ninja,” or similar label signals a seller’s compatibility claim—not necessarily manufacturer approval or tested fit. Third-party sellers may list popular brands to improve search visibility, basing claims on approximate capacity ranges rather than model-by-model checks. A “4.2–5.8 QT” range doesn’t confirm that an accessory suits your appliance.
Check the listing for your exact model number, dimensions, and intended use. Compare usable interior width and height, rail spacing, and rack depth; consider accessory thickness and its distance from the heating element. These details affect clearance, airflow, and cooking performance. Also confirm the accessory’s temperature rating against your fryer’s settings.
Genuine OEM parts usually follow model-specific tolerances and safety testing. For generic items, verify the manual and return terms before buying; a brand name alone doesn’t establish fit, safety, or endorsement.
Round Pan, Square Basket
Even when the quart capacity matches, a square accessory may sit unevenly or fail to fit in a round basket. Capacity describes volume, not the basket’s shape or internal dimensions, so don’t use quart ratings alone to choose a pan, liner, or rack.
Check your fryer’s basket before buying. Measure its interior and compare those dimensions with the accessory, then confirm compatibility by exact model number. For example, an 18-piece square-basket set may suit many 3.6–6.8-quart square fryers but not non-square models.
Cosori’s 5.8-quart baskets also vary: pre-2022 versions are round, while 2022-and-later versions are square. A 5.8-quart liner may leave excess space in a 4-quart basket or become crushed in a 6-quart one. Match shape and measurements first.
Liners, Racks, and Skewers
Match liners to your basket’s dimensions, and keep parchment weighted so it can’t block airflow or reach the heating element. Check that racks stay stable and preserve at least 1 inch of clearance from the element. Measure basket space before choosing skewers, since oversized pieces may not fit safely.
Liner Fit and Airflow
Because basket shapes vary by model, measure the basket and check its shape before buying a liner: a 5.8-quart liner may leave dead space in a 4-quart basket or be crushed in a 6-quart one. “Universal fit” describes a broad volume range, not guaranteed compatibility; flat-tray models may reject some accessories. Choose pre-perforated parchment rated to 425°F, which lets air reach food undersides. Solid sheets can obstruct flow and lift toward the heating element.
| Liner | Practical effect |
|---|---|
| Parchment | Air reaches underside |
| Silicone | Adds crisping time |
Silicone liners simplify cleanup and protect coatings, but fries took 60–90 seconds longer to crisp in testing. For crisp-dependent foods, add 30–60 seconds, then check texture; don’t assume liners cook like open baskets carefully.
Rack Clearance and Stability
Before adding a rack or skewers, check that they fit the basket and leave at least 1 inch of clearance from the heating element.
Then test rack stability: it should sit level and stay put as you slide the drawer in or out. A loose or oversized insert can touch the element, obstruct convection, and cause uneven cooking.
Don’t choose two-tier racks promising double capacity; crowded levels can block airflow and compromise clearance. In six of ten test cycles, oversized racks brought food into contact with the element.
A silicone liner protects coating but may slow crisping: fries took 60–90 seconds longer than on the basket. Check the liner’s dimensions against your basket shape; a 5.8-quart liner may leave dead space or get crushed in a size mismatch.
Skewer Space and Compatibility
Skewers, liners, and racks need to fit your basket’s shape and leave at least 1 inch of clearance from the heating element. Measure internal depth and check each accessory’s dimensions; skewers over 4 inches failed clearance checks in 8 of 10 tests.
| Accessory | Fit check |
|---|---|
| Skewers | Measure length and element clearance |
| Two-tier racks | Choose smaller or model-specific designs |
| Liners | Match basket capacity, shape, and dimensions |
Oversized racks brought food into contact with the element in 6 of 10 test cycles. A 5.8-quart liner may leave dead space in a 4-quart basket or crumple in a 6-quart one. Don’t trust “universal” labels alone. Ninja’s 10-piece and 17-piece kits suit DZ401 and DZ201 dual-basket models, not single-basket fryers. Square-basket kits may not fit round models or capacities outside their stated range.
Heating-Element Clearance
Measure the gap between your accessory or food and the heating element, leaving at least 1 inch of clearance. Check accessory height before cooking; tall racks and long skewers can contact the element and create overheating risks. Keep foil trimmed and secured under food, and avoid solid parchment or plastic dividers that can lift or deform.
Measure Element Clearance
Check the space between the accessory or food and the heating element: leave at least 1 inch to prevent contact and support even cooking. Measure the accessory’s height and length, then compare them with your air fryer’s interior dimensions. Basket shapes and dimensions vary by model, so don’t rely on a universal-fit label alone.
Test the setup before cooking: place the rack or skewers in the basket, load food as you normally would, and check the narrowest gap to the element. Oversized two-tier racks can push food too close; in testing, food touched the element in 6 of 10 cycles. Skewers longer than 4 inches violated clearance in 8 of 10 cycles. Choose shorter skewers, and cook in two batches if a multi-tier rack crowds the element or impairs even cooking.
Prevent Overheating Risks
Prevent overheating by keeping accessories and food at least 1 inch from the heating element. Check this clearance after loading the basket, since food can shift during cooking.
Oversized two-tier racks brought food into contact with the element in 6 of 10 test cycles. Don’t assume a rack marketed to “double your air fryer capacity” is safe: stacked food can sit too close, causing contact and uneven cooking. Cook in two batches instead.
Avoid skewers longer than 4 inches; they were linked to clearance violations in 8 of 10 test cycles. Keep plastic accessories out of the cooking chamber: plastic dividers deformed at 350°F in all 10 tests.
Loose foil can lift into the element. Use foil only when trimmed to fit and firmly weighed down by food.
Check Accessory Height
Because heating-element positions vary by air fryer model, test each accessory’s height in your own basket and leave at least 1 inch of clearance above the food. Before cooking, place the accessory in the empty basket and slide the drawer fully into position. Check the highest point of the accessory and the loaded food, since stacking can reduce the gap.
Keep both at least 1 inch below the heating element; don’t rely on advertised capacity or nominal quart size.
Tests show oversized two-tier racks can bring food dangerously close; food contacted the element in six of ten test cycles. Choose model-matched racks and avoid products marketed as “doubling capacity,” because extra tiers may violate clearance and cook unevenly. Keep skewers shorter than four inches.
Batch-Baking Mini Muffins
A seven-cavity silicone pan lets you bake mini muffins in batches, but it must fit your air fryer’s basket.
Check the pan’s external dimensions against the basket’s usable width, depth, and shape; a universal label doesn’t guarantee compatibility. A round or square basket may reject a pan designed for another model even when both appliances share a similar capacity. Compare the product’s listed model numbers before buying.
For example, Ninja Crispi Pro has a seven-hole muffin pan made for that appliance, while Gourmia offers a seven-cavity pan for its 7- and 8-quart fryers and compatible toaster ovens. Choose food-grade silicone rated for your cooking temperature; Gourmia’s pieces are rated to 450°F. If dimensions or model support aren’t clear, verify with the seller.
Overlooked Handle Clearance
Handle and pull-pin clearance can make an otherwise compatible accessory unsafe or unusable. Before you buy, measure the full basket, including the handle, pull-pin mechanism, and usable cooking area. Basket designs can differ even within one brand; the Ninja Foodi DZ201 uses a pull-pin basket that changes the space available for an insert. Don’t rely on quart capacity or a “universal-fit” label: a 5.8-quart liner can crush inside a 6-quart basket, and appliance shape affects fit.
Check accessory dimensions against your model number. Keep racks, pans, and skewers at least 1 inch from the heating element. In tests, oversized two-tier racks contacted it in 6 of 10 cycles; skewers longer than 4 inches violated clearance in 8 of 10. Verify usable length before cooking.
Silicone Liner Airflow Blockages
Fit isn’t the only concern with silicone liners; a solid liner can restrict airflow beneath food and slow crisping. Choose a raised or perforated liner so hot air can reach the food’s underside, but don’t expect silicone to transfer heat as quickly as the bare basket. Fries may need 60–90 seconds longer to match direct-basket crispness.
- Leave food clear of openings; piled fries can seal holes and trap moisture.
- Add 30–60 seconds for fries or breaded food, then check crispness.
- Match liner shape and size to the basket; an oversized liner can crush, while an undersized one may leave dead space.
A 5.8-quart liner won’t suit every basket, so confirm model fit instead of trusting “universal” claims alone.
Check Your Model Manual
Before buying an accessory, check your air fryer’s manual for its exact model number, basket shape, capacity, and internal dimensions.
Don’t rely on the brand name alone: models within one line can differ. For example, the Ninja Foodi DZ201 uses a pull-pin basket, and Cosori 5.8-quart baskets changed from round to square in 2022. Confirm that the accessory suits your fryer’s format; basket-style pieces rarely fit flat-tray oven-style models. Compare the accessory’s measurements with the manual’s basket dimensions, and follow its clearance guidance. An oversized two-tier rack can place food within one inch of the heating element.
“Universal fit” labels don’t guarantee compatibility with a Ninja AF101 or an Instant Vortex 10-quart. Check the listing for model numbers and return terms when ordering.
Conclusion
Before you buy an air fryer accessory, measure your basket’s interior, note its shape, and check handle and heating-element clearance. Don’t rely on brand labels alone; confirm dimensions against your exact model manual. Test liners, racks, pans, and skewers for airflow and a secure fit.
If an accessory blocks circulation or sits too close to the element, don’t use it. A fit check helps you cook evenly, avoid damage, and get more from every batch.