Cleaning a Deep Fryer After Use: A Step-by-Step Routine
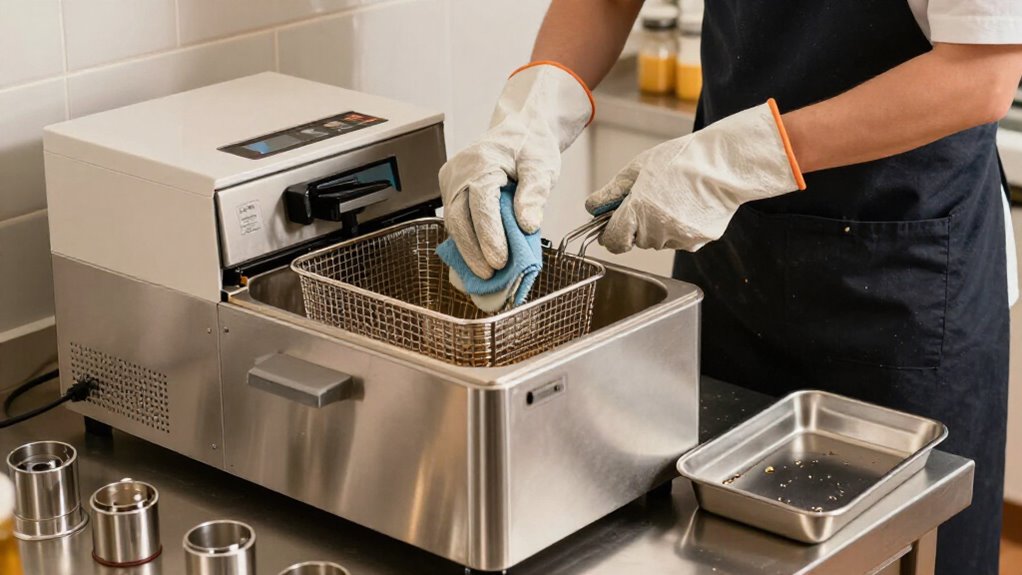
You’ll clean your deep fryer safely by switching it off, unplugging it, and letting the oil cool completely.
Wear gear and clear the work area before gathering detergent, a non-abrasive sponge, and an oil container. Remove the basket, drain oil without pouring it down the sink, then clean the interior surfaces.
Secure the drain valve, rinse and dry each part, and inspect the cord for damage before use. More checks follow.
Oil-Cooled-Down Readiness
Before cleaning, switch off and unplug the fryer, then let the oil cool for about 1½–2 hours. Don’t drain hot oil: it can cause severe burns and serious eye injuries if it splashes. Keep the fryer unplugged throughout preparation.
Wear safety gloves, eye protection, and a vinyl apron. Clear the area so you can move without spilling oil. Handle cooled oil carefully, and drain it only into a suitable container.
Follow your fryer manufacturer’s instructions and local rules for handling and disposing of used oil; don’t assume the procedure is the same everywhere. If the oil still feels hot or you’re unsure it has cooled, wait longer before draining. Keep children and others away until the fryer is safely prepared for cleaning.
Gather Cleaning Supplies
While the oil cools, gather the supplies you’ll need, but don’t start cleaning until it’s at a safe temperature.
First, check your fryer’s manual for model-specific directions and choose tools that suit your unit’s size and surfaces. Set out:
- Heat-resistant gloves, safety goggles, and an apron protect you from warm oil and splashes.
- A rigid, leak-proof container holds oil for reuse or disposal; add a label and marker if you’ll store it.
- Mild dish detergent, a non-abrasive sponge, soft brush, clean cloths, and paper towels handle routine washing and drying.
Keep chemical-resistant gloves ready for detergent use, and use only cleaners approved for your fryer. For small spills, keep absorbent pads nearby. If you’ll filter and reuse oil, prepare a fine-mesh strainer or filter paper.
Step 1: Clear Nearby Countertop Items
Clear the countertop around the fryer to create an uncluttered work area. Move food, utensils, and other supplies away from the appliance before you begin. This keeps them from receiving oil splashes, grease, or cleaning residue. Set aside anything you won’t need; don’t stack objects beside the unit where they could fall or block your movements.
Keep the bucket, drain pan, and cleaning tools close enough to reach, but place them outside the space you’ll use to handle the fryer and hot oil. Check that each item sits securely on a stable surface. Before draining, clear the route from the fryer to the oil-disposal container. Remove obstacles underfoot and confirm you can carry oil without twisting, stepping over clutter, or changing direction abruptly.
Step 2: Remove Fryer Basket and Filter
With the work area clear, switch off the fryer and let the oil cool to a safe handling temperature.
Put on heat-resistant gloves before you lift out the basket and its holder. Keep them level to limit drips, then set both aside for separate cleaning. Don’t reach into hot oil or remove parts while the fryer is warm.
Decide whether you’ll reuse the oil. If so, position a suitable strainer or paper filter over a stable container. Pour the cooled oil through it to catch food particles and sediment. Work to avoid splashes and keep the container steady. If you’re discarding the oil, skip filtering and collect it in a suitable container. Never pour used cooking oil down the sink; follow local disposal rules.
Step 3: Wash the Fryer Interior
Once the cooled oil is drained, gently scrape loose food particles from the fryer interior with a cleaning rod or scraper, taking care not to damage the surfaces. Use gentle strokes, then brush the bottom, sides, and corners with a soft-bristle brush or non-abrasive pad. Wipe these areas with a damp cloth to loosen and lift remaining residue.
For a deeper wash, add water and a manufacturer-approved cleaning solution to the designated fill line; don’t exceed it. If your manual permits a boil-out, heat the solution for the specified time, typically 15–20 minutes. Turn off the fryer before draining. Rinse the interior thoroughly until no cleaner remains, then let it dry completely before adding fresh oil. Keep moisture away from electrical parts throughout cleaning.
Step 4: Clean the Control Panel
Before wiping the control panel, turn off and unplug the fryer, then let it cool. Wait until it’s cool to the touch; don’t clean a warm panel.
Dampen a soft cloth with water and wring it out well. Wipe gently to lift grease and residue, keeping the cloth slightly moist. Never spray water or cleaning solution directly onto the panel. Keep moisture away from controls, switches, and electrical openings; liquid can enter and damage electrical parts.
If residue remains, wipe again with a clean, damp cloth instead of scrubbing. Avoid abrasive pads and harsh cleaners, which can scratch the surface or erase markings. Dry the panel with a clean cloth, then leave the fryer unplugged until it’s fully dry. Make this part of your daily exterior upkeep.
Step 5: Wipe the Heating Element
Turn off and unplug the fryer, then let the heating element cool completely. Confirm it feels cool before you begin; never wipe a warm element.
Use a clean, soft cloth dampened with water, not dripping wet. Gently wipe along the element to lift grease and food residue, taking care not to bend or scrape it. Don’t use abrasive pads, sharp tools, or excess force.
If your element lifts out, remove and clean it only when the manufacturer’s instructions allow; follow the specified method. Keep water away from electrical connections, and never immerse the element or nearby electrical parts.
After wiping, inspect the surface and let it air-dry fully. Check that no moisture remains around connections before you reassemble the fryer or restore power safely.
Step 6: Lock the Drain Valve
Close and secure the drain valve after the oil has finished draining, and confirm it’s fully shut before adding rinse water, cleaning solution, or fresh oil.
Follow the fryer’s manufacturer’s instructions for operating and locking the valve; designs vary, so use the specified latch, handle, or locking mechanism. With the appliance switched off and unplugged, check the position without forcing the fitting. If you drained warm oil, keep your gloves on and leave the collection container in place until flow stops.
Before a boil-out, verify the outlet is closed, then add the water and cleaner directed by the manual. Never fill with liquid while the valve remains open. Recheck the closure before refilling with filtered or fresh oil. This helps prevent leaks.
Check for Greasy Residue
With the oil drained and the valve secured, inspect the fryer’s sides, back wall, front ramp, bottom, and corners for greasy residue.
Use a soft brush or non-abrasive scrubber with soapy water to lift buildup above the oil well. Keep suds and rinse water out of the well if you plan to reuse the oil; contamination can compromise it. Check around and beneath heating pipes for stuck-on grease, but don’t scrub there until the pipes have cooled sufficiently. Wear heat-resistant gloves, and use gentle pressure to protect surfaces and components.
Rinse the interior, directing water away from electrical areas. Let the water drain, then inspect the surfaces. Continue rinsing until drained water runs clear. Check that the oil well is free of residue.
Persistent Burnt-Oil Odor
If a burnt-oil odor lingers after draining, grease, food particles, or carbon may remain in the oil well. Turn off and unplug the fryer, let it cool, then remove debris and scrub the well with a non-abrasive tool. Rinse with clean water in 1–2-inch additions; drain each time, and repeat until water runs clear.
| Step | Check |
|---|---|
| Well | Scrub residue |
| Cleaner | Use approved boil-out |
| Finish | Dry all parts |
Clean baskets and holders separately. For stubborn grease, follow the manual’s boil-out directions with an appropriate cleaner, then rinse thoroughly to remove traces. Let every component and the fryer dry completely before adding fresh or filtered oil.
If odor remains, check oil quality and discard degraded oil; don’t return it to the fryer again.
Inspect the Power Cord
Before inspecting the power cord, turn off and unplug the fryer, then let it cool completely. Keep the cord and plug dry, and follow your manufacturer’s electrical-safety instructions. Set the fryer where you can reach the cord.
Examine the cord from the appliance to the plug, moving your eyes along its full length. Look for fraying, cuts, cracks, crushed sections, exposed wires, or any other damage. Check the plug for bent or loose prongs, scorching, discoloration, or signs of overheating. Don’t bend or tug the cord to test it, and don’t wipe electrical parts with a wet cloth.
If you find damage on either the cord or plug, don’t reconnect or use the fryer. Arrange inspection and repair by a qualified technician before using it.
Conclusion
Once the fryer is clean, dry every part thoroughly before reassembly. Confirm the drain valve is locked, the power cord is undamaged and dry, and no grease remains on nearby surfaces. Dispose of used oil according to local guidance; never pour it down a drain.
Keep the fryer unplugged until you’re ready to use it again. A careful final check helps prevent leaks, electrical hazards, and lingering odors, so you can store or operate your fryer with confidence.