Building the Right Air Fryer Accessory Set for Your Basket Capacity
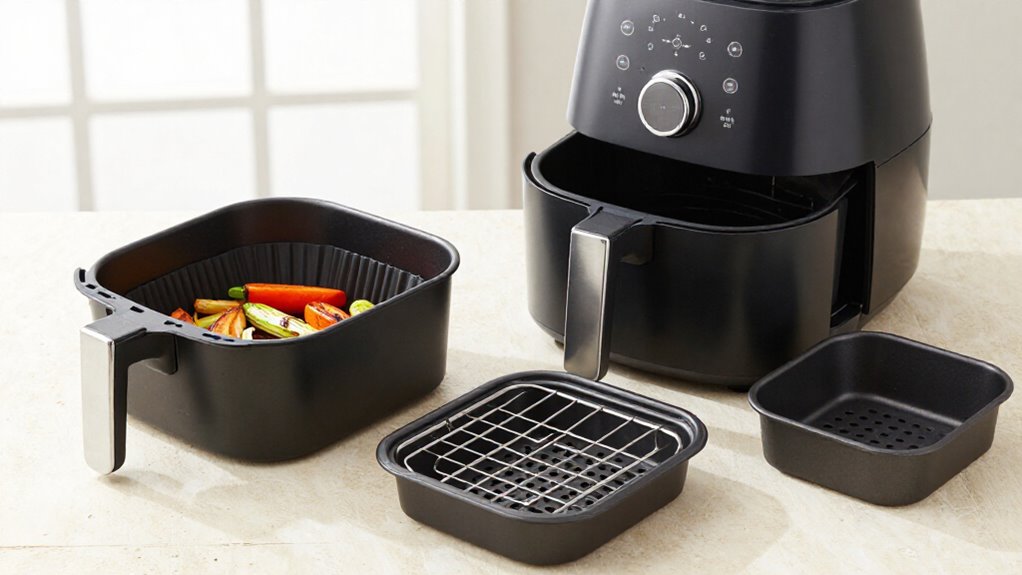
Build your air fryer accessory set around the basket’s usable floor and depth, not its quart rating alone. Measure the interior at its widest points, then check that racks or pans sit below the rim and leave room to slide the basket and grip its handle.
Match accessory type and rack count to your food and batch. Leave gaps for airflow, choose heat-rated materials, and verify care instructions for every component. More fit details can further refine your choices later.
Measure the Basket Floor
Measure the basket’s usable floor—not its quart capacity—to size an accessory correctly. For a square or rectangular basket, measure the interior length and width; for a round basket, record its inside diameter. Compare each measurement with the accessory’s stated dimensions, and account for the shape and fit rather than assuming a nominal size will work.
A 7.72-by-7.72-inch P&P CHEF rack needs a basket size greater than 8 inches. The 8.27-inch BYKITCHEN rack calls for an inner width of 8.5 inches and a diagonal of at least 11 inches. Check sides and diagonal: a rack may clear the width yet fail to fit. Confirm it sits flat and leaves clearance for basket movement. For round or unusual baskets, verify fit with the manufacturer or seller before buying.
Match Accessories to Meals
Once an accessory fits the basket, choose it for the food you’re cooking. Use a basket for small portions you’ll shake, such as fries or vegetables. Choose a rack for drumsticks, wings, fish, kebabs, or larger cuts that need turning; stacking can let you prepare more than one food at once.
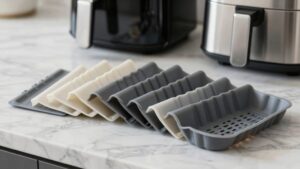
For baking, match the pan to the dish: silicone cups suit muffins or egg quiches, while pizza and cake pans support larger bakes. Skewers work well for shrimp and vegetables, but shorter mini skewers may be more practical for a small household. Check how many pieces your basket can hold before buying a set. Even an accessory may offer limited batch capacity: in a tested basket, only a handful of silicone baking cups fit.
Basket Depth and Airflow
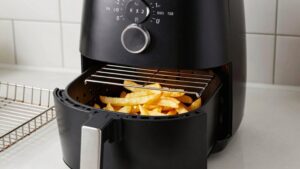
Basket depth determines which accessories fit and how much food you can cook at once. Measure the basket’s widest interior diameter at the top and bottom; tapered walls can shrink the usable footprint. Measure depth from the lowest point to the rim, then subtract crisper-plate thickness to estimate usable height.
| Feature | What to check |
|---|---|
| Diameter | Leave about 0.5 in clearance |
| Depth | Keep pans below the rim |
| Open area | Avoid blocking over 25–30% |
| Airflow | Choose perforations or elevation |
Use usable volume (π × radius² × usable depth) to compare capacity, not as a fit guarantee. Tight pans slow convection and crisping, so leave about 0.5 inch at the walls. Shallow baskets limit tall pans and stacking; deeper loads may need more cooking time for evenness.
Accessory Material and Coatings
Choose food-grade 304 stainless steel for durable, corrosion-resistant racks, and verify each accessory’s heat rating against your fryer’s maximum temperature. If you prefer nonstick, look for PFAS-free coatings and check their care limits, since overheating or abrasive cleaning can damage them. Use silicone tools to protect coated surfaces, and replace pans or trays if their coating scratches or flakes.
Food-Grade Stainless Steel
For racks and trays, food-grade 304 stainless steel offers corrosion resistance and durability at air-fryer temperatures, but check the product’s stated heat limit: some racks are rated to 600°F, while others are limited to 400°F. That rating should exceed your appliance’s maximum setting, with a margin if you use oven-style or high-heat modes.
Before buying, measure your basket’s usable footprint and height; choose a rack or tray that fits its shape without crowding the walls or blocking circulation. Look for polished, rounded, burr-free edges, which help protect your hands and basket during loading and removal.
Many steel options are dishwasher-safe, but confirm the listing’s care instructions and verify that the piece is stainless steel rather than coated. A durable choice still needs suitable fit.
PFAS-Free Nonstick Coatings
PFAS-free claims depend on the specific coating, not the accessory’s brand or material category. GreenPan air fryers use ceramic nonstick made without intentionally added PFAS, but that statement doesn’t establish the status of every GreenPan accessory. Check the exact accessory’s labeling or manufacturer specifications before you buy; generic “nonstick” wording doesn’t confirm a PFAS-free formulation.
For a basket-sized set, compare coated pans and trays with your measured footprint and available cooking area, so you don’t buy pieces that crowd the basket or restrict airflow. The provided descriptions don’t identify other nonstick coatings as PFAS-free. If you want to avoid coated surfaces, choose a properly sized 304 stainless-steel rack. Silicone is another option, but don’t assume it’s PFAS-free from its material name alone; verify product claims.
Heat Resistance And Durability
Beyond coating chemistry, check each accessory’s temperature rating against your air fryer’s maximum setting. A mismatch can warp liners or compromise a coating, so compare every piece’s limit with the appliance manual. Ratings differ even among similar materials: HONYAO 304 stainless-steel racks reach 600°F, while BYKITCHEN racks top out at 400°F. Silicone liners may be rated to 430°F, and GOAUS paper liners to 428°F.
Choose by your actual cooking temperature, not appearance alone. For repeated use, food-grade 304 stainless steel offers strength and corrosion resistance. Smooth, polished, burr-free edges can resist rust; verify the maker’s care instructions before dishwashing. Silicone-coated or silicone-tipped tools help protect nonstick surfaces, whereas metal tongs may scrape or chip coatings. Match rack size and heat rating to your basket.
Coating Care And Maintenance
To protect nonstick coatings, choose silicone-tipped utensils and handle accessories gently; metal tongs can scrape or chip the surface.
Before loading a coated tray or liner, check that its dimensions and shape fit your basket without forcing the edges or blocking airflow. Rounded, burr-free rack edges help prevent scratches from the basket. A food-grade 304 stainless-steel rack offers corrosion resistance.
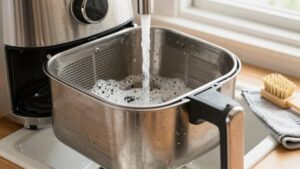
Choose a dishwasher-safe model only if your fryer’s manual permits machine washing. Silicone liners can shield the basket coating and may be dishwasher-safe, but observe their rated limit: Siudangka liners specify 430°F. For handwashing, use soapy water and a soft sponge; avoid abrasive pads, then dry components before reassembly. Inspect coated surfaces and stop using any accessory that flakes or exposes damaged coating. Store coated pieces separately, or place soft liners between them.
Rack Count for Batch Size
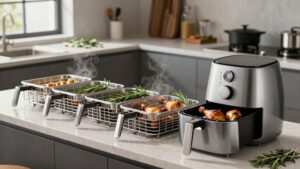
Match rack count to your portions: one rack suits small batches, while two or three can increase capacity for larger meals. Check that the racks fit your basket, especially if you have a 4 to 5-quart model, and leave space between tiers for airflow. Choose stackable racks only if they let you cook more without overcrowding.
Match Racks to Portions
Choose rack count by the portions you cook: one rack is simpler for single batches, while a stackable two- or three-rack set lets you cook more at once. More levels can suit multiple portions, but they don’t guarantee every basket can hold the set. For a 4–8-quart square fryer, a three-rack set may add three cooking layers; check the interior dimensions, since some sets need more than 8 inches.
If you have a Ninja dual-basket model, verify that each 8 × 5.5 × 2.2-inch rack fits its basket before buying. A three-tier dehydrator set is designed for many 6–8-quart fryers, though shape and measurements still matter. Leave gaps between racks so hot air circulates around the food; don’t crowd layers to fit extra portions.
Plan Batch Size
Plan rack count around the batch you cook: one level is simplest for a small batch, while two or three tiers can hold more portions at once.
Choose a two-rack set when a second cooking layer meets your usual needs; move to three racks for larger meal-prep batches, provided the set fits your fryer. Examples include three-rack TeamFar or P&P CHEF sets measuring 7.72 inches, or 7.72 by 7.72 inches, respectively.
Check each rack’s dimensions against the basket’s interior before assigning portions, and don’t assume a listed rack count guarantees usable capacity. Your fryer’s volume matters too: a 4–5-quart basket generally suits two to four people, while a household of four or more may need a 6–8-quart model. Keep a simpler rack for routine family dinners; reserve extra tiers for planned batch cooking.
Leave Room for Airflow
Rack count only adds useful capacity when hot air can move freely around the food. Choose two or three rack levels according to your batch size, but don’t use every level if portions would crowd. Leave open gaps between racks and around each portion so circulating air can reach food surfaces. Open-grid or fine-mesh racks allow airflow, while a raised rack keeps food off the basket bottom. Space food across tiers to limit overlap and support more even crisping.
Match each rack to your basket’s interior dimensions and shape; a poor fit can obstruct airflow or stop the basket from moving properly. For a larger batch, cook several uncrowded rounds rather than pack the basket or add more levels than air circulation can support.
Choose Stackable Racks
How many rack levels you need depends on your usual batch size: a single rack suits simple meals, while a stackable two- or three-tier set can cook more food at once and reduce batches.
For a 4–8-quart fryer, consider a three-rack set such as P&P CHEF’s 7.72 × 7.72 × 1.83-inch racks, but measure your basket’s interior first. A 6–8-quart model may suit a three-layer 304 stainless-steel rack, provided the rack and food fit without crowding. For dual-basket cooking, a pair of 8 × 5.5 × 2.2-inch racks is listed for selected Ninja Foodi Dual Zone models, including 8- and 10-quart versions. Check compatibility with your exact model and drawer dimensions before buying. Choose tiers for your batch; leave gaps between levels for airflow, and avoid overcrowding to maintain even cooking and crisping.
Handle and Control Clearance
Check more than capacity when choosing a rack or pan: measure the basket’s interior dimensions and diagonal, then confirm the accessory leaves room to pull the basket out and grip its handle without catching on the walls. In dual-basket fryers, check each rectangular drawer separately; one rack may fit one basket but not the other. Confirm model-specific fit, not quart capacity or a generic dual-zone label.
After placement, slide the basket fully and make sure you can reach controls without obstruction. Keep the accessory clear of heating areas and preserve airflow around all sides; added levels shouldn’t restrict circulation. Test insertion and removal empty before cooking.
Use heat-resistant silicone tongs to handle hot baskets or grates while protecting nonstick surfaces from scratches. If clearance is tight, choose smaller accessories.
Replacement Parts and Availability
When an accessory wears out, you can often buy a replacement rack or set separately rather than replace the whole kit.
Find parts through Amazon or from Ninja, Tower, and Philips. Before ordering, compare listed dimensions with your basket’s internal length and width or diameter; quart capacity alone doesn’t establish a fit. Check the product listing for named compatible models.
For example, Cosori says its accessory set fits the Pro 5.5L and larger models, including Dual Blaze, and works with most other air fryers, including Tower, Philips, and Ninja. Measure your basket carefully first. If dimensions or compatibility remain unclear, contact the seller or manufacturer before purchase. Warranty or manufacturer support may help with defects, but available warranty information doesn’t specify terms.
Overcrowding Food on Racks
Overcrowding a rack restricts hot-air circulation, so food may cook unevenly and turn out less crisp. Choose a rack that matches your basket’s footprint and leaves open space around each piece; the rack shouldn’t press food against the walls.
- Arrange pieces in a single, uncrowded layer when crisping matters most.
- Add tiers only if gaps remain above, below, and around the food; too many layers can block airflow.
- Cook in batches when the rack is covered, rather than compressing portions to fit.
For larger portions, consider an air fryer with at least 6–8 quarts; its bigger basket can give food more room to cook evenly. Match rack tier count to basket height, and follow your model’s guidance so accessories don’t crowd the cooking area.
Dishwasher-Safe Component Check
After choosing racks that preserve airflow, consider how easily each piece cleans up. Dishwasher-safe parts can save time after batch cooking, but don’t assume every item in a set shares the same care requirements. Check each component’s manufacturer instructions before loading it.
- Stainless-steel racks from HONYAO, BYKITCHEN, HAOYAO, TeamFar, and P&P CHEF are described as dishwasher-safe; verify the exact model.
- Dishwasher-safe options also include dual-zone and GQZ XL sets, a 9-piece dehydrator set, OXO Good Grips silicone baking cups, Siudangka reusable silicone liners, and the silicone pot.
- Check temperature and placement guidance, especially for silicone or coated pieces; hand-wash the pot with hot, soapy water if preferred.
For a capacity-matched set, clean racks and liners promptly after full loads, and keep parts separate when you check labels; one dishwasher-safe accessory doesn’t certify neighboring trays, clips, or utensils for machine washing.
Let hot accessories cool before handling. Dry every washed part thoroughly before reassembling, so moisture doesn’t remain trapped in your basket or affect the next cooking cycle.
Conclusion
Choose accessories only after you measure your basket’s floor and depth, then match each piece to the meals you actually cook. Keep airflow open, confirm materials and coatings suit your temperatures, and size rack counts to your batch—not the advertised maximum.
Check handles and controls for clearance, and verify replacement parts and dishwasher guidance before buying. If food crowds the racks, cook in batches; you’ll get more even results and protect your fryer’s performance reliably.