
How to Replace an Air Fryer Heating Element: A Step-by-Step Walkthrough
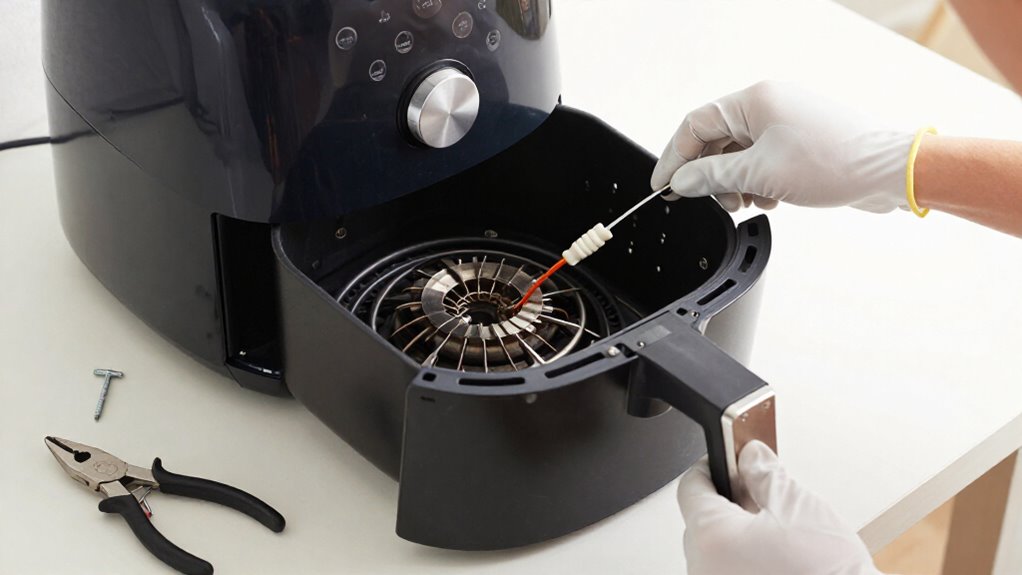
Before replacing an air fryer’s heating element, unplug it, let it cool completely, and check the service guidance and warranty.
Match the model and a compatible element with the original type, rating, voltage, and mounts. Photograph and label wires before disconnecting anything.
Remove the housing and element only if instructions are clear and wiring is sound.
Reconnect wires to recorded positions, restore shields, and check airflow and stable heat; the steps below explain checks.
Element Replacement Overview
If your air fryer no longer heats or takes unusually long to cook, the heating element may have failed; cleaning won’t fix it.
Before opening, unplug the fryer from the mains and let it cool completely; this reduces shock and burn risks. Confirm service guidance before proceeding. If replacement is appropriate, use an element with the original type and rating, commonly about 1,300 watts. Photograph or label the red, black, and earth wires before disconnecting them so you can restore connections correctly.
Keep fasteners organized and avoid straining wiring or supports. Stop and seek qualified service if you find burned connectors, damaged insulation, cracked supports, or signs of electrical damage. Don’t continue disassembly when the appliance’s condition or repair instructions are unclear.
Check Model Compatibility
Before ordering a replacement, confirm it matches your air fryer’s exact model and revision; a part that looks similar may have different electrical ratings, mounts, or connectors. Find the model number and variant on the appliance label; record any serial or production code, since revisions can affect compatibility. Check the manual or manufacturer parts list for the OEM part number, then cross-reference it with an authorized seller’s compatibility data.
- Match voltage and wattage exactly; don’t substitute a higher-rated element.
- Compare element type, dimensions, mounting holes, brackets, and screw positions.
- Verify connector style, pin configuration, and any integrated thermostat, fuse, or sensor.
- Confirm required heat shields, insulation, and safety interlocks match your revision.
- Treat repair guides and marketplace listings as supporting evidence; confirm fit against OEM specifications.
Check warranty terms before opening the unit; unauthorized repairs may affect coverage. If uncertain, contact the manufacturer or use authorized service.
Step 1: Photograph Wire Connections
With the air fryer unplugged from the mains, take clear, well-lit photos of the thermostat and heating-element connections before disconnecting any wires. Frame the view to show where the red, black, and earth wires attach, including each terminal and nearby components. Take close-up images from more than one angle if wires overlap or connector positions are difficult to distinguish.
Before moving a wire, check that your photos cover both ends of each connection and preserve the original orientation. Use these images alongside labels on each wire when reconnecting the replacement element. Don’t disconnect wires until you’ve confirmed the images show every terminal clearly and in focus. Compare each connection against its recorded position before restoring power.
Step 2: Gather Insulated Tools
Gather insulated-handled needle-nose pliers to disconnect the heating-element and thermostat wires, and use an 8 mm wrench to loosen the fan’s central nut.
Before you begin, unplug the air fryer from the mains and let it cool completely; insulated handles don’t replace isolation. Choose pliers and a wrench with intact insulation, and inspect their jaws and handles for cracks, looseness, or exposed metal. Keep a marker or phone nearby to identify the red, black, and earth wires before you disconnect them.
Set a small container beside your work area for the fan spacer and screws, so you can retain them in order. Use the wrench squarely on the central nut and apply controlled force; don’t let the fan turn abruptly or strain nearby wiring. Keep your tools organized and dry, and avoid placing metal implements across terminals or conductors. If insulation is damaged, replace the tool before proceeding.
Step 3: Remove the Outer Housing
After confirming the air fryer is unplugged and completely cool, turn it over and remove the three screws securing the metal plate beneath the lid. Use a correctly sized screwdriver and steady pressure to avoid damaging screw heads. Keep the screws together and note their positions for reassembly. Support the plate while removing the last screw, then lift it away carefully.
Don’t pry or force a stuck edge; check for another fastener. Work slowly in the confined lid space. Keep your fingers clear of sharp metal edges and the unfinished glass rim. As the housing opens, don’t pull, twist, or strain any wires. Set the plate aside in its original orientation on a clean surface. Check the plate and work area for loose fasteners before proceeding.
Step 4: Remove and Replace the Heating Element
Once the lid plate is off, hold the fan securely and loosen its central nut with an 8 mm wrench. Slide the fan off, then set the small spacer behind it aside where you won’t lose it.
Remove the three screws securing the heater housing. Undo the two element mounting screws and the stabilising screw. Before disconnecting anything, photograph or label the red, black, and earth wires so you can restore each connection correctly. Use needle-nose pliers to disconnect the terminals without pulling on the wires.
Straighten the side bracket, then lift out the old element.
Fit a replacement that matches the original type and power rating, about 1300 W. Reconnect the labelled wires, then reinstall the bracket, housing, spacer, fan, and plate in reverse order. Tighten fasteners securely. Don’t proceed if wiring or insulation appears damaged; seek qualified repair help.
Step 5: Test Thermostat Continuity
With the air fryer unplugged and fully cool, access the thermostat only if the manufacturer’s service instructions permit it. Photograph the wiring before you disconnect anything, then label the leads so you can restore their positions accurately. Disconnect at least one thermostat lead; leaving both connected can let other components affect your reading.
Set your multimeter to continuity or its lowest resistance range. Place one probe on each thermostat terminal, keeping your fingers clear of the metal probe tips. At room temperature, a closed thermostat should usually beep or read near 0 Ω. An open reading may indicate a failed thermostat, but some models use normally open thermostats or temperature-dependent switches, so confirm the expected behavior in the service information. Don’t bypass the thermostat. If the reading remains unclear or you find damaged wiring, stop and consult a qualified technician.
Step 6: Reinstall Insulation Shields
Before closing the housing, reinstall each insulation shield in its original position and orientation, clear of the heating element, fan, and wiring. Align each shield’s mounting holes with the housing screw points, then refit the screws. Tighten them securely, but don’t overtighten or distort the shield.
Check that each panel sits flat against its supports, with no gaps caused by trapped material. Keep the insulation and supports dry and free of grease or cleaning residue; contamination can compromise insulation or create hazards. Inspect the red, black, and earth wires before you close the housing, confirming none is pinched or trapped beneath a shield. Finally, make sure every shield is secure and no wire or loose part obstructs the fan, then proceed with lid reassembly.
Check for Stable Heat
After reassembly, run the air fryer empty only when it’s fully dry, and monitor it for steady heat, unusual odors, or smoke. Confirm the fan runs and hot air circulates evenly; blocked airflow can create cold spots and uneven results.
If the fan operates but the fryer produces no heat, unplug it and stop testing. Have a qualified technician check the element, thermal fuse, connectors, or controls. For unusually slow or fluctuating heating, disconnect power and verify that the replacement element matches the original rating: about 1,300 W for the model described. Don’t continue operating the appliance if it trips a breaker or GFCI, or if you detect burning near wiring, exposed conductors, or damaged insulation. Allow it to cool before inspection or service.
Loose Wire Connections
A loose wire can interrupt power to the heating element even when the element is intact. Before you inspect wiring, unplug the air fryer and let it cool completely. Photograph or label the red, black, and earth wires before disconnecting them, so you can restore each to its correct terminal.
Check connectors at the thermostat and heating-element terminals; each must sit fully seated.
| Check | Action |
|---|---|
| Thermostat | Seat connector fully |
| Element terminals | Verify secure fit |
Use needle-nose pliers to grip each connector, not its wire; pulling the wire can damage it. Don’t power the unit while it’s open. If you find a burned connector, damaged insulation, or repeated heating failure, stop using the appliance and consult a qualified technician. Don’t assume the element needs replacement until you’ve checked these connections. Reassemble only after correcting the fit.
Clean Airflow Vents
Restricted airflow can reduce heating performance, so unplug the air fryer and let it cool completely before cleaning its vents.
Start by removing loose crumbs and dust with a dry microfiber cloth or soft nylon brush. Use light pressure to avoid pushing debris farther into the appliance. Next, wipe the vent openings with a barely damp cloth lightly moistened with soapy water. Follow with a clean, damp cloth to remove soap residue, then dry the area with a dry cloth.
Don’t spray cleaner or water into vents, soak the appliance head, or push tools inside; wiring and electrical components may sit nearby. Leave the unplugged unit to air-dry for at least 30–60 minutes, longer in humid conditions. Plug it in only when completely dry.
Conclusion
Before you use the air fryer again, confirm that the replacement element matches your model and every wire returns to its photographed position. Keep the appliance unplugged while you secure the housing and reinstall all insulation shields. Don’t operate it with loose connections, exposed wiring, or blocked vents.
Once reassembled, place it on a heat-resistant surface and monitor a test cycle. If heating seems uneven or you notice sparks or unusual odors, stop and disconnect power. Have a qualified technician inspect it before use.