Toaster Crumb Tray Cleaning Guide
You should remove the crumb tray regularly. Measure its width, depth and height to ensure a proper replacement. Check how it locks or slides. Unplug the toaster and clear slot drainage holes with a soft brush, toothpick or low-suction vacuum. Avoid liquids near electrical parts.
Inspect the tray for melting, discoloration or warping. Match material to its max-temperature rating; replace if damaged. Follow safe cleaning steps and you’ll find tips to prevent clogs and heat damage.
Quick Overview
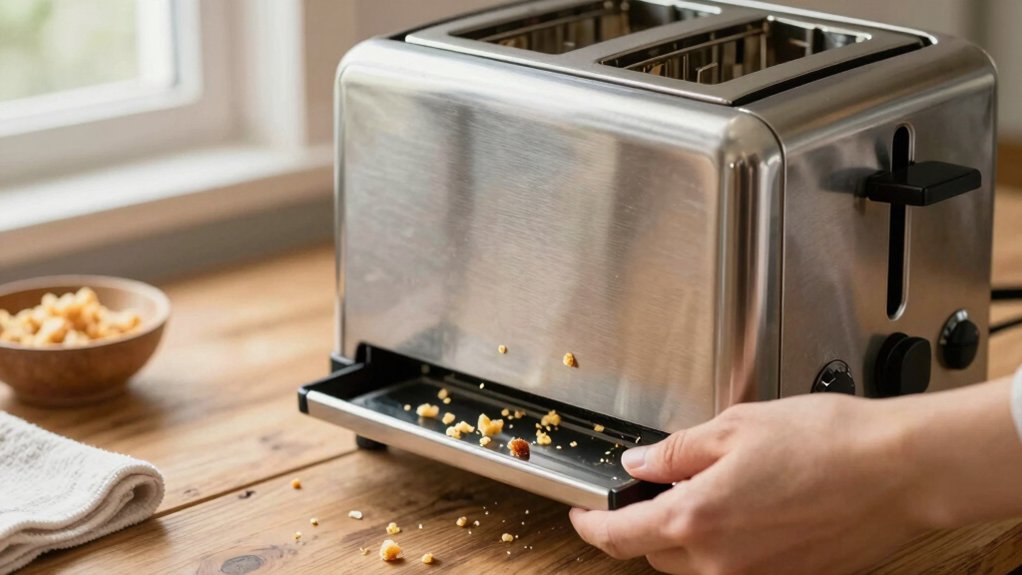
- Unplug the toaster, remove the crumb tray, and tap crumbs into a trash bin before further cleaning.
- Wipe the tray with a damp microfiber cloth and mild dish soap; rinse and dry fully before reinserting.
- Inspect the tray material and stamped max-temp to confirm safe heat tolerance for future use.
- Clear slot drainage holes from the bottom with a soft brush, toothpick, or vacuum nozzle while tilted.
- Replace the tray if warped, corroded, or showing heat damage. Avoid using metal tools near electrical parts.
Crumb Tray Dimensions Chart
How big is your toaster’s crumb tray and will a replacement fit? You should measure the crumb tray dimensions (width, depth, height) before buying a spare. Commercial trays often list sizes: 9″ x 10.1″ x 0.5″ for some models; while many consumer trays don’t specify dimensions. Measure edge-to-edge and note any front lips or handles that affect fit. Match removal mechanism too: sliding, hinged, or handled trays install differently.
Use this simple table to compare what to check:
| Feature | What to measure |
|---|---|
| Width | Side-to-side edge measurement |
| Depth | Front-to-back including lip |
| Height | Tray thickness and clearance |
Always unplug the toaster before testing fit or removing the tray to avoid injury or damage.
Removable Tray Heat Tolerance Rating
After you’ve measured tray dimensions to ensure a proper fit, check the tray’s heat tolerance rating before using it in high-temperature settings. You’ll want to confirm the removable tray material and its maximum safe temperature to prevent warping, melting, or fumes. If the manufacturer doesn’t list a rating, assume conservative limits and avoid oven or broiler exposure.
Follow these practical checks:
- Verify stamped or printed max-temp value on the tray or packaging.
- Match material type (metal, silicone, plastic) to typical heat tolerance charts.
- Replace trays if they show discoloration, bubbling, or soft spots after use.
Prioritize safety: Unplug the toaster before inspecting, and never expose a tray beyond its rated heat tolerance.
Slot Drainage Hole Location
Check where the slot drainage holes sit; usually along the bottom edges or center of each slot. This way, you know where crumbs and liquids exit. You’ll need to access them by removing the crumb tray or tipping the toaster. Use a soft brush, toothpick, or vacuum nozzle to clear blockages while avoiding moisture.
Always unplug the toaster first and keep tools dry to prevent short-circuiting or damage.
Typical Drain Hole Placement
Where will crumbs and liquids go if they escape the tray? You’ll usually find small drain holes positioned beneath the toast slots or along the rear edge of the crumb compartment. These holes channel stray crumbs and condensate into a catch area or out through a service opening.
Don’t treat this as an irrelevant topic or assume it’s an unrelated aspect of design; it affects safety and cleanup. Inspect placement visually before cleaning so you avoid pushing debris into hard-to-reach cavities. If holes sit low, expect more residue in the lower compartment. If they’re near the slots, check the slot area for buildup.
Always unplug the toaster and let it cool before probing or clearing these drain points for safe maintenance.
How To Access
Want to locate the slot drainage holes without risking damage or injury? First, unplug the toaster and let it cool completely. Inspect the top slots and sides for small recessed openings; manufacturers place drainage holes near the slot base or along the side walls.
Tilt the toaster slightly over a towel and use a flashlight to confirm hole positions before reaching inside. When you need to access deeper openings, avoid pouring liquids or inserting wet cloths to protect interior moisture safety. Instead, use dry, non-metallic tools and gentle tapping to dislodge crumbs toward the tray.
After locating holes, return the toaster upright, re-seat the crumb tray, and check that nothing obstructs airflow. Always keep safety first when learning how to access these areas.
Cleaning Tools Needed
Which tools you bring makes accessing slot drainage holes safe and effective. Gather a small scrub brush for loosening trapped crumbs around slot edges, a microfiber cloth for dry wiping and final polishing, and a melamine sponge for gentle scuff removal on plastic or metal surfaces.
Keep baking soda on hand to make a mild paste with water for spot-treating greasy buildup: apply sparingly and avoid electrical components. Always unplug the toaster and work in a well-lit area; use the scrub brush with light pressure to avoid bending slot parts. Use the microfiber cloth to capture loosened debris and the melamine sponge only on non-electrical exterior areas.
Dispose of residue safely and let all parts dry completely before reassembly.
Preventing Future Clogs
Regularly check the slot drainage holes, usually located at the bottom edges of the toast slots or beneath the crumb tray, so you can spot and clear blockages before crumbs or grease build up. Inspect those openings weekly and use a soft brush or compressed air to dislodge particles.
Avoid poking metal objects into slots; use plastic picks or wooden toothpicks if needed. Wipe nearby surfaces after each use to reduce stray crumbs and grease that can migrate into holes.
Empty the crumb tray routinely and note any recurring clog locations to target during future maintenance. Keeping a brief cleaning schedule and addressing early signs prevents crumbs from compacting and reduces the risk of malfunction. This practice keeps your toaster performing reliably.
Safety Precautions
Where are the slot drainage holes and why do they matter? They’re small openings inside the toast slots that let crumbs and tiny liquids escape toward the tray. Before you clean, unplug the toaster and let it cool. Never work on powered or hot elements.
Use a soft brush or compressed air to dislodge debris; don’t poke metal objects into slots. Avoid pouring water down holes or treating this like an irrelevant topic: internal moisture risks short-circuiting. If you see rust or damaged insulation, stop and consult a technician; don’t treat that as an unrelated detail you can ignore.
Keep cleaning tools dry. Wipe exteriors with a damp cloth and always replace the tray securely before plugging the toaster back in.
Frequently Asked Questions
Can I Clean the Crumb Tray in a Dishwasher?
Yes, you can usually wash the crumb tray in the dishwasher, but check dishwasher safety first and confirm the crumb tray materials (metal or dishwasher-safe plastic).
If the manufacturer approves, place the tray on the top rack to avoid warping and run a normal cycle. If the tray’s finish looks delicate or the manual warns against it, wash by hand in warm, soapy water to avoid damage and preserve safety.
How Often Should I Deep-Clean the Interior Beyond the Tray?
You should deep-clean the interior beyond the tray every 3–6 months, or sooner if you notice burnt smells or excessive crumbs. Set a deep clean cadence based on use frequency: monthly for heavy use, quarterly for average, and biannually for light use.
Always unplug first. Avoid wetting the heating elements, and perform heating element debris removal gently with a soft brush or by inverting the toaster over a towel to catch loosened particles.
What’s the Safest Way to Remove Stuck Crumbs From Heating Elements?
You’ll unplug the toaster and follow safety precautions before touching anything. Turn it upside down and gently tap to dislodge loose crumbs. For stuck bits, use a dry, nonmetallic tool (wooden skewer or plastic brush): that’s your tool selection.
Never use water or metal tools near heating elements. Afterward, listen for rattles, wipe exterior with a damp cloth, and only plug in once everything’s fully dry and reassembled.
Can Crumb Tray Buildup Affect Toast Browning Consistency?
Yes, crumb buildup can disrupt crumb distribution and cause uneven browning consistency. You’ll get hot spots where crumbs concentrate, producing darker or burnt areas; cooler spots leave underbrowned bread.
Empty and clean the tray regularly. This will help avoid internal moisture and remove stubborn debris safely: unplug first. That will restore even heat flow, prevent burnt smells and fire risks, and keep your toasts browning consistently.
Are Replacement Crumb Trays Available for My Toaster Model?
Yes, you can usually find replacement parts for your toaster, including tray replacement options. Check the manufacturer’s website or authorized dealers first for exact-fit trays, part numbers, and safety ratings.
If unavailable, look for compatible generic trays that match dimensions and electrical safety specs. Do not use damaged or poorly fitting trays; they can cause jams or fire hazards. Always unplug the toaster before installing any replacement part.
Conclusion
You’ve learned where crumb trays sit, how heat-tolerant they are, where drainage holes usually appear, and the best way to access and clean them. Use the right tools, remove crumbs safely, and dry parts before reassembling.
Regular cleaning and avoiding oversized crumbs will prevent clogs and keep your toaster working efficiently. Always unplug the toaster, wait until it’s cool, and handle removable parts gently to avoid burns or damage.