Rotisserie Balance and Trussing Basics
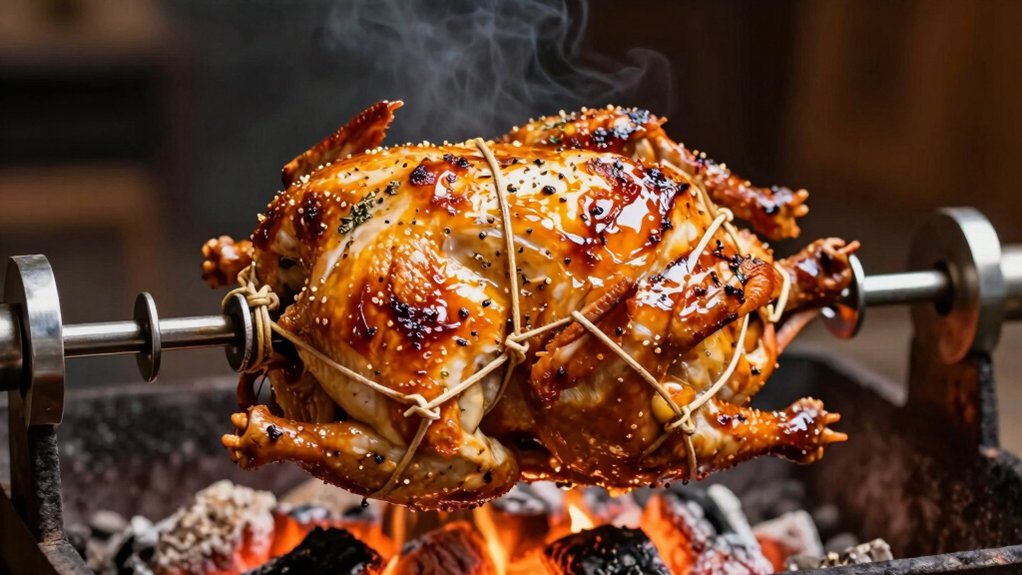
You’ll match the spit load to your model, center the rod, and compact meat into a near‑cylindrical shape with twine so the motor isn’t strained. Mount forks tightly and mirror them. Then hand‑spin to spot wobble or sag; shift meat or add a counterweight until level. Allow 20–30% torque margin, size motor/gear reduction for starting torque, and keep RPM above the minimum for smooth rotation.
Follow these steps and you’ll reduce burnout and improve results. More practical tips follow.
Quick Overview
- Compact meat into a near‑cylindrical shape and truss tightly with butcher’s twine for uniform rotation.
- Center the heaviest section on the spit and mount forks symmetrically to prevent wobble.
- Hand‑spin the loaded spit to feel for lags or sag. Then shift meat or counterweight in small increments.
- Use a counterweight opposite the motor until the rod remains level and rotation is smooth.
- Respect model spit load limits and provide 20–30% extra torque margin to avoid motor strain.
Spit Load Limits Chart
When you’re loading a rotisserie, match the spit capacity to the model and keep the rod centered through the food. Overloading or off-center loads strain the motor, cause uneven rotation, and can damage gears. Check your model’s spit load limits (10–132 lbs) and choose meat that meets balance considerations. Distribute mass close to a cylindrical shape and center the rod.
Use torque calculations mentally: Heavier loads need higher torque and more counterweight to hit rpm targets without bogging the motor. If rotation slows or wobbles, stop and rebalance or reduce weight. Below is a quick reference to compare capacities and act accordingly.
| Model | Max Load |
|---|---|
| Showtime 3000/4000 | 10 lbs |
| Showtime 5000 | 15 lbs |
| Showtime 6000 | 23 lbs |
| VEVOR/Big John | 125–132 lbs |
Weight Distribution Checklist
Now that you’ve matched load capacity to your rotisserie and centered the rod through the meat, use this weight distribution checklist to get the spit spinning smoothly: compact the meat into a near-cylindrical shape with butcher’s twine; place the heaviest section at the center of the rod; mount spit forks tightly and mirror them on each side. Test by hand-spinning and note any sag. Then add or slide a counterweight opposite the motor until the rod holds level without drifting.
Follow these concise checks to avoid uneven rotation and protect the motor:
- Visual: confirm balanced skewers and uniform profile along the rod.
- Manual spin: feel for lags, wobble, or a single heavy side.
- Adjust: shift meat or counterweight in small increments until level.
Motor Torque Minimum RPM
You’ll calculate required torque from your spit’s weight and radius to ensure the motor can overcome static load without stalling. Use the minimum RPM guidelines while accounting for motor load factors and any gear reduction. Gears change torque and effective speed.
Check safety and overload limits so you don’t exceed motor ratings or risk burnout.
Required Torque Calculation
How much torque does your rotisserie motor need to turn a loaded spit reliably at the minimum RPM? Calculate required torque by treating the spit load as a torque demand: weight × lever arm. Measure the heaviest mass distance from the spit centerline, multiply by gravity, and add frictional and bearing losses as a safety margin.
Account for torque variance between static start and steady spin; starting torque can be 2–3 times running torque. Specify motor torque rating above the calculated peak to avoid stall under trussing shifts or uneven loads. If you use a counterweight, reduce effective lever arm in the equation.
Pick a motor with a rated torque and service factor that covers calculated peak plus expected torque variance for reliable, durable rotation.
Minimum RPM Guidelines
Why aim for a specific minimum RPM? You need a baseline rotation speed to keep a balanced load moving smoothly without jerks that stress the motor. Set a minimum RPM that maintains steady rotation even under worst-case trussing impact. Tighter ties can change inertia, so choose RPMs that handle that shift.
Aim for slow, continuous turns rather than stops and starts: they reduce wear and preserve even cooking. Test with your heaviest, most compact roast after trussing to confirm the motor holds the chosen RPM under load. If the motor slows or stutters, increase RPM slightly or adjust balance.
Enforce that minimum RPM as an operating standard to protect the motor and ensure uniform results.
Motor Load Factors
Wondering how to match your rotisserie motor to the load? You’ll size motor torque around the expected spit load and the balance dynamics of the assembly. Calculate torque from the heaviest mass radius and required minimum RPM to maintain smooth rotation. Aim for a motor that delivers steady torque above that minimum so speed won’t sag when the spit starts.
Test with your typical trussed roast. If rotation slows or jerks, the motor’s torque margin is insufficient. Use counterweights and improved trussing to reduce required torque by tightening shape and centering mass. Prioritize a motor with a modest safety factor (20–30% extra torque) to handle brief imbalances without overheating or stalling.
Gear Reduction Effects
Curious about how gear reduction changes what your rotisserie motor actually delivers? You rely on gear reduction to convert motor speed into usable torque. So, check the minimum RPM the gearbox needs to maintain smooth rotation under your specific spit load.
Measure or estimate spit load and consider distribution dynamics: concentrated weight demands more torque and can drop effective RPM if gears aren’t matched. Choose a reduction ratio that keeps RPM above the motor’s stall-prone region while providing required torque to overcome friction and initial inertia.
If you increase reduction, torque rises but output RPM falls; confirm that drop won’t create uneven rotation. Match motor, gearbox, and load. Test at operating temperature and adjust counterweights or trussing to optimize balance.
Safety And Overload
How fast does your rotisserie need to turn to keep the motor safe and the roast steady? You’ll aim for the minimum RPM that maintains smooth rotation without straining the motor. Match spit load to the motor’s torque limits: heavier, unbalanced roasts demand more torque and higher RPM to avoid stalls.
For balance safety, secure and truss the roast so the rod spins evenly; that reduces peak torque spikes. If rotation slows or jerks, stop and rebalance. Overload prevention matters more than speed. Use counterweights or redistribute meat to keep the center of mass centered.
Check manufacturer specs for required minimum RPM and never force a motor past rated torque. Regular inspections prevent overheating and gear damage.
Frequently Asked Questions
Can I Rotisserie-Truss a Stuffed Bird Safely Without Leaks?
Yes, you can safely truss stuffed birds without leaching juices. You’ll prevent leaks with proper truss tension and waterproofing the cavity by compacting stuffing, tying tightly with non-burning twine, and tucking edges under.
Center the bird on the spit, secure with forks, and test-spin. If juices escape, adjust ties or add a foil seal. Keep heat steady and use a probe; resting preserves juices and final texture.
What Materials Are Safe for Twine Besides Butcher’s Twine?
Use heat-safe twine alternatives like silicone bands, stainless steel butcher’s links, or food-grade silicone-coated ties; those safe fibers won’t melt or impart flavors.
You can also use linen or unbleached cotton butcher’s twine if it’s specifically labeled oven-safe and untreated. However, avoid decorative or dyed cord. Secure knots tightly, tuck ends, and test stability before cooking.
Don’t use nylon, polypropylene, or standard craft twine; they’ll melt or burn.
How Do I Prevent Drip Pan Flare-Ups During Rotisserie Cooking?
Use a deep, covered drip pan and keep it filled with 1–2 cups water to catch drippings and cool them. That drip pan design prevents flare up. Position the pan under the spit and use indirect heat. Remove grates so fat can’t hit flames.
Trim excess fat, baste sparingly, and monitor temperature. If flare ups start, close vents slightly; move the pan closer or add soaked wood chips to smother flames quickly.
Can I Rotisserie Vegetables With Meat on the Same Spit?
Yes, you can rotisserie vegetables with meat on the same spit, but do it smartly. Skewer denser vegetables (potatoes, carrots) closest to the meat so they cook evenly. Use foil baskets or truss softer veggies to prevent falling.
Monitor temperature and don’t crowd. Use same spit cooking to capture drippings for flavor but protect veggies from direct fat flare-ups. Check doneness separately and remove veggies earlier if needed.
How Long Should I Rest Rotisserie Meat Before Carving?
Rest for 10–15 minutes for medium cuts and 15–20 minutes for large roasts before carving. That resting time ensures juices redistribute and improves carving readiness. You’ll tent loosely with foil to prevent cooling too fast. Avoid pressing or slicing early, and use a probe thermometer to confirm final temp held.
When the meat yields slightly under finger pressure and temps are stable, you’re ready to carve confidently and cleanly.
Conclusion
You’ve got the basics to load, secure, and spin a rotisserie safely and efficiently. Follow the spit load limits and weight distribution checklist. Calculate required torque and choose a motor with the minimum RPM and torque margin you need.
Factor in gear reduction and load multipliers; never ignore safety and overload protections. Stick to these rules, inspect connections every time, and don’t run the motor beyond its rated capacity. You’ll avoid failures and cook consistently.