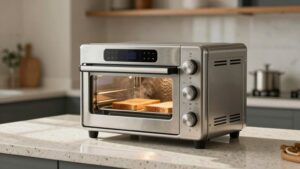
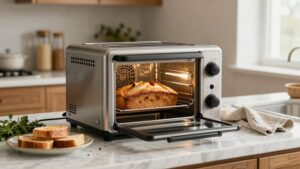
Indoor Electric Pizza Oven Preheat and Cook Stages
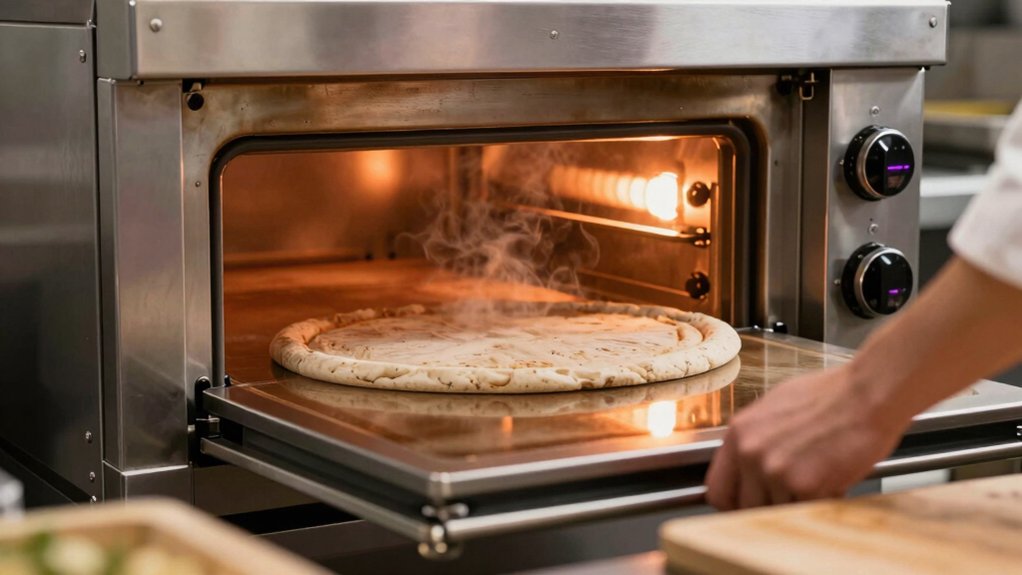
Preheat the deck and bricks for at least 45 minutes until the edge reaches about 650°F, using an IR probe and multiple readings.
High wattage gets you to 800–850°F in ~13–15 minutes; moderate wattage yields 450–500°F in 15–20 minutes.
Hold for 5–10 minutes between pies for surface rebound.
Inspect door seals visually every 3 months and after heavy use.
Measure gaps at four points and replace if any exceed 5 mm.
Continue for setup and maintenance steps.
Quick Overview
- Preheat stone or steel at least 45 minutes for thermal saturation. Allow 5–10 minutes between pies for surface rebound.
- Aim brick edge temperature ~650°F and verify surface temps with an IR probe; take multiple readings.
- High wattage reaches 800–850°F in ~13–15 minutes; moderate wattage yields 450–500°F in 15–20 minutes.
- Inspect door seals visually every 3 months and check compression at four points. Target gaps ≤3 mm.
- Log ramp timelines, surface readings, and seal gap measurements. Adjust insulation or placement for uneven heating.
Temperature Ramp Timeline
How long should you wait before launching a pizza? You wait at least 45 minutes for stone or steel thermal saturation. Outer bricks need approximately 2 hours to approach 650°F. Measure surface temperature with an infrared or thermocouple; take multiple readings to detect gaps in heating and perform gap measurement between element zones.
Monitor heat resistant material wear near elements and inspect the door seal for leaks that slow ramp. Recover 5–10 minutes between pies for surface rebound.
| Metric | Target | Action |
|---|---|---|
| Surface temp | Style-specific (see chart) | Verify with IR probe |
| Brick edge | ~650°F | Allow 2 hours |
| Recovery | 5–10 min | Stagger launches |
Follow readings, log ramp timeline, and adjust placement or insulation.
Preheat Wattage and Time
Why does wattage matter as much as time when you preheat? You’ll plan preheat wattage and time to achieve target deck and air temperatures efficiently; wattage impact dictates ramp rate and preheat efficiency. Measure initial temp, select power, and time accordingly.
High wattage shortens ramp to 800–850°F for Neapolitan in approximately 13–15 minutes. Moderate wattage requires 15–20 minutes for stable 450–500°F for New York style. Low wattage may need full 20-minute stabilization despite nominal preheat time. Sudden door openings drop deck temp; higher wattage recovers faster.
Balance dial and element distribution change effective wattage at the deck. Follow setpoints, record times, and adjust wattage to optimize preheat efficiency and consistent cook starts.
Door Seal Inspection Intervals
Inspect the door seal visually every 3 months for cracks, glazing, or fraying and record findings. Measure compression and gap width at four cardinal points each inspection; target gap ≤3 mm. Replace if any point exceeds 5 mm or compression loss >30%.
Also assess heat‑resistant material for hardening or delamination. Schedule replacement when wear indicators appear or performance degrades.
Visual Seal Condition
When should you check the door seal? Inspect the visual seal every 30 cooking hours or monthly, whichever comes first. Begin with the oven cold and power off. Use a flashlight and 2x magnification to scan the full perimeter for cracks, compression set, fraying, or detachment.
Record length and location of defects in millimeters; mark anything >3 mm as critical. Verify continuous contact without gaps by closing the door slowly and observing light leakage. If you see soot accumulation or melted sections, note temperature exposure and remove for replacement.
Repeat inspection after any high-temperature session exceeding 800°F or after accidental door impact. Log findings, corrective actions, and replacement dates to maintain traceable maintenance intervals and safety compliance.
Compression And Fit
Check the door seal compression and fit every 30 cooking hours or monthly, whichever comes first, by closing the cold, powered-off door on a 1 mm feeler gauge at four equidistant points (top, bottom, left, right). Record pass/fail; a consistent light drag indicates acceptable compression fit.
If any point allows greater than 1 mm gap, mark as fail and schedule adjustment or replacement within 10 operating hours. Inspect for uneven compression, hard spots, or detachment that signal durability wear. Quantify degraded zones in mm and percentage of seal circumference.
After corrective action, re-test at the same four points and log results. Retain logs for 12 months to track trend lines and predict service intervals based on measured wear rates.
Heat-Resistant Material Wear
Regularly assess door-seal wear at defined intervals to prevent heat loss and safety risks. Perform visual and tactile checks every 30 cooking hours or monthly (whichever comes first). Measure compression at four equidistant points (top, bottom, left, right) with a 1 mm feeler gauge while the oven is cold and powered off. Record pass/fail and any gaps >1 mm, and log quantified wear (mm and percent of circumference) so you can schedule adjustment or replacement within 10 operating hours for any failed point.
Inspect heat resistant seals for cracks, hardening, or delamination. Note the material wear rate (mm/month). If any point exceeds 1 mm loss or shows brittle failure, replace the seal with OEM or equivalent heat resistant material. Retest within one week of service.
Gap Measurement Frequency
How often should you measure the door-seal gap to prevent heat loss and safety risks? Inspect seals monthly and after any temperature ramp exceeding 200°F within 24 hours. Use a feeler gauge or calibrated shim set to record gap measurement at three points (top, left, right) with the oven at room temperature and again after a controlled temperature ramp to target cooking preheat.
Log gaps in millimeters; flag any increase >0.5 mm from baseline or any gap >3.0 mm for immediate action. Repeat checks quarterly if your oven averages fewer than ten high-temperature cycles per month. For heavy-use environments (>30 high-temperature cycles/month), inspect weekly and after door impacts. Follow documented measurements to schedule further diagnostic checks.
Replacement Timing Indicators
Having established a schedule for measuring door-seal gaps, set clear replacement thresholds and inspection intervals to prevent heat loss and safety hazards. You’ll record gap measurements monthly for high-use ovens (≥10 hours/week) and quarterly for light-use units.
Define replacement timing: replace seals when gaps exceed 3 mm on any side or when compression loss exceeds 20% from baseline. Use indicators timing by logging seal stiffness and visual degradation. If either metric worsens by 10% within six months, escalate to monthly checks.
Perform a functional leak test after each replacement and document results. Keep a timestamped log with model, hours, and preheat performance. Correlate seal condition with preheat time deviations to validate replacement timing thresholds.
Frequently Asked Questions
Can I Use a Pizza Stone From a Conventional Oven in This Electric Oven?
Yes, you can often use a conventional pizza stone, but check fit and max temp first.
Two word discussion idea1: verify diameter; two word discussion idea2: confirm thickness. Measure oven interior, ensure stone clears heating elements.
Stones tolerating >850°F work for high-heat models; if stone’s max Preheat stone with oven to avoid thermal shock. Place on middle deck and use a peel to load to prevent cracking.
How Often Should I Replace Heating Elements?
You should replace heating elements every 3–5 years or sooner if output drops >10% or oven calibration fails. Inspect elements quarterly for warping, blistering, or hotspots. Measure element resistance annually and compare to manufacturer specs.
If resistance rises >10% or you need repeated calibration adjustments, swap elements and recalibrate the oven. After replacement, run a full temperature stabilization cycle and verify oven calibration across low, mid, and max setpoints.
Can I Cook Frozen Pizza Without Preheating at All?
Yes, you can cook frozen pizza with no preheat in the oven’s Frozen Pizza mode. Set the oven to the Frozen Pizza program: defaults are 500°F, 18 minutes, top+bottom elements.
Place the pizza directly on the deck; use a peel if needed and follow the timer. If you use a manual mode below 302°F, you must preheat for 15 minutes.
The range of 302–482°F needs 5 minutes. Monitor doneness and rotate if required.
Is It Safe to Use Aerosol Non-Stick Sprays on the Deck?
No, you shouldn’t use aerosol sprays on the deck; they are not a safe coatings option for high heat. You’ll risk polymer buildup, smoking, and damaging elements.
Instead, clean the deck, dust with flour or semolina, or apply manufacturer-approved high-temperature baking sprays per instructions. If you must use a coating, test in a small area at target temperature. Monitor for smoke and replace coating if residue forms. Follow the oven manual.
Do Ambient Kitchen Temperatures Affect Cook Times?
Yes, ambient conditions and temperature variability influence cook times. You should measure kitchen temperature. A cooler room can extend preheat and cook durations by several minutes, while a hot room shortens them.
Procedurally, record ambient temp; compare to oven target; adjust preheat: add 5–15 minutes if below ~302°F threshold; monitor core/visual cues during cook. Log results to refine timing for consistent outcomes.
Conclusion
You’ll follow a measured timeline for preheat and cook stages, monitoring wattage and time against specified ramps. Inspect the door seal every 30 days: note visible cracks, fraying, or hardening. Test compression and fit with a 3 mm gauge; record heat-resistant material condition quarterly.
Measure gaps monthly, replacing seals when gaps exceed 5 mm or when material loses elasticity. These procedures keep temperature stability, efficiency, and safety within documented tolerances.