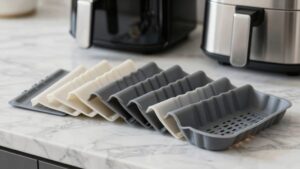
Griddle Seasoning Vs Nonstick Care
Griddle seasoning requires you to build very thin, towel-wiped polymerized oil layers using multiple heat cycles (400–475°F).
Avoid pooled or heavy coats so each micro-layer bonds.
Nonstick pans need gentle cleaning and minimal oil to protect the coating rather than polymerize it.
For rust prevention, oil lightly after use.
Increase frequency in humid or acidic-cook situations and schedule full maintenance passes seasonally.
Keep this approach and you’ll get clear, actionable maintenance steps ahead.
Quick Overview
- Seasoned griddles rely on thin polymerized oil layers that you build with repeated thin coats and high-heat cycles; nonstick pans use factory-applied coatings.
- For seasoning, apply towel-wiped, uniform sheens (
- Nonstick care requires gentle cleaning, low-to-medium heat, and avoiding metal utensils to protect the factory coating.
- Seasoned griddles tolerate higher heat and acidic foods occasionally; they can be refreshed regularly with thin oil passes.
- Prevent rust on seasoned griddles by drying hot and wiping thin oil after use. Re-oiling more often is necessary in high-humidity environments.
Seasoning Layer Thickness Comparison
Wondering how much oil to put on your griddle? You’ll target a very thin coat, wiped to a faint sheen, because seasoning thickness controls polymer bonding and prevents sticky failure. Apply with circular strokes, remove pooling, then run controlled heat cycles.
Follow a heat cycle frequency of 3–6 rounds at 400–475°F for durable black/brown seasoning. Avoid single heavy layers that pool, chip, or peel.
| Parameter | Guideline |
|---|---|
| Visual thickness | Towel-wiped sheen, |
| Heat cycle frequency | 3–6 cycles @400–475°F |
| Failure mode | Pooling → sticky gunk |
| Best practice | Thin multiple coats, reapply after acidic/sugary cooks |
You’ll get a hard, rust-proof polymer and superior nonstick if you keep layers thin.
Oil Layer Weight Guidelines
A thin, consistent oil layer is critical: aim for a towel-wiped sheen that is visibly uniform but under about 1 mm. This ensures each pass deposits roughly 2–5 mg/cm² of oil, which bonds predictably during heat cycles and avoids pooling or sticky build-up. You’ll measure by feel and appearance: no beads and no matte dryness. Use a neutral seasoning oil with a known smoke point and apply evenly after cleaning and heating.
This minimizes uneven polymerization and supports rust prevention without excess residue. Monitor gloss and wipe excess immediately. Use controlled heat ramps to cure each micro-layer.
- Target 2–5 mg/cm² per wipe for uniform films.
- Use thin, short strokes to avoid pooling.
- Select a stable seasoning oil with adequate smoke point.
- Cure layers with gradual heat to ensure bonding.
Rust Prevention Intervals
You should set rust-prevention intervals based on how often you use the griddle. Increase frequency for daily cooking and reduce it for occasional use. Immediately after each cook, scrub and dry the surface; then apply a thin oil layer. Perform a more thorough maintenance session weekly or after acidic or sugary foods.
For long-term storage, follow a seasonal schedule. Inspect and re-oil before humid months and again after winter to prevent corrosion.
Frequency Based On Use
How often should you re-season or oil your griddle to prevent rust? Base frequency planning on actual use: Daily cooks need oiling after each session. Moderate use (2–3 times/week) demands a thin oil wipe every 2–3 uses. Infrequent use (once weekly or less) requires oiling and a quick heat cycle after each use plus a light coat weekly.
For new or recently stripped seasoning, reapply 3–4 initial coats. Treat subsequent sessions as usage based maintenance; shorter, targeted sessions (10–20 minutes) suffice. Track exposure to acidic or sugary foods; increase oiling frequency when you cook those.
Always cool, cover, and store dry. This approach minimizes full re-season cycles and prevents surface oxidation efficiently.
Seasonal Maintenance Schedule
Given your use patterns and the routines above, set a seasonal schedule that prevents rust while minimizing unnecessary work. Inspect the seasoning layer monthly during active seasons and every 6 to 8 weeks in low-use months. Lightly clean, heat to evaporate moisture, and apply a thin oil layer if you see dull spots, surface pitting, or color variance.
Plan a full maintenance pass: scrub, heat, and perform 2 to 3 replenishing coats at season start and end (spring/fall) or whenever humidity spikes. In coastal or high-humidity environments, shorten intervals to 3 to 4 weeks. Record dates and observations. Treat any surface rust immediately with abrasive removal, heat, and re-seasoning.
This schedule balances protection against rust with minimal disruption to routine cooking.
Immediate Post-Use Steps
Why wait to act after cooking? You should initiate rust prevention immediately: scrape solids, deglaze with a small amount of water, then bring the surface to a low heat to evaporate residues.
Follow a strict heat activation cadence; maintain low-medium heat just long enough to dry and stabilize the metal. While hot (but not smoking), perform a controlled post use oil wipe: fold a towel around tongs, apply a thin, even film of seasoning oil, and pass it across the plate until it’s uniformly sheened.
Let the heat briefly set the oil, then cool to touch before covering. Repeat the oil wipe if you’ve cooked acidic or sugary foods. These intervals stop oxidation and preserve the hardened seasoning layer.
Long-Term Storage Timing
When are your rust-prevention actions due during long-term storage? You should schedule interventions at defined intervals: immediately after final cleaning and seasoning, then at 1 month, 3 months, and every 6 months thereafter, adjusting for use and environment.
After initial sealing, inspect visually and by touch for dullness or tackiness. Reapply a thin oil coat if the surface feels dry. Between scheduled checks, monitor accumulated residues when you open the cover and wipe them away with solvent; re-season locally.
For strict humidity management, place silica or desiccant packs near the griddle and verify ambient readings monthly. Increase oiling frequency if relative humidity consistently exceeds recommended thresholds. Log each action with date and condition for predictable prevention.
Humidity And Climate Factors
Because moisture drives rust formation, you should tie your rust-prevention intervals to local humidity and seasonal climate: increase checks and thin-oil applications when average relative humidity regularly exceeds ~50% or during wet seasons. Space them farther apart in consistently dry environments. You’ll monitor local RH trends and plan inspections after prolonged damp spells, rainstorms, or high dewpoint nights.
For humidity challenges, use a hygrometer and log readings. Schedule thin-oil wipedowns more frequently when RH >50% for 48+ hours. In coastal or tropical zones, implement weekly maintenance; in arid regions, monthly is sufficient. Treat this as climate dependent seasoning: adjust frequency, use corrosion-inhibiting oils, and store the griddle indoors or under vapor-barrier covers to limit condensation and preserve the seasoning shell.
Frequently Asked Questions
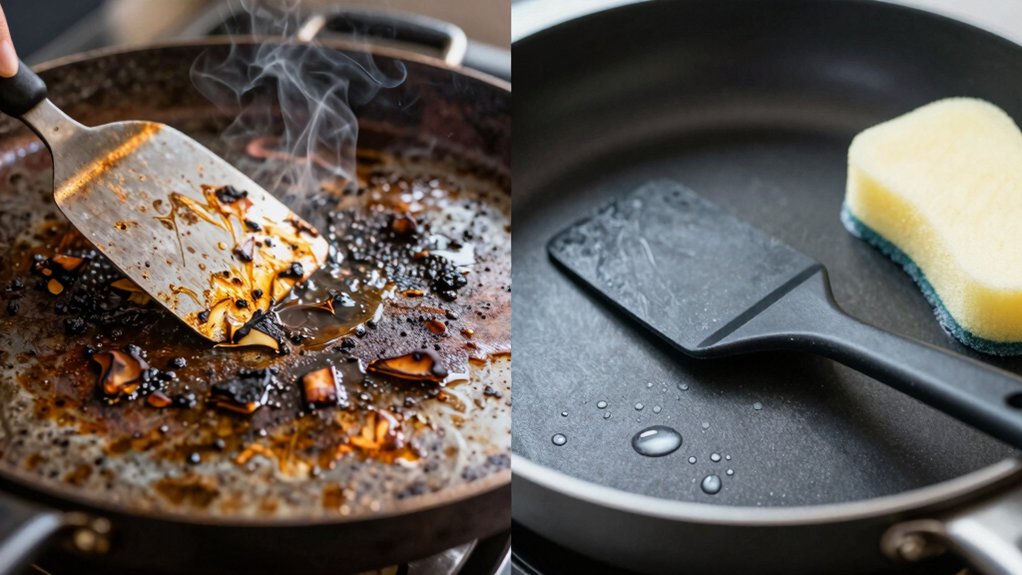
Can I Use Aerosol Cooking Spray on a Seasoned Griddle?
You shouldn’t use aerosol spray on a seasoned griddle. Aerosol spray leaves polymerized residues that can gum the surface and shorten seasoning longevity. Instead, apply a thin film of high-smoke-point oil with a folded paper towel and tongs. Then, heat until it smokes and bonds.
If you accidentally used spray, scrub and re-season with several thin coats. Monitor for unevenness to restore a consistent, durable seasoning layer.
Will Lemon or Vinegar Clean My Griddle Without Stripping Seasoning?
You shouldn’t use lemon or vinegar for routine cleaning because acidic liquids can strip seasoning. Lemon safety and vinegar cautions matter. If you spot-clean a little acid, rinse immediately and heat to evaporate residue. Then, reapply a thin oil layer.
For stuck-on debris, use hot water, scraping, and oil maintenance instead. Reserve acids only for rare, controlled use followed by prompt neutralization and reseasoning to protect the seasoned surface.
Can I Use My Griddle Under a Broiler or in the Oven?
Yes, you can use many griddles in the oven and under a broiler if the manufacturer lists griddle oven compatibility and broiler safe usage. Check handles, paint, and temperature ratings first.
Cast iron and steel griddles tolerate high heat; avoid wooden or plastic parts. Preheat gradually, monitor seasoning, and protect surfaces from direct flame if coating isn’t rated. Use oven mitts and metal tools to prevent damage.
Is Cast Iron Seasoning the Same as Cold-Rolled Steel Griddle Seasoning?
No, cast iron vs steel seasoning aren’t identical; however, they’re compatible. You’ll use the same oils and heat to polymerize fats. Cold-rolled steel forms a thinner, harder carbonized shell that builds differently than cast iron’s porous patina.
For compatibility, treat both with thin oil coats, higher heat for steel, and more repeated layers for durability. Adjust frequency: steel may need quicker touch-ups. Cast iron absorbs and holds seasoning longer.
How Do Sugary Marinades Affect Long-Term Seasoning Integrity?
Sugary marinades accelerate seasoning breakdown by caramelizing and burning on the surface; this reduces seasoning durability and creates sticky residues. You should add sugary marinades late. Clean promptly with water-and-scrape cycles, then reapply a thin oil wipe while warm.
For long-term seasoning durability, avoid prolonged high heat with sugars. Perform extra maintenance after sugary cooks, and plan occasional re-seasoning coats to restore the hardened, nonstick layer.
Conclusion
You’ve learned how seasoning and nonstick care differ: thicker seasoning tolerates high-heat use while light oil layers suit nonstick pans. Follow weight guidelines for oil to avoid buildup. Wipe and re-oil after each use, and treat rust at first sight.
Increase maintenance with frequent use or humid climates. Do a full reseasoning or deep clean each season. Store dry and lightly oiled, and check every few weeks in damp conditions to prevent corrosion.