Air Fryer Temperature Conversion From Oven
Convert oven recipes by lowering the oven temperature 25°F for your air fryer and reducing the cook time about 20%. Start checking doneness at roughly halfway.
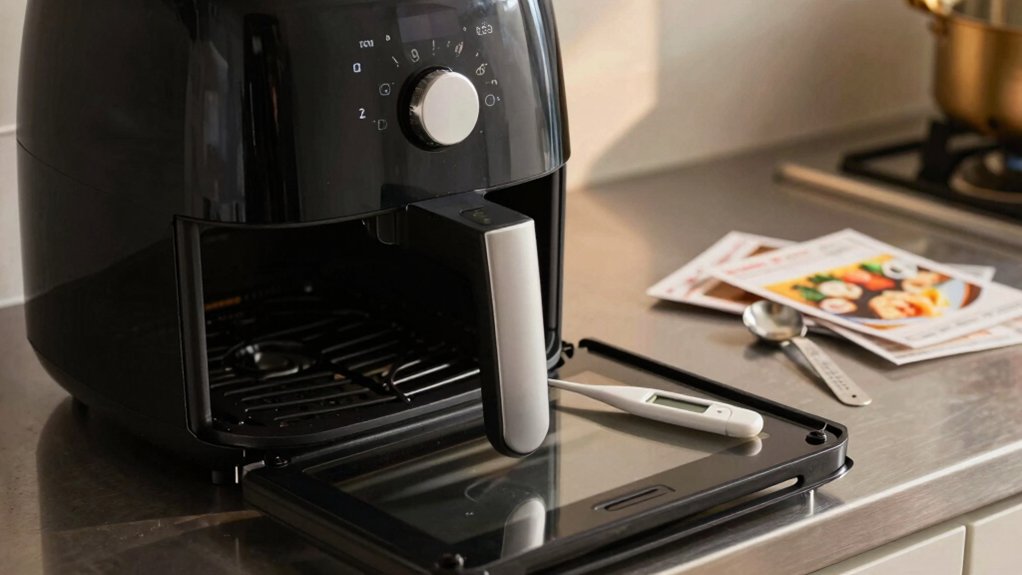
Use a thermometer for proteins and keep frozen items single-layer at or above 350°F. Airflow matters: medium fan speeds give the best browning without overdrying; lower speeds slow crisping.
Monitor the first batch and make small tweaks for your model. Keep an eye on browning so you can fine-tune further.
Quick Overview
- Subtract 25°F from the oven temperature to set the air fryer temperature.
- Reduce the oven cooking time by about 20%; multiply time by 0.8 for air frying.
- Check doneness about halfway through the adjusted time. Use a thermometer for proteins.
- For frozen items, keep air fryer temp ≥350°F and cook in a single, non-overlapping layer.
- If browning occurs too fast, lower temperature another 25°F or reduce fan speed for gentler airflow.
Oven-To-Air Fryer Temps Chart
Wondering how to quickly convert oven settings to your air fryer? You’ll use a simple chart: subtract 25°F and cut time by approximately 20%. That keeps crispness and avoids over-browning. Use a thermometer for proteins and check at halfway.
| Oven (°F) | Air Fryer (°F) | Air Fryer Time (%) |
|---|---|---|
| 400 | 375 | 80% |
| 375 | 350 | 80% |
| 350 | 325 | 80% |
Apply oven conversions consistently. First, find original temp/time; then reduce temp by 25°F and multiply time by 0.8. For frozen items, keep the temperature at or above 350°F, use single-layer loading, and add no oil.
Monitor the first batch. Model variance requires small tweaks to air fryer timing.
Reduce Oven Temp 25°F
Now that you know to subtract 25°F when converting oven settings to your air fryer, apply that single adjustment consistently: take the recipe’s listed oven temperature and lower it by 25°F before you set the air fryer. That small change accounts for the air fryer’s higher effective heat from rapid air circulation and drier cooking environment. It’s not an irrelevant topic or an off topic discussion; it’s the core conversion rule.
- Subtract 25°F from the oven temperature.
- Reduce cooking time ~20% and monitor early.
- Use a thermometer for accuracy; lower another 25°F if browning too fast.
Follow this method across recipes, including frozen foods. Start checking doneness earlier to fine-tune timing precisely.
Convection Fan Speed Limits
You’ll want to understand fan speed basics because airflow, not just temperature, controls browning and cooking rate in an air fryer. Know that motor RPM limits, noise and vibration thresholds, and component cooling needs set practical caps on how fast that air can move.
Balancing airflow versus heat helps you apply the 25°F and ~20% time reductions reliably without over-agitating food or overstressing the unit.
Fan Speed Basics
How fast should the air fryer’s convection fan run, and how does that affect your cooking? You want steady, moderate RPMs rather than max speed. Research shows too-high fan speeds increase surface drying and uneven browning; too-low speeds reduce crisping efficiency. Aim for a balanced setting your unit provides, often labeled low/medium/high. Favor medium for most conversions: subtract 25°F and ~20% time.
Fan speed matters for texture and heat distribution. Therefore, treat wildly varying specs as an irrelevant topic when converting temperatures. Do not confuse fan speed with an unrelated concept like element power: both matter but affect results differently. Test once, adjust speed or time modestly, and verify doneness with a thermometer.
Airflow Versus Heat
Medium fan speeds usually give the best balance between airflow and heat for consistent cooking. So, when you adjust fan speed, remember it changes how heat is transferred, not the actual temperature setting. You’ll find higher speeds increase convective transfer but hit practical airflow limitations: turbulence, food displacement, and uneven boundary layers reduce marginal gains.
Lower speeds reduce convective efficiency and slow browning; so balance is key. Control fan speed to optimize heat distribution across the basket, not to raise or lower set temperature. If you see uneven browning, reduce speed slightly or reposition items rather than increasing temperature. Use the medium-speed baseline when converting oven recipes and tweak only for specific foods or crowding.
Motor RPM Limits
Why does fan speed stop improving cooking beyond a point? You’ll find that increasing fan speed yields diminishing returns because heat transfer shifts from convection-dominated to limited by conduction into the food.
Manufacturers set rpm limits to balance airflow benefits against thermal uniformity and component lifespan. At moderate fan speed, you get faster crust formation and moisture removal; above certain rpm limits, turbulence causes uneven boundary layers and marginal time savings.
You should therefore prioritize correct temperature and reduced time: the standard oven-to-air-fryer conversions rather than maxing fan speed. For best results, follow the device’s recommended settings, check doneness with a thermometer, and adjust temperature down in 25°F steps if browning is too rapid; don’t rely on fan speed alone.
Noise And Vibration
You’ve already seen that cranking fan rpm past a certain point gives little cooking benefit. It can also raise noise and vibration to levels that affect both comfort and appliance longevity. You should limit convection fan speed to the range manufacturers recommend; typically enough to maintain even heat without introducing noise issues. Higher rpm can produce tonal frequencies and rattles that bother users and mask audible alerts.
Identify vibration sources: imbalanced impellers, loose mounts, or contact between the fan housing and outer casing. Inspect and tighten fasteners, replace worn bushings, and clean buildup on blades to reduce imbalance. If persistent noise issues remain, choose lower temperature/convection combos or a model rated for quieter operation to protect both experience and component life.
Component Cooling Needs
How fast should the convection fan run to keep components within safe temperature margins? You should target a fan speed that maintains internal electronics below rated temperatures while preserving cooking performance.
Research shows incremental increases in RPM improve heat removal but yield diminishing returns and higher noise. Set fan control to a nominal range, typically 1,200–2,200 RPM for compact air fryers. Then verify with thermal probes at heat sinks and motor housings.
If temperatures approach limits, raise speed or add intermittent high-speed cycles rather than continuous max RPM to avoid wear. Do not confuse this with unrelated topic material or let irrelevant discussion about cooking times dictate fan limits.
Prioritize component longevity; measure and adjust empirically for each model.
Frequently Asked Questions
Can I Convert Recipes for Toaster Ovens to an Air Fryer?
Yes, you can convert toaster oven recipes to an air fryer. For toaster oven to air fryer compatibility, reduce the temperature about 25°F and cut cooking time roughly 20%.
Start checking at halfway through; use a thermometer for meats. Avoid going below 350°F for frozen items. Watch browning: if it’s too fast, lower the temperature another 25°F. Adjustments may be needed for rack height and basket crowding.
How Do Altitude and Humidity Affect Air Fryer Conversions?
Altitude effects: You’ll need slightly higher temperatures or longer times at high altitude because lower air pressure reduces boiling point and slows browning. Raise air fryer temp 5–10°F or add 5–10% time.
Humidity effects: High humidity can reduce crisping, so increase temp ~10°F or extend time and dry surface before cooking. Low humidity speeds drying, so watch for over-browning. Always verify doneness with a thermometer and adjust per trial.
Do Rack Position or Basket Load Change Conversion Guidelines?
Yes, rack position and basket load change conversion guidelines. You’ll need to lower temperature or extend time if food’s on a lower or higher rack that limits airflow. You’ll also increase cooking time or reduce load when the basket’s crowded. Aim for single-layer spacing, leave gaps for circulation, and check doneness earlier.
Use a meat thermometer and adjust by approximately 10–25°F or 10–30% time if airflow is noticeably restricted.
Can I Use the Same Conversion for Dehydrating or Low-Temp Jobs?
No, you shouldn’t use the same conversion for dehydrating or low-temp jobs. Dehydrating pitfalls and low temp nuances mean you need lower, steady temperatures and longer times than the typical −25°F/−20% rule.
Air fryers often lack precise low-temp control and consistent airflow for dehydration. Use appliance-specific settings or a dedicated dehydrator. Monitor moisture, and employ a thermometer/hygrometer to ensure safe, even drying rather than applying standard air-fry conversions.
How Do Conversions Differ for Glass or Ceramic Bakeware in Air Fryers?
You’ll mostly use the same reductions, but adjust for glassware safety and bakeware materials: glass or ceramic heat more slowly and retain heat. Therefore, drop temperature another 10–25°F and check earlier. Preheat glass briefly; avoid sudden temperature shocks, and don’t use cracked pieces.
Metal heats faster; use standard −25°F/−20% time. Always verify doneness with a thermometer and monitor first runs to fine-tune timings for your specific bakeware.
Conclusion
When converting oven recipes to an air fryer, reduce the temperature by about 25°F and shorten cooking time while monitoring doneness.
Remember that higher convection speeds increase heat transfer, so adjust time more than temperature for delicate foods. Respect motor RPM and fan speed limits to avoid noise, vibration, or overheating components.
Use airflow-aware placement and brief checks to ensure even cooking. This practical, research-backed approach keeps food safe, consistent, and appliance-friendly.