Air Fryer Rack and Skewer Setup Guide
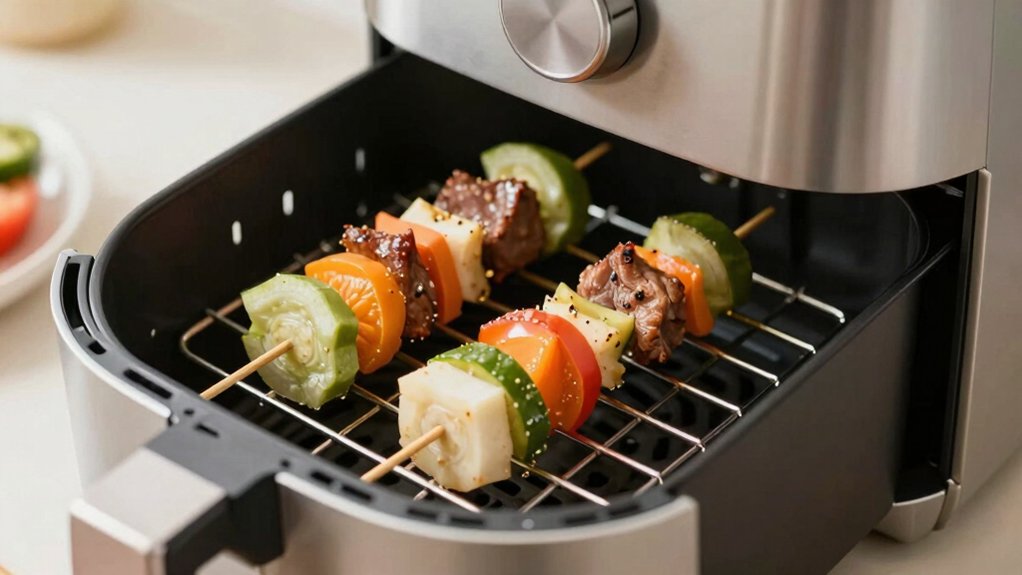
Pick racks sized to nest inside your basket so tiers clear about 3.5″ (9 cm) for airflow. Square or rectangular shapes fit flat baskets best. Balance loads evenly across each tier and avoid centering heavy items on the shaft to protect rotation.
Use 304 stainless with high-temp powder, ceramic, or food-safe silicone coatings rated at least 50°F (30°C) above your fryer max. Inspect for scratches, bubbling, or flaking and recoat or replace if metal shows. Keep going to learn setup tips and safety tricks.
Quick Overview
- Measure interior basket width and visualize nesting to choose rack shape and tier fit before purchase.
- Prefer 304 stainless steel racks with appropriate tier spacing (about 3.54″ or 1.8″ depending on design).
- Follow the appliance manual’s max rack load; distribute weight evenly to avoid shaft stress or tipping.
- Inspect coating for scratches, peeling, or discoloration. Replace if damaged or if coating odor or bubbling occurs.
- Use heat-safe coatings rated at least 50°F (30°C) above fryer max. Perform initial smell and visual test after first cycles.
-Tier Rack Dimensions
Curious how to pick a tier rack that actually fits your air fryer? You’ll sense the difference when you measure interior width and imagine rack shapes nesting inside. Check tier spacing; most 3-tier units give about 3.54″ (9 cm) per tier, so visualize food clearance and airflow. Square racks (20–21 cm) maximize flat surface; rectangular and round options fit narrower or curved baskets.
Prefer 304 stainless steel for a cool, clean touch and dishwasher ease. Measure before buying, noting branded fits like Ninja or universal multi-shape sets. Below is a quick comparison to guide selection:
| Shape | Tier Count | Tier Spacing |
|---|---|---|
| Round/Square | 3 | 1.8″ |
| Square | 2 | 3.54″ |
| Rectangular | 3 | 3.54″ |
Max Rack Load (Lbs)
How much weight can you safely load on a tier rack? You’ll want to respect the max rack value stamped in the manual and visualize the load: dense sausages at the center, lighter veggies near the edges. Test by feeling the rack’s flex with one hand; a tiny give is normal, sagging isn’t.
- Imagine ten skewers loaded evenly; meat balanced across the span, no single cluster.
- Picture a heavy chicken centered over the shaft. The rack is barely bending but steady.
- Visualize veggies and kebabs distributed outward, reducing stress near mounting screws.
Follow the listed load limits to protect mounts and rotation. Even distribution matters more than raw pounds. Steady, centered loading keeps rotation smooth and parts lasting.
Heat-Safe Coating Limits
Check the coating on your racks and skewers for its rated temperature so you know how hot you can safely run the rotisserie without risking fumes or melting. Notice any scratches, peeling, or discolored spots; those are early signs the coating’s wear or failure may expose bare metal.
If you spot damage, use only heat-safe replacement coatings or plan maintenance and recoating to restore scratch resistance and safe use.
Coating Temperature Limits
What temperature can the coating safely handle before it starts to discolor or degrade? You’ll check the coating temperature rating on the rack or skewer packaging first. Manufacturers list an upper limit for a safe coating.
Preheat the air fryer to a moderate setting and watch the finish during initial use. If it stays glossy and unchanged, you’re within limits. If you smell chemical odors or see bubbling, flaking, or dark spots, reduce temperature immediately and ventilate.
Record the maximum cycle temperature that produced no change and avoid higher settings. When loading skewers, distribute heat by spacing items evenly so hotspots don’t locally exceed the safe coating threshold. Regular visual checks catch gradual breakdown before it becomes a problem.
Safe Coating Materials
Knowing the coating’s temperature limit is a good start, but you also need to pick materials that tolerate repeated heating without off-gassing, chipping, or discoloring. You’ll want a safe coating that’s rated above your air fryer’s maximum operating temperature by at least 50°F (30°C).
Look for labels like “food-safe silicone,” “ceramic enamel,” or “high-temp powder coat” and check manufacturer specs for continuous-use coating temperature. Run a simple smell-and-visual test after initial cycles: warm the unit, then inspect for odor, bubbling, or color change.
If you notice any chemical smell or flaking, stop use. Prefer coatings with smooth, non-porous surfaces you can wipe clean; they resist trapped oils and make inspection easier. This helps you maintain safety over time.
Scratch And Wear Resistance
How rough will the coating look and smell after repeated use? You’ll notice small scuffs and a faint heated-metal odor if the coating faces heavy contact. However, normal rotation and handling shouldn’t produce strong smells.
Check coating durability by feeling for raised edges, rubbing gently with a dry cloth, and scanning visual seams where scratch wear concentrates. Avoid abrasive pads; use soft tools and let parts cool before touching to limit micro-abrasions.
When loading skewers and tightening the shaft screw, align parts carefully to prevent scraping the finish. Rotate the shaft slowly during initial runs and inspect both identical racks for consistent wear patterns. Methodical, sensory checks—sight, touch, smell—give the best early read on longevity.
Signs Of Coating Failure
Pay attention to visual cues and smells. If the coating flakes, bubbles, or gives off a persistent burnt-metal odor during or after use, it is showing early signs of failure. You will notice crisp edges where coating peels away, dull patches that won’t wipe clean, or tiny blistered spots after high-heat cycles.
Listen for unusual sizzling when the rack heats; scent and sight often reveal overheating before structural problems appear. Test corrosion resistance visually: any rust near exposed metal means the protective layer has compromised.
Track frequency: repeated high-temp cooks that shorten coating durability indicate you have hit the coating’s heat-safe limits. When you observe these sensory signs, stop heavy use and inspect the affected areas to prevent further damage or food contamination.
Maintenance And Recoating
Wondering when it’s time to recoat or stop using a rack? You’ll follow a short maintenance checklist: inspect for flaking, discoloration, bubbling, or metal showing through. Run a tactile check: lightly scrape an inconspicuous spot with a fingernail to sense adhesion. Note heat-safety limits printed by the manufacturer and compare them to your unit’s maximum temperature.
For recoating, confirm coating compatibility with food contact and rotisserie heat. Use only high-temperature, food-safe sprays or professional ceramic/Enamel coatings rated above your air fryer’s peak. Clean thoroughly before applying: degrease, sand dull spots, and dry until no moisture remains.
If corrosion or deep pitting exists, retire the rack. Safety beats saving a compromised part; replace rather than risk contamination.
Frequently Asked Questions
Can Skewers Be Washed in a Dishwasher Safely?
Yes, the skewers are dishwasher safe, but you’ll want gentle handling. Rinse food residue under warm water first so you don’t steam up the dishwasher.
Place skewers flat or in a cutlery basket, spacing them to avoid clanging. Use a normal cycle and mild detergent; high-heat drying can discolor metal.
After washing, feel for residual bits and dry immediately. Cleaning tips: inspect clips and holes for trapped debris before reuse.
Can Skewers Be Used for Bone-In Meats?
Yes, you can use skewers for bone-in meats, but prioritize safety handling. Feel the weight shift as you thread meat, tucking bones so they don’t catch the clips.
Arrange pieces evenly so rotation stays smooth and you get crisp, browned surfaces. Use mitts when loading and removing, and check internal temperature near the bone. Clean skewers thoroughly after use to prevent cross-contamination and lingering aromas.
How to Prevent Food From Slipping on Skewers?
You prevent slipping by choosing how to secure foods: pierce meats through center, stagger bites, and keep pieces snug so they don’t wobble.
Use grip techniques like angling the skewer through thicker sections and squeezing clip ends to hold. Press food firmly against adjacent pieces for friction.
Cleaning tips: wash skewers and racks promptly, scrub grooves, and dry fully so residue won’t reduce grip next use.
Are Replacement Skewers and Racks Available Separately?
Yes, you can buy replacement options for skewers and racks separately. You’ll want to check rack compatibility with your unit’s shaft sockets and hanger; feel the fit as you test alignment.
Order stainless skewers for sturdiness and smooth clips. Choose racks labeled for your model to ensure proper spacing and secure rotation. When they arrive, inspect screw holes and notch placement before assembling so everything spins quietly and evenly.
Can Skewers Be Cut to Shorter Lengths?
Yes, you can shorten skewers, but you’ll want to plan the skewer length modification carefully. You’ll feel the metal’s resistance as you mark where to cut. Use a hacksaw or metal cutter; clamp the skewer firmly and file sharp edges smooth so they won’t catch food or skin.
Keep clips intact and preserve enough shaft for secure seating in the rack. Test one skewer first to confirm fit and rotation.
Conclusion
You’ve learned the rack and skewer limits: exact tier dimensions, how much weight each shelf holds, and the temperature ceiling your coating can take. You can sense when wear shows: flaking, discoloration, rough spots. You’ll act: clean gently, avoid metal tools, and recoat with a high‑temp, food‑safe finish when needed.
Follow load and temp guidelines; inspect regularly, and you’ll keep the rack reliable, safe, and ready for crisp, evenly cooked meals.