Air Fryer Odors Causes and Fixes
Air-fryer smells usually come from burned food, trapped grease, or old filters. You can fix them quickly. Empty preheat at 400°F for 10–15 minutes to burn off residues. Then cool, scrape crumbs, soak and scrub baskets, and wipe the interior and the heating element.
Use contained dishes for runny batters and clean immediately after use. Replace carbon or mesh filters every 3–12 months if odors persist. Keep going to get step-by-step cleaning and replacement tips.
Quick Overview
- Odors usually come from leftover grease, crumbs, or burned food trapped in the basket, pan, or heating element.
- Preheat and run an empty 400°F cycle for 10–15 minutes to burn off manufacturing residues and loosen trapped grease.
- Clean the basket, tray, and interior after each use. Soak and scrub stubborn cheese, batter, or grease immediately.
- Replace mesh or carbon filters every 3–12 months depending on use; persistent smells after cleaning mean you should replace the filter first.
- For quick odor control, use a contained dish, shorten cook time, and wipe surfaces while still warm, but cooled enough to handle.
Odor-Causing Foods Table
The table below makes it easy to spot which foods are most likely to cause odors and why. You can adjust what you cook or how you clean afterward.
| Category | Typical Problem | Quick Fix |
|---|---|---|
| Fatty meats | Drips solidify, smoke, persistent odor | Clean basket after each use; shorten cook time |
| Cheesy/sugary | Melts/burns, hard residues, foul smells | Use contained dish; wipe immediately |
| Battered/starchy | Batter falls through, chars, acrid odors | Use tray/liner; avoid wet batters |
You’ll detect which items trigger odor causing reactions. Adapt your maintenance schedule accordingly. Diagnose after each session: run a short high-heat burn-off if you smell lingering smoke. Then deep-clean trays and under the element to prevent buildup and repeat problems.
Preheat & Degrease Steps
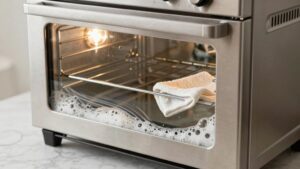
Why preheat and degrease before cooking? You’ll remove manufacturing off-gasses and loosen trapped grease so smells don’t transfer to food. Preheat benefits include faster cook times and reduced sticking. Run an empty 400°F cycle for 10–15 minutes to burn off residues and ventilate plastics.
After cooling, focus on degrease techniques: scrape trapped crumbs, soak baskets in hot soapy water, and wipe the heating element gently with a damp cloth.
- Visualize flaky grease under the mesh, bubbling and smoking when heated.
- Imagine crumbs lodged near the fan, burning and spreading odor.
- Picture a clean element glowing without dark spots that signal residue.
Do this routinely to prevent persistent smells and maintain performance.
Filter Replacement Schedule
Check your air fryer’s filter on a regular schedule: most need replacing every 6–12 months depending on use and type. Look for reduced airflow, lingering odors, visible grease buildup, or discoloration as signs a filter’s clogged and past its prime.
Expect costs from a few dollars for basic mesh or foam filters to $15–30 for branded carbon filters. Dispose of used filters per local waste rules or recycle components when allowed.
Recommended Replacement Frequency
How often you should change filters depends on how much you use the air fryer and what you cook in it. As a practical rule, check and replace any grease or charcoal filters every 3–6 months with regular home use. Replace them sooner (monthly) if you frequently cook fatty or strong-smelling foods like bacon or fish. Track replacement frequency by noting resembling odors after runs and by keeping a simple calendar or sticker on the unit.
If smells persist despite cleaning, replace the filter before troubleshooting other causes. For heavy users or households that cook fish, garlic, or oily meats, assume monthly swaps. Store spare filters and follow manufacturer part numbers. Proper timing prevents trapped grease from degrading into VOCs and reduces smoky, lingering odors without unnecessary replacements.
Signs Of Clogged Filters
Wondering whether your air fryer’s filter needs replacing? Check for reduced airflow, longer cook times, or uneven browning: those are primary cropped filters symptoms. If you notice persistent smoky or sour smells after normal cleaning, treat them as odor indicators that trapped grease or particles are blocking the filter.
Inspect the filter visually. Dark, greasy layers or food debris packed into pleats signal clogging. Listen for louder fan noise; strain often increases sound. A quick test: run the unit empty at 400°F for 5 minutes. If odors or smoke persist, the filter is likely compromised.
Replace a visibly damaged, compressed, or irreversibly stained filter rather than trying to salvage it. Regular checks keep odors down and performance up.
Filter Types And Lifespans
Which filter does your air fryer use and when should you swap it out? Check your manual: mesh or activated-carbon filters are common. Mesh captures grease and crumbs; replace every 6–12 months depending on use and visible buildup.
Activated-carbon targets odors and VOCs; its filters lifespan is shorter, typically 3–6 months with frequent frying of strong-smelling foods. If your model has a washable prefilter, clean it monthly to maintain airflow and odor reduction. Replace the carbon element per manufacturer timing.
You’ll know replacement’s due when smells persist after cleaning, airflow seems weaker, or the filter looks saturated. Keep a simple log or set reminders tied to heavy-use events (bacon, fish) to avoid trapped grease and lingering odors.
Replacement Cost Estimates
Curious about what replacing filters will cost you over a year? You’ll typically buy replacement filters in packs or individually. Basic charcoal or mesh filters run $5–$15 each; specialty HEPA-like or activated-carbon combo filters cost $15–$40.
If your model needs quarterly changes, budget 4× unit price. Monthly swaps multiply accordingly. Factor shipping or model-specific adapters when calculating replacement costs. For effective odor mitigation, choose genuine or high-quality aftermarket filters and follow the recommended schedule on your unit to prevent grease and VOC buildup.
Keep receipts and note dates so you replace on time. Timely swaps are cheaper than deep cleans or component damage caused by persistent odors. Review prices before buying to avoid surprises.
Proper Disposal Methods
Now that you’ve budgeted for replacement filters, plan how and when to dispose of the old ones to avoid odors and contamination. Remove filters after they cool; tap gently to dislodge crumbs, and seal them in a sturdy bag or airtight container so grease and odor causing foods can’t leak.
If filters are washable, rinse debris into the trash, not the sink. Then dry fully before reinstalling or storing. Check local regulations: some municipalities treat grease-saturated filters as special waste. Label sealed bags with the date and contents if you store them briefly.
Replace filters on the manufacturer’s schedule or sooner if they smell or clog. Proper disposal and timely replacement stop lingering smells and limit contamination risks to your air fryer.
Frequently Asked Questions
Can Air Fryer Smells Affect Food Safety or Cause Illness?
Yes, air fryer odors can have food safety implications. You’ll rarely get illness from normal new-appliance smells; however, persistent burnt grease, rancid oil, melted plastics, or moldy residues can contaminate food and cause nausea, vomiting, or chemical irritation.
Diagnose by smelling, inspecting heating elements and baskets, and running a burn-off. Clean thoroughly, replace compromised parts, and use proper oils to eliminate odors and reduce safety risks.
Can I Use Baking Soda to Eliminate Persistent Odors?
Yes, you can use baking soda to help with persistent odors. Baking soda’s effectiveness comes from its mild alkalinity and odor-absorbing properties. Sprinkle it in the basket, let it sit several hours or overnight, then vacuum or rinse thoroughly.
For better smell elimination methods, combine baking soda with a vinegar wipe-down and a short empty high-heat cycle. Don’t use abrasives; repeat if odors persist.
Do Scents From New Accessories Dissipate Over Time?
Yes, new accessories usually lose most odors with use. You’ll get initial odor dissipation as manufacturing oils and VOCs burn off during a few high-heat cycles.
If smells persist, run an empty 400°F cycle; wash parts with warm soapy water; and heat a vinegar or lemon ramekin briefly. Repeat cleaning and airing: that diagnostic routine clears residues and accelerates odor dissipation from new accessories.
Will Vinegar Damage the Interior or Finish of My Air Fryer?
Yes, vinegar compatibility is generally good. It won’t damage most air fryer interiors or finishes when used properly. You should dilute vinegar, avoid soaking seals or electrical parts, and never use abrasive scrubbing that can strip coatings.
Test a small area first to check interior finish safety. Use a short 5-minute steam cycle with a vinegar ramekin or wipe surfaces with a damp, diluted solution. Then rinse and air-dry thoroughly.
How Do I Smell-Test Without Cooking Food Inside?
Run an empty odor testing cycle: Preheat to 400°F for 10–15 minutes. Then, sniff around vents and basket while ventilating. Place a small ramekin with water and a splash of vinegar or lemon if you want neutralization. Rerun for 5 minutes.
Check the heating element and fan for burnt residues by sight and smell. Do this in a well-ventilated area and use gloves. You’re prioritizing odor testing and kitchen safety.
Conclusion
You’ve pinpointed the usual causes of air fryer odors and can avoid them with a few quick habits: Preheat and wipe out grease after every use. Run a vinegar or baking soda clean when scents linger. Check or swap filters on a regular schedule.
Replace charcoal or HEPA filters when they smell or airflow drops. Dispose of used filters per local rules. Follow these practical steps and your air fryer will stay fresh, safe, and performing well.