Air Fryer Maintenance Checklist
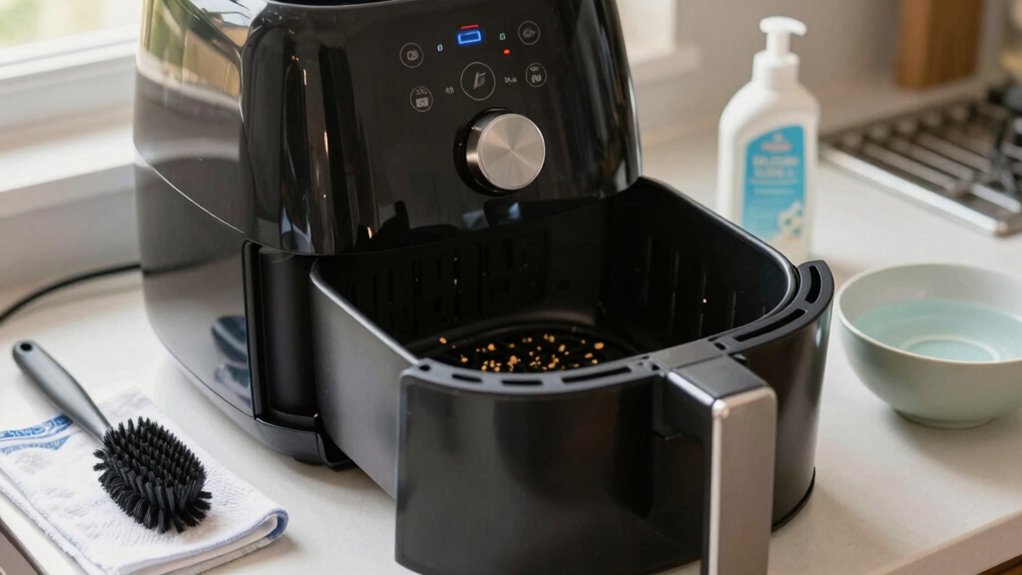
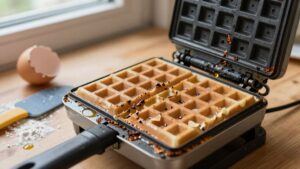
Keep your air fryer safe and cooking evenly by inspecting, cleaning, and caring for the basket after every use. Unplug and cool the unit. Remove the basket and tray, soak for 10–15 minutes in warm soapy water, then wipe with a soft sponge or nylon brush; avoid metal tools and abrasives.
Check the nonstick coating for chips or peeling. Document damage and replace if metal shows. Dry completely, store upright, and follow gentle repair steps if needed. Continue for step‑by‑step maintenance.
Quick Overview
- Unplug, cool, and remove the basket and tray before cleaning after every use to prevent burns and preserve coating.
- Soak basket and tray 10–15 minutes in warm, soapy water. Then wipe with a soft sponge or nylon brush; avoid abrasives.
- Inspect nonstick coating for chips, peeling, or warping under bright light. Document damage and date findings.
- For stubborn residue, use a baking soda paste or manufacturer-approved repair products. Do not use metal tools or steel wool.
- Replace the basket if coating peels or exposes metal. Schedule monthly inspections and avoid overloading the basket.
Maximum Basket Capacity
How much can you safely load an air fryer basket? You should match food load to maximum capacity and basket volume to keep airflow and safety. For 1–2 people, use 2–3 qt baskets (≈250g fries); do not pile food. For families, pick 4–6 qt to fit whole chicken or larger batches. For parties, use 8+ qt or oven-style units for 7 lb chickens or 12″ pizzas.
Avoid overloading small baskets; expect uneven cooking and longer times. Check shape and surface area: wider, shallower baskets often cook more evenly than deeper ones of the same qt rating. Monitor fan strain on very large units and stagger loads if needed.
| Size | Typical Load |
|---|---|
| Small | 250g fries |
| Large | Whole chicken |
2-inch Basket Care
For inch-size baskets, clean and inspect them after every use to preserve non-stick coatings and ensure even airflow. You’ll remove crumbs, wipe grease, and check for chips or warping that can trap food or block vents. Don’t use metal tools or abrasive pads; that’s where damage starts. Follow safe drying and storage so moisture doesn’t corrode parts or encourage odors.
- Wash basket and tray in warm, soapy water; avoid steel wool and rinse thoroughly.
- Inspect coating and mesh for peeling or deformation; replace if you see damage to prevent contamination.
Dry completely, then store upright in a cool, dry spot to prevent moisture and irrelevant discussion about unrelated repairs.
Keep two word ideas like “inspect daily” visible as a checklist prompt.
Nonstick Coating Restoration
Check the nonstick surface regularly for chips, peeling, or discoloration so you can decide if cleaning or replacement is needed.
Use only soft sponges and mild detergent to remove residue; avoid scrubbing and never use metal utensils on the coating. If you spot light scratches, smooth edges gently. Switch to silicone or wooden tools to prevent further damage and extend the coating’s life.
Assess Coating Condition
Want to know whether your air fryer’s nonstick coating is still safe and effective? Start with a quick coating inspection: unplug and cool the unit, remove the basket, and scan under bright light for scratches, peeling, blistering, or discoloration.
Use a soft cloth to wipe away crumbs so damage is visible. Perform a wear assessment by gently running a fingernail across questionable areas. If the surface flakes or catches, it’s compromised. Note isolated minor scratches, but replace the basket if coating peels or large areas show abrasion. Document findings and date them for trend tracking.
If you find damage, stop using metal utensils and discontinue cooking acidic foods. Replace the part to avoid contamination or reduced performance.
Gentle Cleaning Methods
Why restore a worn nonstick surface when gentle cleaning can extend its life and keep food safe? You’ll use gentle cleaning to restore performance without harming the coating.
Unplug and cool the unit. Remove the basket and tray, then soak for 10 to 15 minutes in warm, soapy water. Use a soft sponge or nylon brush to lift grease; avoid abrasives. Rinse thoroughly and dry before reassembly to prevent trapped moisture.
For stubborn residue, apply a paste of baking soda and water, let it sit for 10 minutes, then wipe gently. Always avoid metal utensils and harsh chemicals that strip coating. Regular gentle cleaning supports surface protection, delays replacement, and reduces food sticking; this keeps cooking safe and prolongs your air fryer’s usable life.
Repair Scratches Safely
If gentle cleaning hasn’t removed surface scratches or you notice food sticking, you can take measured steps to restore the nonstick coating without risking harm. First, unplug and cool the unit completely. Remove the basket and inspect for deep gouges. Minor surface scratches can be treated, but peeling or exposed metal means replacement.
Lightly sand only very fine rough edges with a 600–800 grit wet sandpaper, using minimal pressure and rinsing debris away. Dry thoroughly. Apply a manufacturer-approved nonstick repair paste or spray in a thin, even layer following product instructions and oven-safe limits. Never use DIY oils or silicone not rated for cookware.
Reassemble, run an empty cycle to cure if directed, and test with a small amount of food. Safely maintain by repeating inspections and replacing damaged parts.
Use Compatible Utensils
How should you handle utensils to protect and restore your air fryer’s nonstick coating? Use compatible tools only: choose silicone, wooden, or heat-resistant nylon utensils to avoid scratches. Inspect utensils before use and discard ones with rough edges or exposed metal.
When scraping stuck food, loosen with warm water soak first; then apply gentle pressure with a soft spatula. Non-abrasive care prevents further coating loss. Avoid metal tongs, forks, or knives that gouge the surface.
If minor wear appears, stop using affected areas and clean gently to prevent contamination. Always follow manufacturer guidance on utensil safety and replace baskets showing peeling. Using safe utensils extends coating life and reduces the need for repair or replacement.
Prevent Future Damage
You’ve covered proper utensil use; now protect and restore the nonstick coating to prevent further damage. Start by cleaning gently: Soak removable parts 10–15 minutes in warm, soapy water. Then use a soft sponge to remove residue. Rinse and dry completely to avoid trapped moisture.
If you spot minor scratches, buff lightly with a soft cloth and apply a thin layer of high-smoke-point oil (e.g., avocado) to the surface. Then run the fryer empty at 350°F for 5–10 minutes to polymerize the oil and help reseal microscopic abrasions. Never use abrasive pads, metal utensils, or chemical strippers.
Schedule monthly inspections for peeling; replace the basket if coating loss is visible. These steps will help prevent damage and extend lifespan safely.
Frequently Asked Questions
How Often Should I Replace the Heating Element?
You should replace the heating element when you see damage, reduced performance, or every 2 to 3 years as general replacement intervals. Inspect monthly for cracks, residue, or uneven heating. Check the power cord and basket too.
If you notice burning smells, sparking, or persistent overheating, stop using the fryer and replace the heating element immediately. Always power off and unplug, and follow manufacturer instructions; or use a qualified technician for safe replacement.
Can I Run My Air Fryer Without the Basket Inserted?
No: you shouldn’t run your air fryer without the basket inserted. Safety warnings: operating it empty can expose the heating element, increase fire risk, and damage non-stick surfaces.
Cleaning tips: always remove crumbs and grease before reassembly. Dry parts thoroughly, and avoid abrasive tools when you clean the basket.
Procedure: power off, wait for cooling, insert the basket correctly, and verify alignment before restarting to ensure safe, even cooking.
Are Replacement Baskets Model-Specific?
Yes, are basket compatibility is usually model-specific baskets. You should check fit and specs. Measure dimensions, latch type, and coating before buying.
Verify manufacturer part numbers or approved replacements. Replace only with dishwasher-safe parts if manual allows. Don’t force a wrong basket into the unit; misalignment can block vents, damage coatings, or expose the heating element.
Test seating and run a short, empty cycle after installation.
Is It Safe to Leave the Appliance Plugged in When Not in Use?
No, it’s not safe to leave the appliance plugged in when not in use. For unplug safety, always disconnect power after cooling, especially before cleaning or heating element replacement.
If you suspect damage or need a new basket, confirm model compatibility first. Regularly inspect the cord and element for wear. Unplugging reduces fire risk, prevents accidental activation, and protects electronics from power surges while stored.
How Do I Troubleshoot Uneven Cooking Temperatures?
Check for uneven heating by running a temperature testing cycle: preheat to a set temp, place oven-safe thermometer in center and retest at multiple spots. If temps vary, clean vents, clear crumbs, and inspect heating element for residue or damage.
Shake or rotate basket during cooking; avoid overfilling, and ensure parts dry and aligned. If irregularity persists, check power cord and replace damaged components before further use.
Conclusion
Stick to your air fryer’s maximum basket capacity; care for 2-inch baskets gently. Restore nonstick coating only when needed. Regularly assess the coating condition; use gentle cleaning methods. Repair scratches safely following manufacturer guidance.
Always use compatible utensils to avoid damage. Prevent future issues by avoiding overcrowding and abrasive cleaners. By following these procedural, safety-minded steps, you’ll keep your air fryer functioning efficiently and reduce health and fire risks.