Toaster Slot Width and Bread Types Guide
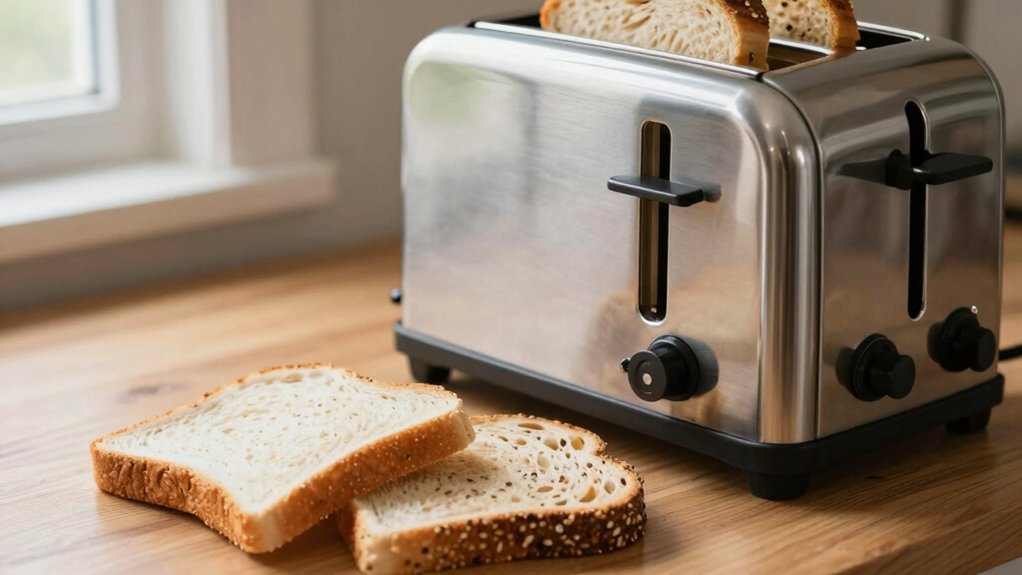
Match your bread to slot width and depth for reliable toasting: standard pre-sliced loaves fit 1.25–1.26″ slots. Thick or bagel-style slices need ≈1.5″ slots, and artisanal or homemade loaves require long, wide slots or single long-slot toasters.
Limit slice thickness to ~0.6″ for standard and ~0.9″ for extra-wide slots; mind internal depth (≈5.5″ insertion).
Locate and remove the crumb tray before maintenance for safe cleaning. Continue for step-by-step removal, cleaning, and troubleshooting.
Quick Overview
- Match slot width to loaf type: standard pre-sliced needs 1.25–1.26″; thick slices and bagels need ≥1.5″.
- Check slice thickness limits: standard slots accept up to 0.6″ (15 mm); extra-wide up to 0.9″ (23 mm).
- For artisanal or doorstop loaves, use long, wide, or single long-slot toasts. Alternatively, cut slices to fit.
- Consider slot depth: limit insertion length (recommended ≤5.5″) and avoid stacking thick slices in one slot.
- Remove and clean the crumb tray by unplugging; slide it out along rails. Dry it fully and reseat before use.
Slot Widths by Loaf Type
How wide does your loaf need to be to fit reliably? You’ll match loaf type to slot width: standard pre-sliced loaves fit 1.25–1.26″ slots. Thick-sliced or doorstop styles require extra-wide slots (≈1.5″). Artisanal and homemade loaves often need long, wide slots or single long-slot designs to avoid uneven heating.
Measure slice width and thickness against slot width and depth. If a sourdough exceeds standard dimensions, cut or use a long-slot toaster. Bagels and English muffins demand ≥1.5″ slot width and a bagel function for correct browning.
| Loaf Type | Recommended Slot Width |
|---|---|
| Standard pre-sliced | 1.25–1.26″ |
| Thick-sliced | ≥1.5″ |
| Artisanal/homemade | Long + wide slots |
| Bagels/muffins | ≥1.5″ |
Max Loaf Thickness Chart
Having matched loaf types to slot dimensions, you now need clear limits for slice thickness to ensure reliable toasting and safe operation. You’ll use measured maxima tied to slot width and internal depth; exceeding these increases jam risk and uneven heating. Base limits on standard slot specs (≈1.25–1.26″) and extra-wide (1.5″) types.
Don’t conflate this with an irrelevant topic or introduce an unrelated concept like appliance aesthetics.
- Standard slots (1.25–1.26″) — max 0.6″ (15 mm) slice thickness
- Extra-wide slots (1.5″) — max 0.9″ (23 mm) slice thickness
- Long-slot depth considerations — limit length to 5.5″ insertion to avoid contact
- Multi-slice units — halve thickness per slot when stacking slices
Crumb Tray Removal Instructions
Locate the crumb tray by inspecting the toaster base or rear for a removable panel aligned with the heating chamber. Then slide it out along its guide rails to access accumulated debris.
Remove and empty the tray. Wash with warm soapy water or wipe with a damp cloth depending on manufacturer recommendations. Dry completely before use and inspect for warping or damage.
If the tray jams, power off and unplug. Gently wiggle while checking for obstructions or bent guides. If resistance persists, consult the manual or contact service to avoid damaging the mechanism.
Locating The Crumb Tray
Where can you find the crumb tray? You’ll locate the crumb tray on the underside or rear base of most toasters; manufacturers position it for gravity-assisted collection and service access. Inspect the toaster base for a slim, removable drawer or a hinged panel. Designs vary by model (standard two-slot, long-slot, four-slice).
Use visual alignment with slot centers to identify tray orientation. Note locking tabs or retention clips that secure the tray; persistent resistance often indicates engaged clips or accumulated debris causing jammed trays. Don’t force removal; instead, confirm clip release points described in the user manual.
For safety, unplug the appliance and let internal elements cool before manipulating access panels. Record tray location relative to slots for routine maintenance.
Removing The Tray
After you’ve identified the crumb tray‘s position under the slots, unplug the toaster and allow the interior to cool to ambient temperature before attempting removal. Confirm power isolation visually and with the plug; residual heat can damage components.
Slide the tray out along its guide rails using steady, even force; don’t tilt or jerk, which can dislodge internal wiring. If the tray resists, inspect for latches or release tabs and depress them while extracting. For long-slot or multi-slice models, remove any adjacent crumb shields first to avoid bending.
Place the tray on a stable, heat-resistant surface. Reinsert by aligning rails, sliding fully until it seats and any retention click engages. These removing the tray steps ensure safe crumb tray removal and maintain toaster alignment.
Cleaning The Tray
How will you guarantee the crumb tray is safely cleaned and reinstalled? Start by unplugging the toaster and letting internal elements cool to ambient temperature; this minimizes electrical and burn risk.
Slide the crumb tray out along its guide rails. Inspect rails and tray for deformation or burnt residue. Use a soft brush and a damp, mild-detergent cloth to remove particulates. Avoid abrasives that could damage coatings.
Rinse metal trays under warm water, dry thoroughly with a lint-free cloth, and confirm no residual moisture before reassembly. While cleaning the tray, perform jam troubleshooting by checking for lodged debris in slot bottoms and bread guides. Remove foreign objects with non-metallic tools.
Reassemble only when the tray and internal area are dry and free of obstructions.
Reinstalling The Tray
Ready to reinstall the crumb tray? Align the tray with its guide rails, ensuring the tapered edge faces the toaster front and the retention tabs engage the slots.
Slide the tray smoothly until it seats; you should feel a slight click or resistance change when properly positioned. With models that have leveling feet, check stability and consider adjusting toaster feet to maintain even contact with the countertop. Uneven seating can misalign the tray and impair crumb collection.
After seating, run a short, unloaded cycle at low heat to verify the tray remains secure and that auto-shutoff functions as intended. Document any recurrent misalignment. Repeated replacing crumb tray operations may indicate worn guides requiring service.
Troubleshooting Jammed Trays
If the crumb tray won’t slide out smoothly despite correct alignment and seating, start by powering off and unplugging the toaster to remove electrical risk. Next, inspect the tray channel visually using a flashlight; compressed crumbs, hardened residue, or foreign objects commonly cause jammed trays.
Use a non-metallic tool and vacuum with a narrow nozzle to dislodge debris. Avoid bending the tray or applying excessive force. For wide slot troubleshooting, verify dual bread guides retract fully so they don’t obstruct the tray path.
If corrosion or warped metal is present, measure tray tolerances against manufacturer specs and consider replacement parts. Reassemble only after drying and confirming smooth manual operation. Restore power and cycle a short test to confirm resolution.
Frequently Asked Questions
Are Extra-Wide Slots More Energy-Efficient Than Standard Slots?
No, extra-wide slots aren’t intrinsically more energy-efficient; you’ll see marginal differences. Extra-wide efficiency depends on slot width heat distribution and toaster design. Wider slots can increase radiant losses if heating elements run longer to achieve uniform browning. However, improved heat distribution, dual guides, and targeted elements can offset that.
You’ll get efficiency gains only when element placement and insulation minimize heat loss for thicker slices rather than from width alone.
Can Slot Width Affect Toasting Time Consistency?
Yes, slot width can affect toasting time consistency. You’ll see variations in slot timing because thicker slices in extra-wide slots change heat distribution and sensor response. This change reduces toasting accuracy if the toaster’s guides or sensors aren’t calibrated for thickness.
Precise models with auto-adjusting bread guides and calibrated timers maintain consistent slot timing and high toasting accuracy across slice profiles. In contrast, basic designs produce greater timing variance.
Do Slot Dimensions Impact Toaster Storage Footprint?
Yes, slot dimensions affect storage footprint because longer or wider slots require larger chassis. You’ll account for slot compatibility with appliance internals and external clearance. Therefore, extra-wide or extra-long slots increase length, depth, or height. That changes packing density for brick and mortar storage, shipping cartons, and shelf allocation.
Measure slot width and length against overall toaster dimensions to predict required shelf space. This will help you optimize inventory layouts.
Are There Safety Differences Between Long-Slot and Regular Toasters?
Yes, you’ll face modest safety differences: long-slot models can expose longer heating elements and larger slot openings. You’ll need stricter safety considerations like anti-jam shutoff and secure crumb trays.
Regular toasters often concentrate heat in shorter zones, reducing finger-access risk. Energy efficiency is comparable per cycle; though long-slot toasters may use slightly more energy for larger items, use proper loading and functions to optimize both safety and efficiency.
Will Wide Slots Void My Toaster’s Warranty?
No, wide slots alone won’t void your toaster’s warranty unless you modify the appliance. You should check warranty considerations in the manufacturer documentation. Using thicker bread or bagels as intended doesn’t count as alteration.
If you attempt user repairability, such as opening the housing or replacing components, you may void coverage. Keep receipts, register the product, and follow care instructions to preserve the warranty and avoid invalidating claims through unauthorized repairs or physical modifications.
Conclusion
You’ve learned how slot widths match loaf types and where to measure maximum thickness, so you can pick bread that fits reliably.
When you need to clean, locate the crumb tray by the base notch. Slide it out with steady pressure, and wash and dry it before reinserting until it clicks. If a tray jams, power off and clear obstructions before testing.
Follow these steps consistently to maintain performance and reduce fire and malfunction risk.