How to Clean an Oil Sprayer Bottle
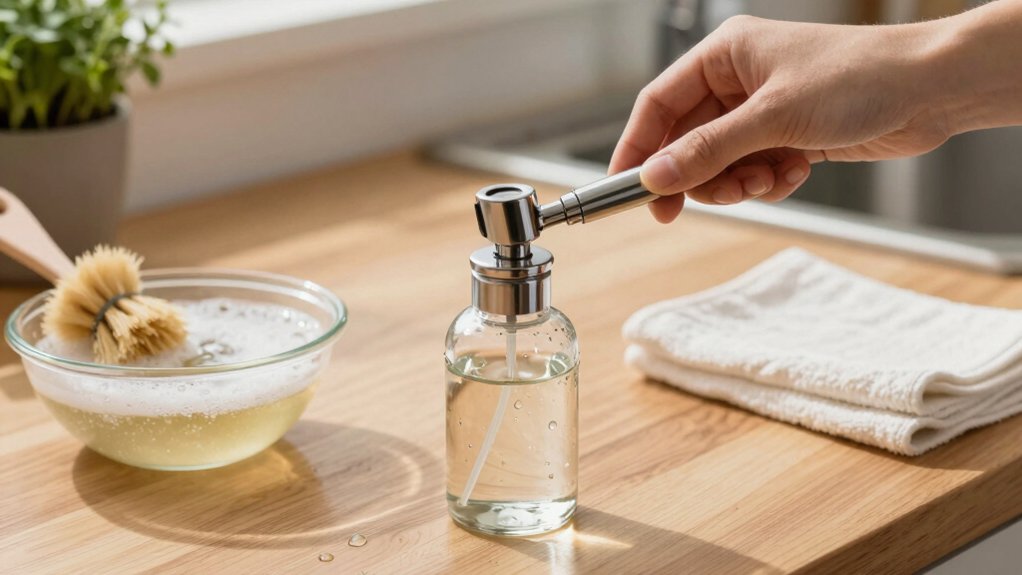
Empty and release pressure. Then rinse the bottle and pump warm water through until clear. Remove the nozzle, cap, and capillary tube. Soak small parts for 15–30 minutes in hot soapy water or vinegar.
Gently poke stubborn deposits with a fine needle from the bottle side. Agitate and flush thoroughly, then air dry completely. Reassemble, prime by pumping, and test the spray. If it’s still off, keep going for step-by-step troubleshooting and flow tips.
Quick Overview
- Empty bottle, release pressure, and rinse with hot water until the liquid runs clear.
- Disassemble the nozzle, cap, and capillary tube; inspect for residue, leaks, or blockages.
- Soak small parts for 15–30 minutes in warm soapy water (or vinegar for stubborn oil). Then, gently agitate.
- Use a fine needle or feed from the bottle side to carefully clear capillary or nozzle clogs. Then, flush thoroughly.
- Air dry completely, reassemble, pump/prime, and test spray quality and flow before regular use.
Spray Nozzle Flow Rates
How much fluid a spray nozzle delivers comes down to two things: the orifice size and the operating pressure. You’ll use that rule to predict flow: doubling flow needs four times the pressure.
Check nozzle labels. Standardized sizing means a “06” matches across brands. Remember oil viscosity affects droplet size; higher viscosity makes larger droplets unless you heat the oil. Spray angle also matters: wider angles give finer droplets at the same flow.
| Factor | Practical effect |
|---|---|
| Orifice size | Sets base flow (GPH/GPM) |
| Pressure (PSI) | Raises flow with square-root relation |
| Spray angle | Alters droplet size and coverage |
| Oil viscosity | Higher = larger droplets; heat to reduce |
Pick a nozzle rated for your desired GPH at 100 PSI for consistent performance.
Rinse-Soak-Disassemble Checklist
Want a quick, reliable way to get your oil sprayer spotless? Start by emptying and releasing pressure. Then follow a short rinse-soak-disassemble checklist so you don’t mix steps or treat an irrelevant topic like equal priority.
- Rinse: Fill halfway with hot water, pump and spray until flow runs clear. Repeat until no soap or vinegar traces remain.
- Soak: Remove nozzle and small parts. Soak in hot soapy water or vinegar for 15–30 minutes. Then brush tiny holes gently.
- Disassemble: Take apart remaining components. Air dry completely before reassembly; avoid treating an unrelated concept like storage tips here.
You’ll keep misting consistent, prevent rancidity, and make later troubleshooting easier without skipping steps.
Capillary Tube Clog Troubleshooting
First check where the clog is: nozzle, capillary tube, or intake. This will help you know what to clean. Flush the tube with warm soapy water. Then use a thin needle or pin to gently clear any stubborn residue. If it’s still blocked, soak the part in vinegar to break up oil.
Reassemble only after everything’s rinsed and dried. Then pump and test spray to confirm the mist’s restored.
Identify The Clog Location
Where exactly is the spray getting stuck? Start by inspecting each component: cap, nozzle tip, and capillary tube. You’ll look for visible residue, bends, or pinched spots while checking for identifying leaks around seals and joints.
Remove the tube and hold it to light; any dark film or blockage shows up easily. Measure consistency by drawing a small amount of water through the tube; a weak or uneven flow points to partial clogging.
Test the nozzle separately by spraying clear water. If the nozzle sprays fine but the tube doesn’t, the clog’s inside the tube. Mark the problem area so you don’t chase the wrong part. Knowing the exact location speeds cleaning and avoids unnecessary disassembly.
Use Warm Soapy Water
If your earlier checks pointed to the capillary tube as the problem, warm soapy water is often the simplest fix: it is gentle but effective at loosening oily film inside narrow passages. Fill the bottle with warm soapy mix (about 3/4 cup hot water and one squirt dish soap), pump to pressurize, then spray until the solution runs clear.
Let disassembled parts and the capillary tube soak 15–30 minutes in warm soapy water. Then agitate gently to dislodge residue. After soaking, rinse thoroughly with hot clear water, pumping several times to flush the tube.
If you need two word discussion ideas for notes, use “soak time” and “rinse count.” Dry completely before reassembly to avoid water-oil contamination and rancidity.
Try A Needle Or Pin
Need a precise way to clear a stubborn capillary tube clog? Grab a fine needle or pin, steady yourself, and work gently from the nozzle end; never force metal into delicate parts. Release pressure and remove the nozzle and any capping parts first to avoid capping issues.
Insert the needle just enough to nudge debris; rotate slowly while pulling residue out. If the clog’s deeper, feed the needle into the capillary tube from the bottle side, supporting the tube so you don’t kink it. After dislodging debris, flush with warm soapy water and rinse thoroughly.
Don’t treat this like a permanent fix: if clogs return, vinegar soak or replacement tubing may be needed. Avoid subtopic irrelevant tips during this step.
Apply Vinegar Soak
Wondering how to loosen a stubborn capillary-tube clog? You’ll use a vinegar soak to dissolve oil residue without fuss. Empty the bottle, remove the nozzle and capillary tube if possible, and pour about 1/3 cup hot distilled vinegar into the reservoir.
Pump gently to push vinegar through the tube, then let the soaked parts sit for 15–30 minutes. If the clog’s severe, submerge the nozzle and tube in a small container of hot vinegar and agitate occasionally. After soaking, pump vinegar through again; repeat until flow improves.
Don’t confuse this with an irrelevant topic like general cleaning; focus on the tube. If flow’s still blocked, it’s not an unrelated issue with the pump. Try mechanical clearing next.
Reassemble And Test
Reattach the nozzle, capillary tube, and valve cap carefully, making sure each piece seats fully and the tube isn’t kinked or pinched inside the bottle. Once everything’s snug, hand-tighten the valve cap and check the tube path again; a tiny bend can change spray nozzle rates.
Prime the sprayer by pumping slowly until you feel pressure. Then perform reassemble testing: spray short bursts into the sink, noting mist quality and consistency. If the mist’s uneven or streams form, depressurize, remove the nozzle, and clear blockages with a toothpick or vinegar soak.
Then re-test. Record spray nozzle rates mentally—how many pumps per second gives a fine mist—so you can compare after future cleanings and catch declines early.
Frequently Asked Questions
Can I Use Vinegar With Stainless Steel Sprayers?
Yes, you can use vinegar with stainless steel sprayers; vinegar compatibility is good for breaking down oil without harming stainless steel.
You’ll empty and disassemble the sprayer. Pour about 1/3 cup vinegar, pump and spray to clear lines, and soak clogged nozzles. Rinse thoroughly with hot water until no vinegar smell remains. Air dry completely, then reassemble.
That keeps stainless steel sprayers clean and functioning without corrosion.
Is Dishwasher Safe for Any Sprayer Parts?
No, most sprayer parts aren’t dishwasher safe. The heat and detergents can warp seals and damage spray mechanism compatibility. You should hand-wash removable nozzles, pumps, and caps with warm soapy water or vinegar. Soak small parts and use a soft brush or toothpick for holes.
Rinse thoroughly, air dry fully, then reassemble. If the manufacturer explicitly states dishwasher-safe, follow their guidance. Otherwise, avoid the dishwasher.
How Long Does Oil Stay Fresh in the Bottle?
Oil freshness in a bottle usually lasts 6–12 months if you store it properly. You should keep bottle storage cool, dark, and airtight to slow oxidation and rancidity.
Don’t expose oil to heat, light, or air; those speed spoilage. If oil smells bitter or “off,” dump it. Clean and dry the sprayer before refilling to avoid contamination.
Use oils within a year for best flavor and safety.
Can I Store Sprayer Filled Between Uses?
You can store the sprayer filled between uses, but prioritize storage safety and monitor oil shelf life closely. Empty and release pressure if you won’t use it within 6 to 8 weeks to avoid rancidity.
If you keep oil inside, tighten the cap and store cool, dark, upright. Clean and dry monthly or immediately when clogging or changes occur. Always prime briefly before the next use to ensure proper misting.
Are Silicone Seals Replaceable and Where to Buy Them?
Yes, silicone seals are replaceable. You can buy replacement parts from the sprayer manufacturer’s website, general kitchenware retailers, or marketplaces like Amazon and eBay. Look for silicone seals sized to your model or universal seal kits.
Check parts diagrams, measure inner and outer diameters, and read reviews. Keep spare silicone seals on hand so you can swap clogged or hardened seals quickly. This will help maintain a consistent misting performance.
Conclusion
You’ve got this. A clean sprayer works better and lasts longer. Rinse, soak, and disassemble. Then clear the nozzle and capillary tube with warm soapy water, a needle, or a vinegar soak as needed.
Identify where the clog sits before probing. Be gentle with small parts, and reassemble carefully. Test with water; repeat steps if spraying is uneven. Always rinse thoroughly after using vinegar. Regular quick cleanings prevent stubborn blockages down the road.