Pizza Oven Temperature and Crust Results Explained
Your oven temperature, surface, room humidity, and dough hydration all change crust color, crispness, and rise; so adjust them together.
Use steel at 600–700°F for fast browning and blistering.
Use stone in lower-home temps (475–500°F) for even heat and better retention.
Higher humidity and wetter dough slow surface drying and reduce crispness.
Drier conditions yield quicker crust browning.
Lower temps and thicker dough need longer bakes.
Keep tuning these variables, and you’ll learn practical tweaks for consistent results.
Quick Overview
- Higher oven temperatures produce faster Maillard reactions and better blistering, creating a browned, airy crust quickly.
- Low-conductivity surfaces (stone) retain heat for even baking; high-conductivity steel browns bottoms faster.
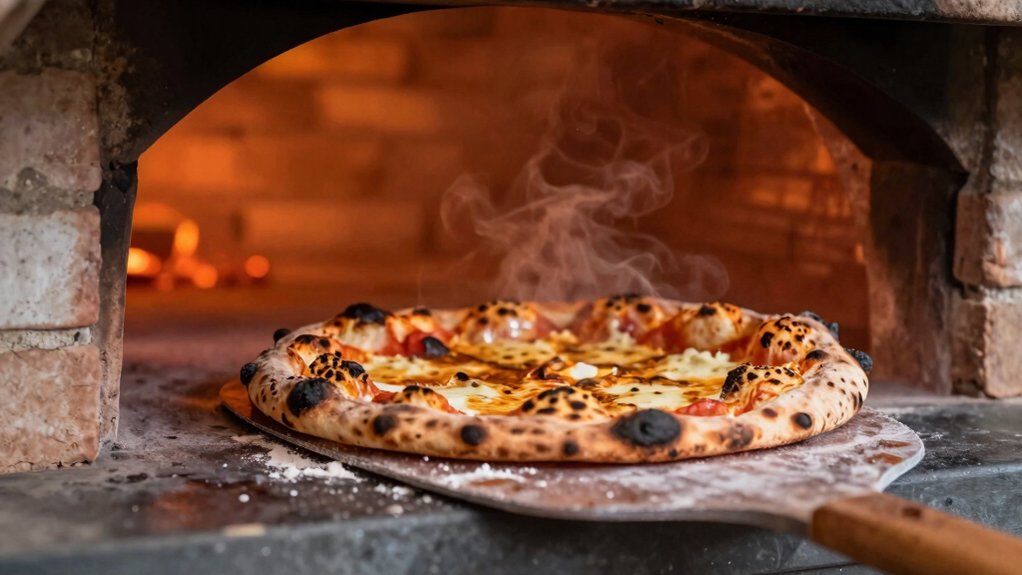
- Very high heat (800–900°F) yields Neapolitan-style domes. Home ovens need lower temps and longer bakes.
- Ambient and oven humidity slow surface drying, reducing crispiness. Drier conditions promote a crisper crust.
- Adjust bake time and temperature by pizza style, cookware, and room humidity to achieve desired crust texture.
Stone vs Steel Temperature Chart
Think of the cooking surface as your pizza’s foundation: Steel heats faster and conducts energy more efficiently, while stone absorbs and radiates heat more slowly but holds it longer. You’ll choose steel when you want faster oven spring and deeper browning at home oven temps. Pick stone surfaces for even heat retention and consistent bases during multiple bakes. Preheat 45–60 minutes and verify with an infrared thermometer.
Use steel below 600°F for faster bakes and pronounced cornicione. Avoid steel in ultra-high ovens to prevent burning. Stone gives steadier recovery and mimics brick floors. Balance thickness and placement to match pizza style and oven limits.
| Surface | Conductivity | Best Use |
|---|---|---|
| Steel | High | Fast browning |
| Stone | Low | Heat retention |
| Both | Complementary | Style-dependent |
Ideal Baking Temps Chart
An ideal baking temperature chart gives you clear targets for matching oven heat to pizza style and equipment. You can reproduce the crust texture and topping results described earlier. Use the chart to pick temperatures that balance rapid rise, moisture evaporation, and topping finish. Note the stone note vs. steel texture differences: stones need lower surface temps for even crisping; steels transmit heat faster for pronounced charring.
- Neapolitan: 800–900°F (427–482°C) — short bake, high dome heat
- Home oven (stone): 475–500°F (246–260°C) — preheat stone to ~350°C
- Steel-assisted: 600–700°F (316–371°C) — faster base browning, blistering
- Thick crust: 425–475°F (218–246°C) — longer bake, gentler heat
- Frozen pizzas: 425°F (218°C) — avoid undercooking toppings
Room Humidity Effects
You should consider room humidity because ambient moisture affects dough hydration and alters proofing time. Higher humidity speeds fermentation, while low humidity can dry the surface and slow rise.
Humidity also influences oven moisture retention: wetter environments can reduce crust crispiness by limiting rapid surface evaporation, while drier rooms promote a crisper exterior. Monitor and adjust dough hydration and proofing schedules to compensate for your kitchen’s humidity for consistent crust results.
Room Humidity Levels
How does room humidity change the way your pizza dough behaves before it even reaches the oven? Room humidity directly affects surface drying and fermentation pace: higher ambient moisture slows crust skin formation and helps preserve dough hydration. Low humidity promotes quick surface drying, which can stiffen the outer layer and impede oven spring.
You’ll notice stickier handling in humid conditions and slightly slower proofing because moisture in the air moderates evaporation from the dough. For consistent results, control proofing environment humidity: use covered containers or proofing boxes to retain moisture, or lightly mist and tent with plastic to prevent drying in arid rooms. Monitoring room humidity helps you adjust resting times and protects internal crumb development without altering dough hydration in your formula.
Dough Hydration Interaction
Why does room humidity matter when you adjust dough hydration? Because ambient moisture alters how much water your flour absorbs and how the dough behaves during fermentation. At higher room humidity, you’ll find dough feels wetter at the same hydration percentage. You should reduce added water slightly to avoid slack, overly extensible dough that spreads on the stone.
In dry rooms, you’ll need more water to reach the same elasticity and oven response. Under-hydrated dough won’t form ideal gas cells and can bake denser. Also consider stone conduction: wetter dough transfers heat differently to the stone floor, potentially slowing initial browning and base set.
Monitor dough feel and proof time, and adjust hydration in small increments based on measurable outcomes.
Crust Crispiness Impact
Building on hydration adjustments, room humidity directly affects crust crispiness by altering surface moisture loss during baking. You’ll notice higher ambient humidity slows evaporation from the dough surface, reducing initial crust crispiness because retained water absorbs heat and delays the Maillard reactions that crisp the exterior.
Lower room humidity promotes faster surface drying, enhancing crust crispiness through more efficient heat transfer at the dough–air interface. In practice, control humidity during proofing and rest: drier rooms favor quicker surface drying when the pizza hits the oven. Humid rooms require slightly higher oven temperatures or longer bake times to achieve equivalent crispness.
Measure outcomes: monitor bake color, surface crackle, and bottom texture to quantify humidity’s impact on texture reproducibly.
Oven Moisture Retention
Although ovens vary in how they trap and release water vapor, room humidity directly alters moisture retention inside the cavity and hence the pizza’s surface-drying rate and final crust texture. You’ll notice higher ambient humidity reduces evaporation from dough and toppings, increasing oven moisture and slowing surface crisping; that favors a chewier, less crackled crust texture.
Lower room humidity accelerates water loss, promoting faster browning and a crisper exterior but risking excessive dryness if heat’s high. Measure relative humidity and account for it when timing bakes: in humid conditions you may need slightly longer high-heat exposure or improved venting to achieve target crust texture.
Meanwhile, very dry rooms may require reduced bake time or brief steaming to prevent an overly dry interior.
Proofing Time Changes
How does room humidity change the proofing clock for your pizza dough? Higher humidity slows surface drying, so your dough maintains hydration balance and ferments more consistently. You’ll see faster visible rise and need shorter proofing time to avoid overproofing.
In low-humidity rooms, the crust skin sets earlier, moisture leaves dough faster, and yeast activity can stall; extend proofing time modestly and monitor dough elasticity rather than clock time. Aim for conditions where dough gains about 30–50% volume during bulk and final proofs. Adjust humidity with a damp towel, proofing box, or controlled chamber to keep hydration balance steady.
Measure dough temperature and feel; rely on tactile cues and volume change to time your bakes precisely.
Frequently Asked Questions
How Does Oven Insulation Affect Fuel Consumption and Heat Retention?
You save fuel and keep temperatures stable: better insulation materials reduce heat loss dynamics. Your oven retains heat longer and needs less fuel to maintain setpoint. You’ll preheat faster, use less energy during cycles, and see fewer temperature swings that affect cooking. Dense, multi-layer insulation minimizes conductive and radiative losses.
You’ll monitor lower fuel consumption and more consistent performance, backed by thermodynamic principles and practical oven testing.
Can Topping Order Change Cook Time or Crust Texture?
Yes, topping order can change cook time and crust texture. If you pile wet or thick toppings first, they slow heat transfer and lengthen cooking; this risks a soggy crust texture.
Placing cheese or light vegetables nearer the dough shields it and can retain moisture. Meanwhile, finishing with quick-browning items on top promotes even cooking and crisping.
Arrange toppings to balance moisture and heat for consistent bake times and desired crust texture.
What Safety Precautions for Handling 500°C+ Ovens?
You should use strict safety handling protocols for 500°C+ ovens to mitigate high temperature hazards.
Wear heat-resistant gloves, face protection, and long sleeves. Use insulated peels and tools with long handles. Keep a clear, non-slip work area. Maintain fire extinguishers and first-aid burn supplies nearby.
Monitor temperatures with reliable thermometers. Ventilate properly. Follow manufacturer maintenance and emergency shutoff procedures. Train staff on burn prevention and response.
How Does Dough Hydration Percentage Alter Baking Temperature Needs?
Higher dough hydration usually means you’ll use slightly lower baking temperature or shorter time to prevent excessive charring and to ensure interior crumb sets. Wetter dough steams more; so baking temperature adjustments help manage moisture and oven spring.
With lower dough hydration, you can push higher baking temperature to get crispier crusts and quicker oven spring. Test and adjust in increments (10–25°F/5–15°C) while monitoring bake time and texture.
Can Repeat Baking Cycles Change Stone Floor Longevity?
Yes, repeated baking cycles will shorten your stone floor’s life. High-frequency cycles increase refractory wear through thermal shock, microcracking, and cumulative heat stress. You should monitor cycle timing and avoid rapid cool-downs to reduce damage.
Implement controlled preheat, gradual cooldown, and regular infrared checks to maintain stone integrity. Proper maintenance and moderated cycle timing minimize refractories degrading; this extends usable lifespan while keeping cooking performance consistent.
Conclusion
You’ll get the best crust when you match oven surface and air temperatures to your dough’s hydration and proofing. Use stone for steady radiant heat or steel for faster conduction. Aim for higher temps for thin, crispy crusts and slightly lower temps for chewier, thicker ones.
Control room humidity and proofing time to adjust oven moisture retention and oven spring. Test small changes, measure results, and keep notes so your adjustments are evidence-based and repeatable.