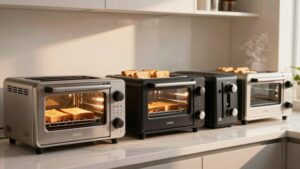
Countertop Cooker Maintenance Checklist
Check your burner temps: use low for simmer (180–205°F), medium-high for sauté (325–375°F), and high for searing. Monitor electric cycling.
Verify the cooker’s rated voltage and circuit amperage; use a dedicated circuit if needed. Power down before inspecting.
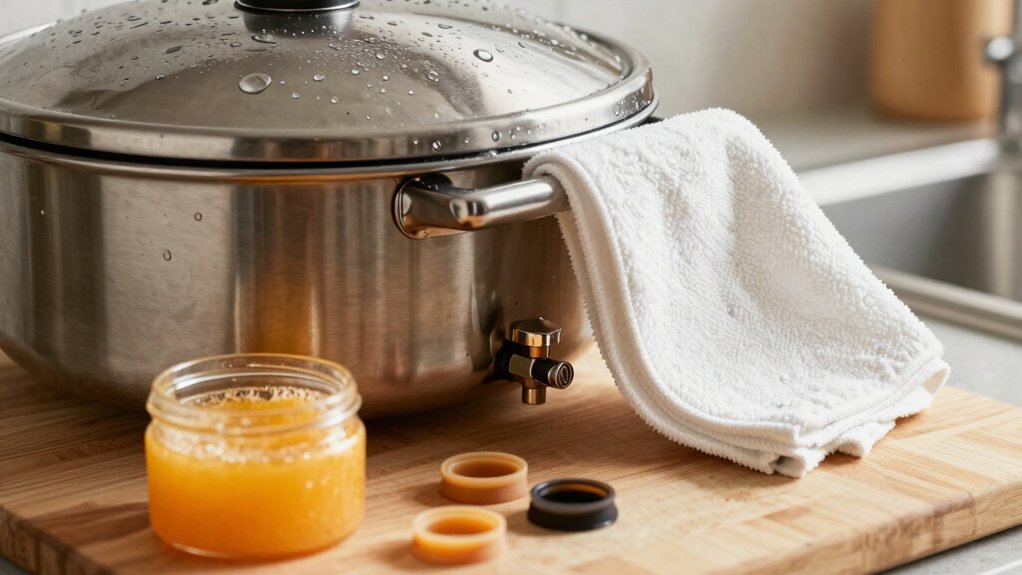
Clean with manufacturer-approved, food-safe cleaners: mild soap for stainless and ammonia-free for glass. Avoid abrasives and strong acids on painted or gasketed parts.
Rinse thoroughly, dry, log work, and continue for more detailed steps.
Quick Overview
- Verify the cooker’s rated voltage and amperage match the dedicated circuit before use or servicing.
- Clean surfaces daily with manufacturer-approved, food-safe cleaners; avoid bleach, abrasives, and ammonia.
- Rinse and dry all removable parts (grates, burner caps) after soaking and scrubbing to remove residues.
- Use neutral-pH cleaners for stainless steel and ammonia-free solutions for glass/ceramic; spot-test new products.
- Record cleaning steps, inspections, and any corrective actions in a maintenance log after each service.
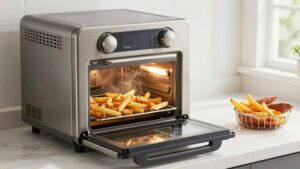
Burner Temperature Ranges
How hot should your countertop burner get for the job at hand? You check burner temperature against task needs: simmer, sauté, fry, or sear. Electric models reach high temps quickly; some to 650–800°F. They cycle, so verify with a probe. Induction units use power settings; rely on induction accuracy and magnetic cookware to hit targets.
Follow safety: cool components before cleaning and dry parts fully.
| Task | Typical guidance |
|---|---|
| Simmer | Low power/low temp; maintain steady 180–205°F |
| Fry/Sauté | Medium-high, 325–375°F (use stable pan) |
| Sear/Braise | High; electric up to 650°F; monitor time |
| Melt/Delicate | Use induction low-power for better induction accuracy |
Voltage & Amperage Limits
Wondering what electrical limits your countertop cooker can safely handle? You’ll check voltage safety first: confirm the cooker’s rated voltage on its nameplate and match it to your circuit to prevent overloads. Next, verify amperage limits listed by the manufacturer and ensure your circuit breaker and wiring meet or exceed that rating.
Follow these steps:
- Measure incoming outlet voltage and compare to nameplate rating.
- Confirm circuit amperage and wire gauge are adequate for the cooker’s maximum draw.
- Install dedicated circuit or upgrade breaker if amperage limits are close to or exceed supply.
Always power down and unplug before inspecting. If readings differ from specs, stop using the unit and call a qualified technician.
Cleaning Solution Compatibility
Choose only approved cleaning agents and check their pH to protect finishes and food-contact surfaces. Match solutions to materials: stainless steel, glass, and nonstick coatings each need different cleaners. Avoid bleach, abrasive powders, or solvents that can damage components. Rinse thoroughly after cleaning to remove residues that could affect food safety or equipment performance.
Approved Cleaning Agents
Which cleaning agents should you use to keep your countertop cooker safe and working well? Use only manufacturer-approved, food-safe cleaners and mild dish soap; avoid harsh abrasives, bleach, and ammonia that can damage seals, coatings, and electrical parts.
For grease, use a commercial degreaser labeled safe for cooking surfaces; rinse thoroughly. Use non-abrasive pads or soft cloths to prevent scratching. For stainless steel panels, pick a cleaner specifically for stainless finishes.
Never substitute household products in a non-relevant topic or engage in irrelevant discussion about unapproved chemicals. Spot-test any new product on an inconspicuous area. Wear gloves and eye protection, follow label dwell times, and ensure surfaces are fully dry before reassembly and operation to prevent corrosion and electrical hazards.
pH Level Considerations
How acidic or alkaline a cleaner is affects both cleaning performance and the longevity of your countertop cooker; so always check pH before use. You’ll select neutral to mildly alkaline cleaners (pH 7–10) for routine degreasing and food-contact surfaces. They clean effectively without etching metals or degrading seals.
Use acidic cleaners (pH Never use them on painted, anodized, or gasketed parts. Test a small hidden area first, follow dilution instructions, wear gloves and eye protection, and rinse thoroughly to remove residues that could corrode components or contaminate food.
Don’t ignore manufacturer guidance. Avoid “subtopic not relevant” or unrelated discussion when confirming compatibility with seals, coatings, and electrical openings.
Material-Specific Solutions
You already consider pH when picking cleaners. Now match cleaners to specific materials to avoid damage and maintain safety. Identify each surface: stainless steel, ceramic, enamel, glass, and plastic. Use only manufacturer-approved, food-safe cleaners.
For stainless steel, use non-abrasive, neutral pH sprays; wipe with the grain. For ceramic and glass, use mild, ammonia-free solutions and soft pads to prevent scratches. For enamel, avoid strong alkalis and scouring powders that cause chipping. For plastics and knobs, choose mild detergents to prevent crazing.
Never substitute an off label solvent; doing so risks damage and voids warranties. Avoid irrelevant topic or off topic discussion when documenting your choices. Record compatibility in your maintenance log and train staff to follow the listed material-specific protocols.
Avoiding Harmful Chemicals
Why check product labels before use? Read labels to confirm compatibility with surfaces, ventilation, and materials. Choose food-safe, mild detergents for cooking surfaces and avoid bleach, ammonia, or acidic cleaners that can corrode metals or damage seals.
Don’t use abrasive powders on coated grates or control panels; they harm finishes and compromise burner safety. Test any new cleaner on a small hidden area; follow dwell times and wear gloves and eye protection. Rinse thoroughly when instructed to prevent chemical contact with food, heating elements, or sensors.
Using correct cleaners preserves gaskets, sensors, and finishes, which maintains appliance efficiency and reduces repair risk. When in doubt, follow manufacturer recommendations or consult a technician.
Rinse And Residue Removal
After checking product labels and avoiding harsh chemicals, make sure rinse methods remove all cleaner residues that can contaminate food or damage sensors. Rinse immediately with potable water after applying food-safe cleaners, using low-pressure flow to avoid driving residue into vents or electrical openings.
For grates and burner caps, soak briefly, scrub, rinse, and dry completely to support burner safety and prevent corrosion. Wipe control panels and knobs with a damp microfiber, then follow with a dry cloth to eliminate streaks. Inspect seams and drip trays for trapped cleaner; flush and dry those areas thoroughly.
Verify no soapy film remains before reassembly and operation. Document residue removal steps and corrective action when residues are detected to maintain safe cooking performance.
Frequently Asked Questions
How Often Should Burners Be Replaced Regardless of Appearance?
You should plan burner replacement every 2–3 years as part of routine maintenance, even if they look fine. You’ll schedule replacements sooner if you notice performance loss, inconsistent flames, clog-prone ports, or corrosion.
Always shut off gas or electric, cool components, and have a qualified tech swap parts if you’re unsure. Keep records of replacements and inspections to support safety, compliance, and predictable cooker performance.
Can Hard Water Damage Internal Components?
Yes, hard water can damage internal components. Mineral buildup from hard water will clog ports, scale heating elements, and restrict valves. This reduces efficiency and causes overheating or failure.
You should flush water lines, descale with manufacturer-approved solutions, and dry components after cleaning. Inspect heating elements and sensors regularly for scale; schedule professional service if flow or temperature control degrades. Use filtered water to prevent recurring mineral buildup.
Is Descaling Necessary for Gas Cookers?
Yes, descaling necessity exists mainly for gas cooker components that contact water, like steamers or boilers; it’s part of gas cooker maintenance. You should schedule descaling when mineral buildup appears or every 3 to 6 months in hard-water areas.
Turn off gas and power, cool the unit, follow manufacturer-approved descaler, and rinse thoroughly. Inspect burners and ignition afterward for clogs, and document the service to maintain safety and performance.
Do Warranty Terms Cover Cosmetic Damage From Cleaners?
Generally, cosmetic warranties won’t cover damage from cleaners; you’re expected to use cleaner compatibility recommended by the manufacturer. First, check your warranty terms for exclusions about chemical damage.
Next, only use approved cleaners and test on an inconspicuous spot. If damage occurs, document it with photos and purchase records. Then, contact the manufacturer; you’ll need proof you followed their cleaner compatibility guidelines to have any chance of coverage.
Can Countertop Cookers Be Used Outdoors Safely?
Yes, you can use countertop cookers outdoors, but you must follow outdoor safety and weatherproofing maintenance steps. Place the cooker on a stable, level, covered surface away from wind and moisture. Keep electrical plugs dry and protected; inspect cords and gas connections before each use.
After outdoor use, wipe down surfaces and dry components. Store the unit indoors or under a weatherproofing maintenance cover to prevent corrosion and damage.
Conclusion
You’ve covered burner temps, electrical limits, and cleaning compatibility to keep your countertop cooker safe and working. Follow the approved agents and pH guidelines for each material; rinse thoroughly to remove residues; and never use corrosive or flammable chemicals.
Check voltage and amperage before plugging in. Avoid extreme heat that can warp parts. Inspect seals and surfaces after cleaning, and only use recommended solutions to protect performance and prevent hazards.