How to Filter and Store Frying Oil
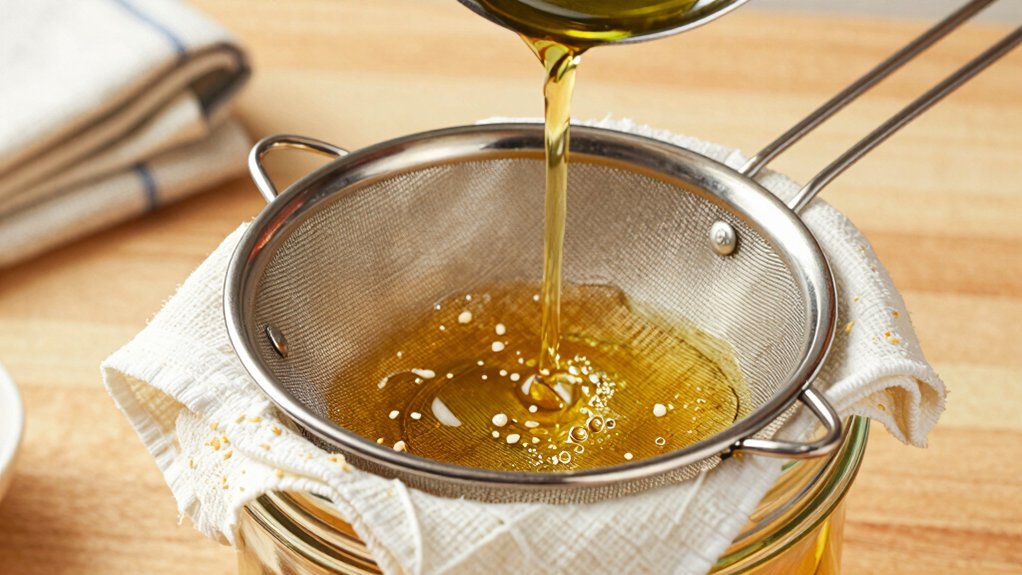
Filter hot oil through a fine mesh and paper filter to remove crumbs and sediment. Then cool it quickly to prevent breakdown.
Store only in nonreactive, airtight containers: stainless steel, dark glass, or food‑grade HDPE. This will block light and avoid flavor transfer. Label with oil type, filtration date, fryer ID, and discard date.
Check clarity and smell before reuse; re‑filter or discard if off. Keep containers sized to minimize headspace and follow a regular filtration schedule to extend oil life and learn practical details.
Quick Overview
- Cool oil to ≤140°F, then strain through a fine mesh and cheesecloth or commercial filter to remove crumbs and sediment.
- Use nonreactive, food-grade containers (stainless steel or food-grade PET/HDPE) to prevent flavor transfer and chemical reactions.
- Store oil in dark, opaque containers with airtight seals to block light and oxygen. This minimizes oxidation and rancidity.
- Label containers with oil type, filtration date, fryer/batch ID, and expected discard date using a standardized format.
- Re-check clarity and smell before reuse. Re-filter or discard if you detect dark streaks, sediment, rancid, or solvent-like odors.
Smoke Point Comparison Chart
Why does smoke point matter when you’re choosing oil for frying? You need oils that stay stable at frying temperatures. Smoke point differences determine flavor, safety, and oil lifespan. Pay attention to oil refinement impact: refined oils run 50–100°F hotter than unrefined counterparts, lowering free fatty acids and raising heat tolerance.
Choose high (>450°F) refined oils for deep frying and medium oils for lower-heat tasks.
| Oil Type | Typical Use |
|---|---|
| Refined Avocado (520°F) | High-heat deep fry |
| Refined Peanut/Canola (450°F) | Versatile commercial fry |
| Unrefined Olive/Butter (325–375°F) | Sauté/finishing only |
Match oil to your fryer’s operating temp and filter regularly to preserve smoke point and extend oil life.
Oil Clarity & Smell Checklist
How clear does your oil need to be before you use it again? You’ll inspect oil clarity and smell before returning oil to service. Check for visible sediment, dark color, or persistent off-odors; these indicate filtration media failure or excessive FFAs. Use this quick checklist:
- Look: color reduction achieved? No dark streaks or suspended particles. Sediment removal must be complete.
- Smell: perform odor removal steps. If rancid or solvent-like odors persist, don’t reuse. Consider solvent compatibility and additional polishing.
- Protect: ensure storage safety by limiting air exposure, sealing containers, and labeling filtered oil with FFA reduction treatment and date.
Act decisively: if any test fails, filter again or discard to protect food quality and safety.
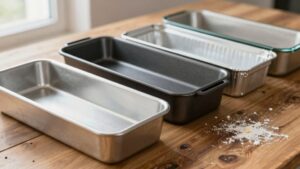
Storage Container Material Guidelines
When you store filtered oil, pick nonreactive containers like stainless steel or food‑grade PET to prevent flavor changes and chemical leaching. Don’t use porous materials. Choose dark or opaque bottles with airtight seals to limit light, air, and contamination.
Always label containers with the date and oil type so you can rotate stock and discard oil before quality declines.
Choose Nonreactive Materials
Think of your storage containers as the last line of defense for filtered oil. They must be nonreactive to prevent flavor transfer, chemical reactions, or accelerated oil breakdown. You should choose stainless steel or food-grade glass whenever possible; both offer proven nonreactive materials and clear storage vessel compatibility with high temperatures and long-term storage.
Avoid reactive metals like aluminum or uncoated iron that can leach and catalyze oxidation. If you use plastic, pick high-density polyethylene (HDPE) rated for food contact and heat cycles; however, treat plastic as secondary. Glass or stainless is preferred. Ensure lids seal tightly to minimize air exposure.
Match container size to cooled oil volumes to reduce headspace and preserve oil integrity for the next fry cycle.
Avoid Porous Containers
After you’ve chosen nonreactive materials like stainless steel or glass, make sure the containers themselves aren’t porous. Porosity traps oils, odors, and bacteria; this accelerates rancidity and contaminates fresh batches. You should use glass containers or fully welded stainless vessels that resist microcrevices and surface pitting.
Porous plastics, untreated wood, and cheap-coated metals all absorb oil and transfer off-flavors. Avoiding porous choices preserves oil clarity and prevents cross-contamination between batches. Inspect seals, lids, and fittings for microscopic wear that creates hidden porosity.
Clean and dry containers thoroughly before refilling. Replace any unit that stains or retains odor after proper cleaning. Following these storage container material guidelines ensures your filtered oil stays chemically stable and food-safe.
Use Dark Or Opaque Bottles
Why choose dark or opaque bottles for stored frying oil? You’ll protect oil from light-driven oxidation that accelerates rancidity, off-flavors, and color darkening. Dark bottles block UV and visible light better than clear containers; this preserves oil chemistry and extends usable life after filtration.
Opaque bottles offer equivalent protection where complete light exclusion is required, and they conceal sediment so you focus on measured sampling rather than visual cues alone. Choose food-grade, dark bottles or opaque bottles with tight-fitting caps and handle-friendly shapes for safe pouring and stacking.
Label containers with filtration date and oil type so you rotate stock correctly. Using dark or opaque storage is a simple, effective step to maintain oil quality and reduce premature disposal.
Ensure Airtight Seals
Keeping oil in dark or opaque bottles helps block light, but you also need airtight seals to keep oxygen and moisture out. Choose containers made from food-grade stainless steel or high-density PET with gasketed lids; they resist corrosion and won’t leach flavors. Tight seals prevent oxidation between uses, so your oil responds better to the established filtration frequency and lasts longer.
When you decant hot oil, let it cool slightly and close lids promptly to limit exposure. Check seals for wear and replace gaskets routinely. Match container neck size to pouring tools to control stirring speed during any short agitation: slow, deliberate motion reduces aeration.
Inspect closures after each fill; a simple pressure test reveals leaks before they compromise oil quality.
Label And Date Containers
When you label and date oil containers, use durable, food-safe markings and a clear format that shows filtration date, oil type, batch or fryer ID, and expected discard date. This lets staff quickly identify what’s inside, how long it’s been stored, and whether it still meets your filtering schedule and quality standards.
Use standardized date label formats (YYYY-MM-DD or DD/MM/YYYY) across all containers to avoid confusion. Enforce labeling consistency with printed labels or permanent markers. Specify container material (stainless steel, food-grade HDPE) and maximum fill temperature if relevant.
Place labels on the side and lid for visibility when stacked. Train staff to verify labels during each shift and to replace damaged labels immediately. This ensures that tracking, rotation, and discard decisions stay reliable and auditable.
Frequently Asked Questions
How Do I Dispose of Used Filter Media Safely?
You should bag used filter media, label it, and choose proper disposal methods based on local regulations and safety considerations.
Let hot oil cool; scrape solids into a sealed, leakproof container. Then dispose via municipal hazardous-waste programs, commercial waste haulers, or approved landfill options. Don’t pour oil down drains.
Wear gloves, goggles, and use spill trays. Keep records of disposal and follow local environmental rules to ensure compliant, safe handling.
Can I Mix Different Brands/Types of Oil Together?
Yes, you can mix oils, but you should check oil compatibility and aim to use similar smoke points and formulations. Canola blends usually mix well with other vegetable oils; this extends usable life and maintains consistent frying behavior.
Don’t combine highly processed and unrefined oils or dramatically different smoke points. That risks faster breakdown and uneven cooking. When in doubt, match oil type, label specs, and manufacturer recommendations for best results.
How Long Should Oil Rest Before Reusing After Cooling?
You should let oil rest for at least 2–4 hours after cooling. The optimal oil rest duration is 8–12 hours if you’ll filter and store it overnight. Aim for a resting temperature between 80–120°F (27–49°C) before filtering so sediments settle without promoting bacterial growth.
Don’t filter while oil’s too hot. Once it’s at the resting temperature, skim, filter with fresh media, then store covered to minimize oxidation.
Will Filtering Remove Burned Flavors Completely?
No, filtering won’t remove burned flavors completely. You’ll remove sediment and many impurities, improving oil filtration effectiveness. However, burned flavor notes often come from dissolved compounds and polymers that passive filtration can’t capture.
Using chemical polishers, powdered adsorbents, or pressure filtration improves results; yet some off-flavors persist. For best outcomes, filter daily, use appropriate media, and replace oil when persistent burnt notes remain despite repeated treatment.
Are There Legal Rules for Storing Large Oil Quantities?
Yes, you must follow legal storage regulations when holding large oil quantities. You’ll need to track oil quantity thresholds that trigger additional requirements: spill containment, fire suppression, labeling, and secondary containment.
Check local fire codes, environmental rules, and food-safety ordinances for specific thresholds and permitting. Keep records, use approved containers, and maintain secondary containment sized for the maximum stored volume. Consult your authority having jurisdiction for exact limits.
Conclusion
You’ve learned how to judge oil by smoke point, clarity, and smell. You have also learned how to store it safely. Now filter used oil while warm, remove food bits, and transfer it into a clean, nonreactive, nonporous, dark airtight container.
Label it with the date and intended reuse limits. Keep it cool and away from light. Discard any oil that smells off or smokes at low heat. Following these steps preserves quality and protects flavor.