Food Steamer Timing Basics by Food Type
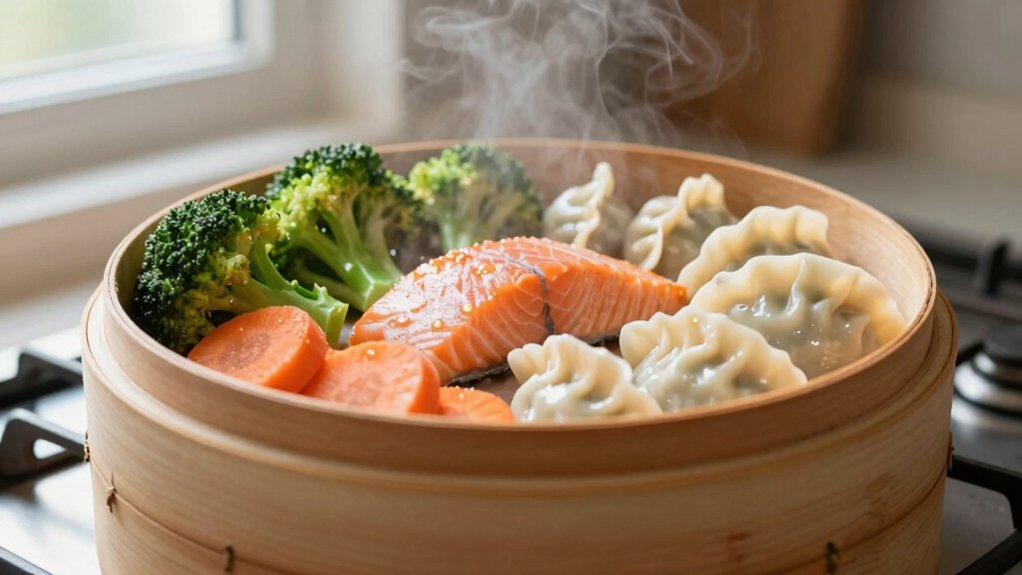
Start timing once the steamer is fully producing steady steam, not when you turn it on. Keep 1–1.5 inches of water in the base. Use 3–5 minutes for soft greens; 4–6 for broccoli florets; 5–7 for sliced carrots. Increase times by approximately 20–30% for frozen or dense items. Test doneness by fork or taste.
Stack heavier items low, and lighter ones high. Leave gaps for flow, and rotate trays mid-cycle for even cooking. More tips follow.
Quick Overview
- Start timing once steady steam forms and keep 1–1.5 inches of water in the pot base for consistent heat transfer.
- Adjust times by size, cut, and freshness: smaller pieces cook faster; frozen or dense items need approximately 20–30% longer.
- Steam soft greens 3–5 minutes. Steam broccoli florets 4–6 minutes. Steam sliced carrots 5–7 minutes. Steam whole artichokes 25–40 minutes.
- Place dense items on lower tiers and quick-cooking or delicate foods higher, leaving 1–2 cm between pieces for airflow.
- Avoid overcrowding. Use perforated racks (20–30% open area) and rotate trays mid-cycle for even cooking.
Vegetable Steaming Times Chart
Wondering how long to steam each vegetable? You’ll follow clear, evidence-based timings: leafy greens 3–5 minutes, broccoli florets 3–6 (larger loads 10–12); root slices 5–15 but whole roots much longer, and artichokes 25–40 for whole globes. Use size, cut, and freshness to adjust toward crisp-tender doneness. Taste-test rather than guessing.
Below’s a quick reference showing size impact — a simple two word ideas reminder that cut matters, not an unrelated topic.
| Item | Typical time |
|---|---|
| Spinach (soft greens) | 3–5 min |
| Broccoli (florets) | 4–6 min |
| Carrots (sliced) | 5–7 min |
| Artichoke (whole) | 25–40 min |
Water Level & Timer Rules
How much water you use and how long you set the timer directly affect steaming results, so measure carefully and monitor during cooking. You Should Keep 1–1.5 Inches of Water in the Pot so the water level doesn’t touch the rack and stays boiling for the set time.
Follow clear timer rules: start timing once steam is steady; add minutes for frozen items; and test doneness rather than relying solely on charts.
- Verify water level before starting; refill between long batches.
- Start the timer when steady steam reaches the food, not when heating begins.
- Increase recommended times by ~20–30% for frozen or dense items.
These practices reduce undercooking and water loss. They also improve repeatable, evidence-based results.
Stacking and Rack Tips
Place racks so heavier, denser items sit on the lowest stable tier, and lighter or quick-cooking foods occupy upper trays to keep steaming times predictable. Leave clear space around items and between tiers for unimpeded steam flow. Avoid overloading trays, which can compress food and extend cooking times.
When reheating, use a single top rack or reduced stacking. Cut times by roughly 20–30% compared with full cooking to prevent overcooking.
Proper Rack Placement
Why does rack placement matter? Proper rack placement controls heat exposure and steam circulation. Place denser items lower where steam is hotter and faster, and lighter items higher. Use stacking tips to prevent overcrowding; leave gaps for steam to travel vertically and horizontally.
Position racks so food isn’t touching the water. Maintain the recommended 1–1.5 inches of water in the pot base. When you stack trays, stagger items rather than aligning holes to avoid cold pockets. Monitor timing adjustments: upper trays typically need about five extra minutes.
For mixed loads, prioritize doneness-sensitive items on the middle rack. Test for doneness with a fork or thermometer rather than relying solely on time. Adjust future rack placement based on those results.
Layering For Even Steam
Now that you’ve set rack positions with denser items lower and lighter ones higher, layer thoughtfully to keep steam moving evenly through each tray. Use a layering strategy that prioritizes airflow: leave 1–2 cm between items and avoid overlapping pieces that block vents.
Place flat or thin items single-layered; pile bulkier cuts in a single, centered mound so steam circulates around them. Check rack placement so trays don’t sit flush against the steamer lid or each other; gaps matter. Rotate trays once mid-cycle when cooking mixed foods with different densities to equalize exposure.
Rely on visual cues and fork tests rather than fixed times alone. Small adjustments to layering strategy and rack placement reduce cold spots and produce consistent doneness across all trays.
Weight And Stability
Stacking stability matters because uneven weight or overloading can warp racks, block steam flow, and produce unevenly cooked food. Distribute heavier items on lower trays and center them over the support posts. Keep lighter or delicate items on top.
You should check rack capacity and manufacturer’s load limits before arranging trays to preserve weight stability and prevent deformation. When you stack, place dense, uniform items (root vegetables, whole poultry portions) low and stagger items to maintain stacking balance and avoid point loads.
Use flat, sturdy steam-safe containers and avoid nesting pans that shift during steaming. If a tray rocks, redistribute contents until all posts bear load evenly. Regularly inspect racks for warping; replace any that compromise stacking balance or safe operation.
Steam Flow Clearance
How much clearance do you need between trays to keep steam moving freely? Maintain 1 to 2 inches (2.5–5 cm) between trays for consistent steam flow; smaller gaps restrict circulation and lengthen cooking.
Position heavier items lower to preserve rack stability and prevent tipping when you lift tiers. Stagger food so steam can reach all surfaces. Avoid stacking identical dense pieces directly above one another.
Use perforated trays or racks with at least 20–30% open area to improve vertical and lateral convection. Check water level and keep boiling. Diminished steam reduces effectiveness regardless of spacing.
For multi-tier setups, monitor the top tier. Add 4–5 minutes if you see uneven doneness. Then adjust spacing or redistribute loads for future batches.
Reheating Vs Cooking
Because reheating and cooking serve different goals, you’ll arrange and load trays differently to get even heat and safe results. For cooking, space items so steam circulates: place dense root vegetables and whole chicken on lower racks, where steaming is approximately 5 minutes faster. Place lighter items like leafy greens higher.
For reheating techniques, stack sparingly. Single layers or shallow stacks prevent cold spots and overcooking. Use preheated steam and reduce time; for example, 5 minutes for refrigerated rice and 15 minutes for frozen chicken breast to restore temperature without drying.
Prioritize nutrient retention by minimizing exposure. Cover food lightly, avoid prolonged high heat, and check doneness visually or with a fork. Rotate trays mid-cycle when cooking large loads for uniform results.
Frequently Asked Questions
Can I Steam Food Without a Dedicated Steamer Basket?
Yes, you can steam without a dedicated steamer basket. Use steaming alternatives like a metal colander, sieve, or heatproof plate set on an inverted bowl; bamboo or wire racks work too. Those basket substitutes keep food above simmering water.
Maintain 1–1.5 inches of water, keep it boiling, cover tightly, and adjust time based on size and freshness. Test doneness with a fork and watch trays placed higher for slightly longer cooking.
How Do I Prevent Steamed Food From Becoming Soggy?
To prevent soggy textures, steam shorter and stagger cook times for delicate items. Use a timer and fork tests to check doneness. Dry foods thoroughly and pat with paper towels before steaming. Arrange in a single layer with space for steam circulation.
Use higher heat but less time, and remove foods promptly to a warm plate to avoid residual steaming. Follow reheating safety guidelines by reheating to steaming hot (165°F/74°C) and consuming immediately.
Can I Season Food Before Steaming or Only After?
You can season before or after steaming. You’ll get different results: seasoning options like salt, herbs, citrus, soy, or marinades applied beforehand promote flavor absorption, especially in thinner or porous foods (fish, sliced veg).
Strong salt or acidic marinades can draw moisture and risk sogginess; use sparingly. Finish with fresh herbs, oils, or acid after steaming to brighten taste and regain texture without over-softening.
Is Steaming Safe for Reheating Leftovers Repeatedly?
Yes, steaming can be safe for reheating leftovers, but reheating safety depends on how you handle food and repetition limits. You should reheat only once, cool rapidly, refrigerate promptly, and ensure the food reaches 74°C (165°F) throughout.
Don’t reheat repeatedly; each cycle raises spoilage risk and degrades quality. Use airtight storage, keep steam even, and discard leftovers if they’ve been reheated or stored too long to stay safe.
How Long Can Steamed Food Stay at Room Temperature?
You shouldn’t leave steamed food at room temperature for more than 2 hours. If the ambient temperature is above 90°F (32°C), reduce that to 1 hour. For room safety, refrigerate leftovers promptly in shallow containers to cool quickly. Alternatively, keep them hot above 140°F (60°C) until serving.
When reheating, heat to an internal temperature of 165°F (74°C). Trust time and temperature guidelines to prevent bacterial growth.
Conclusion
You’ve got the timing basics down: follow the vegetable chart, keep water at the correct level, and set your timer precisely. Place racks so steam circulates freely, avoid overstacking, and distribute weight evenly to prevent tipping.
Use higher trays for quick-cook items and lower ones for denser produce. For reheating, cut cooking times, check internal temperature, and retain moisture. Apply these practical rules consistently to get reliable, evenly steamed results every time.