Pressure Cooker Valve Cleaning Guide
You should cool and fully depressurize the cooker.
Then remove the valve per manufacturer steps and inspect seals and seat for tears, hardening, or residue.
Gently wiggle the stem to check freedom.
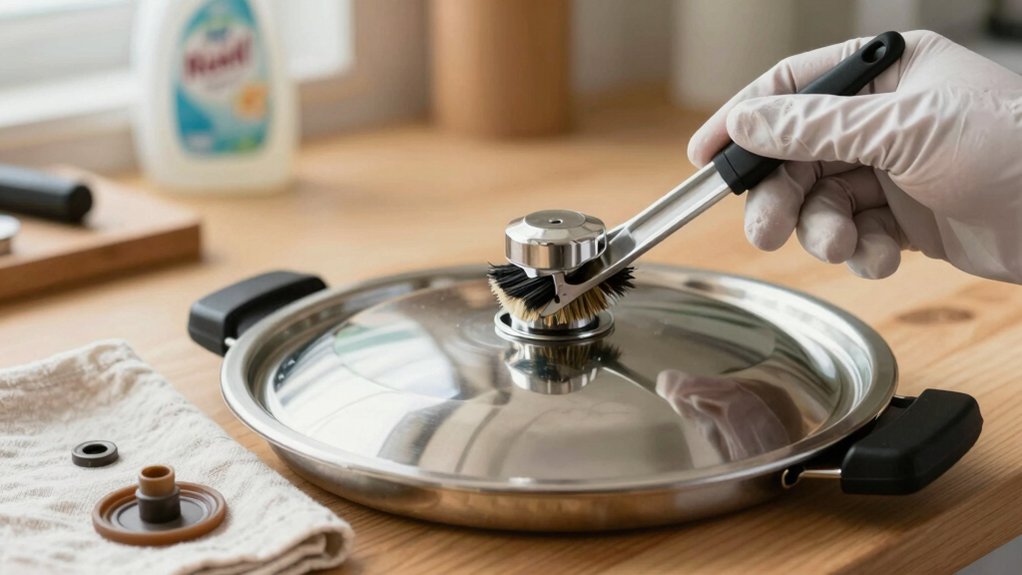
Clean the bore and seat with a soft brush and mild solvent, rinse, air-dry, and reseat with alignment icons matched.
Run a short low-pressure test cycle to confirm movement and sealing.
Continue for step-by-step procedures, safety checks, and replacement guidance.
Quick Overview
- Depressurize and cool the cooker completely before inspecting or removing the valve to avoid burns or sudden steam release.
- Remove the valve per manufacturer instructions. Then visually inspect the stem, seat, and gasket for tears, deformation, or residue.
- Clean the valve and seat with a soft brush and mild soapy water or approved solvent, avoiding abrasives that damage seals.
- Re-seat the valve straight and align any icons or indicators correctly. Press firmly to ensure proper seating without lateral stress.
- Test with a short low-pressure cycle and observe valve travel and sealing. Replace any single-use or damaged gaskets immediately.
Valve Pressure Ratings Chart
How do you match a pressure cooker valve to the correct rating? You identify valve safety needs, compare pressure ratings, and select the valve that matches your cooker’s working PSI or PN. Check manufacturer specs, note operating temperature, and allow tolerance for response precision.
| Rating System | Typical Value | Notes |
|---|---|---|
| PSI | 11.6–14.5 psi | Domestic cooker range |
| PN (bar) | PN 20–100 | European nominal classes |
| ANSI/Class | CL 150–600 | Industrial flange designations |
Convert between systems before ordering: PSI↔bar, PN↔ANSI approximations. Account for temperature-dependent derating and brand response precision. Verify icons and alignment on reinstallation to preserve valve safety and accurate pressure control.
Single-Use Gasket Inspection Checklist
When did you last check the single-use gasket? You should perform a gasket inspection every deep-clean cycle and before pressure tests. Remove the gasket per manufacturer steps. Visually inspect for tears, deformation, hardening, or contamination, and discard single-use gaskets showing any defect. Do not attempt repairs.
Check edges for cracks or flattening that compromise the seal. Verify material resilience by gently flexing; a brittle response warrants replacement. Inspect contact surfaces for embedded food residue or chemical damage.
Record findings and replacement date in the maintenance log. Use only specified replacement parts. Reinstall only if the gasket meets all criteria; otherwise, fit a new single-use gasket and confirm lid alignment per valve icon before testing.
Stuck Relief Valve Clearing
First, check how freely the relief valve moves and disconnect any heat or pressure source before you touch it. Use a soft brush and cloth to remove debris. Re-seat the valve with the alignment icon matching the button, then press down firmly and test operation.
Finally, document cleaning frequency and clear anti-block shields to prevent future sticking.
Assess Valve Movement
Wondering whether your relief valve is truly stuck or just sluggish? Start by visually confirming valve movement: press the release button and note travel distance and resistance. If travel is limited or uneven, record symptoms before disassembly.
Next, perform a gasket inspection around the valve seat for deformation or residue that could impede motion. With the lid secured, gently wiggle the valve stem to detect binding; smooth axial movement indicates internal freedom. Lateral play indicates wear. If movement is sticky, remove the valve for cleaning (see next section) but do not force it while pressurized.
Use a small brush and solvent to clear deposits from the valve bore and seat. Recheck movement after cleaning; consistent, unobstructed travel confirms clearance and proper function.
Remove Pressure Source
How do you safely eliminate trapped pressure before disassembling a stuck relief valve? You verify the cooker shows zero pressure: the indicator lowered and the handle at “Sealing” release position moved to “Venting” as per manual. Cool the unit until steam stops. Do not force the lid.
Use a damp cloth to gently touch seams to confirm no residual heat or steam. If pressure persists, engage the manufacturer-recommended manual venting method while standing to the side; wear heat-resistant gloves and eye protection. Once pressure is confirmed at zero, follow the removal procedure: depress the valve plunger straight up with steady force, avoiding lateral stress.
Check valve alignment marks before reassembly; misalignment can defeat the seal and cause malfunction.
Clean With Soft Tools
Need to clear a stuck relief valve without damaging components? Use soft tools and follow a deliberate sequence. First, ensure the cooker is depressurized and cooled.
Apply gentle cleaning only: soft-bristled brush, wooden pick, or plastic toothpick to dislodge surface debris. Work radially around the valve stem; don’t lever or pry. Use a cotton swab dampened with soapy water to remove loosened residue from the nozzle and seating area. Rinse with clean water, then blow air or let parts air-dry completely before reassembly.
Inspect the valve visually for trapped particles and confirm the icon alignment mark remains visible. If the valve still resists after soft-tools cleaning, stop and proceed to the next troubleshooting step rather than forcing components.
Re-seat And Test
Ready to re-seat the relief valve and confirm it’s functioning? Follow this re-seat procedure precisely: align the valve icon with the lid button, ensure the flat side of the indicator faces up, then press straight down with firm, even pressure until it seats.
Check that the valve moves freely after seating; don’t force it if resistance remains.
Next perform test verification: assemble the lid, set the handle to “Sealing,” and run a short pressure build cycle with minimal water. Observe the valve for proper rise, steam release, and audible venting.
If the valve fails to rise or leaks continuously, depressurize, remove the valve, repeat cleaning, inspect for damage, and re-seat again. Document results for maintenance records.
Prevent Future Sticking
Want to prevent a stuck relief valve? Follow this routine: After each use, cool and depressurize per manual. Then remove and inspect the valve and seat. Clean with a small brush and soapy water, targeting the nozzle, anti-block shield, and float valve areas to eliminate food residue that causes sticking. Soak silicone parts periodically with vinegar solution to aid odor control; then rinse and air-dry.
Reinstall aligning icon with button and press firmly to seat. Perform a stovetop safety test at low heat to confirm movement and sealing. Schedule monthly deep-clean cycles, including deodorizing treatments (baking soda or denture tablet) if odors persist. Replace cracked or pitted components immediately to maintain reliable operation and safety.
Frequently Asked Questions
How Often Should I Deep-Clean Valve Components for Odor Prevention?
You should deep clean valve components monthly to maintain odor prevention. During each deep clean routine, remove valves, soak in soapy water, and scrub with a small brush to dislodge debris.
Inspect the anti-block shield and float valve for lodged particles. Use vinegar or lemon solutions or denture tablets for deodorizing stubborn smells. Reinstall aligning icons and seat firmly.
Replace any cracked or pitted parts and follow manufacturer-specific intervals if they differ.
Can Lemon Juice Damage Silicone Valve Parts Over Time?
Lemon juice generally won’t damage silicone valve parts with occasional use, but you should verify silicone compatibility and manufacturer guidance. Rinse thoroughly after acidic soaks and avoid prolonged exposure.
For routine cleaning, prefer soapy water; use lemon juice sparingly for deodorizing. Check dishwasher safety: some valve materials tolerate top-rack dishwashing, others don’t. Inspect seals after cleaning for swelling, pitting, or odor retention and replace damaged components promptly.
Are Denture Tablets Safe for All Valve Materials?
Yes, denture tablets are generally safe for many valve materials; however, you should confirm denture compatibility and valve material safety first. Soak removable parts briefly, rinse thoroughly, and inspect seals, silicone, and plastics for swelling or discoloration.
Don’t use on painted or metal-finished parts without manufacturer approval. If you see degradation or softening, stop and choose a milder cleaning agent approved for your specific valve materials.
How Do I Know if the Anti-Block Shield Needs Replacement?
You inspect the anti-block shield for signs of shield wear and test its integrity by removing it, cleaning debris, then visually checking for cracks, warping, pitting or hardened residue.
Press the shield gently and wiggle it to detect looseness or material fatigue. A submerged soapy-water soak followed by an air-pressure or blow-test reveals hidden leaks.
Replace the shield if you see damage, persistent obstruction after cleaning, or failed integrity tests.
Can I Run Removable Valve Parts Through the Dishwasher?
Yes, most removable valve parts are dishwasher-safe; however, check your manual first. Remove silicone seals, anti-block shield, float, and steam-release components. Then, place them on the top rack. Use a normal cycle and avoid high-heat drying to prevent warping.
Follow with a monthly deep-clean scrub to remove trapped debris and ensure odor prevention. Inspect parts for cracks or residue; replace any damaged components before reassembly.
Conclusion
You’ve completed the valve-cleaning steps and verified the relief valve moves freely and reseats correctly. With the pressure source removed, soft tools used, and gaskets inspected against the pressure ratings chart, reassembly and a short pressure test confirm functionality and leak-free operation.
Document findings; replace any single-use gaskets, and adjust maintenance intervals to prevent future sticking. Follow this routine every few months or after heavy use to keep the pressure cooker safe and reliable.