Electric Skillet Lid Condensation and Steaming Tips
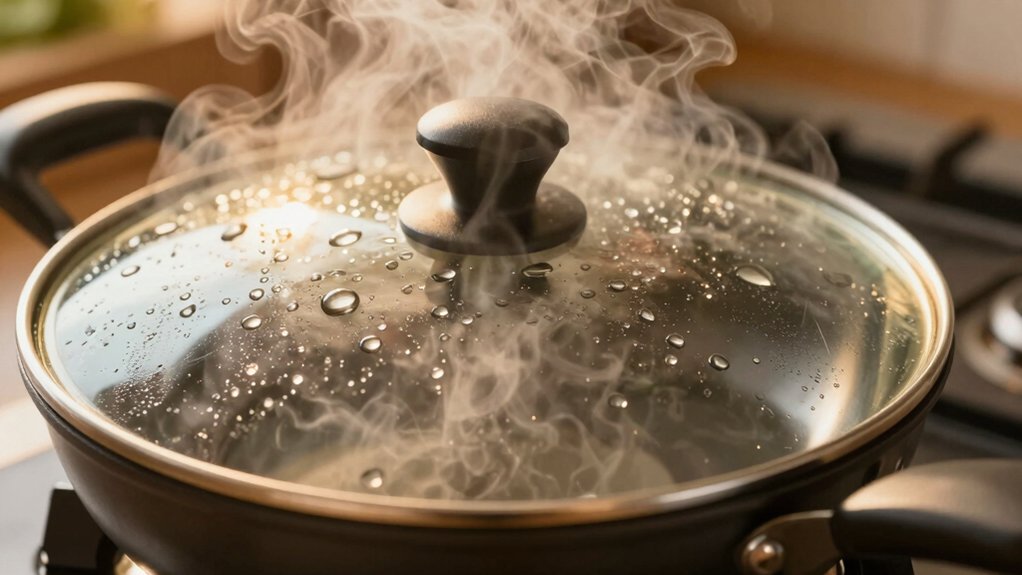
Use a tempered glass lid with a snug silicone gasket so it stays warm and forms fine beads instead of heavy drips. Tilted or vented glass lets steam escape steadily; thin metal or plastic cools fast and encourages showers.
Aim for multiple small vents (about 3–6 mm) near the rim, opposite the handle, to diffuse flow and keep heat.
Wipe beads before they run and check seals often. Keep going and you’ll get practical vent, placement, and maintenance tips.
Quick Overview
- Use a snug tempered glass lid with a silicone gasket to slow cooling and reduce heavy drip formation.
- Prefer vented or tilted glass lids to allow steady steam escape and prevent pressure build-up.
- Choose multiple small vents (3–6 mm each) placed 10–20 mm from the rim, opposite the handle.
- Wipe away condensate beads before they run. Check seals regularly for gaps or brittleness.
- Balance vent size: smaller holes retain heat for simmering; larger or more holes speed evaporation and cooling.
Condensation Rates by Lid Type
Although exact condensation rates by lid type aren’t available from the sources, you can still predict behavior based on materials and design: glass lids, especially thicker, tempered ones, stay warmer and form fewer droplets. Vented or tilted glass lets steam escape steadily. Thin plastic or stainless steel lids cool or conduct heat quickly and produce heavier drips. In practice, expect more rapid, heavier condensation with highly conductive or thin lids and reduced, finer condensation with thick glass or vented designs. You’ll sense steam bead, run, or mist differently depending on lid type and cooking intensity.
| Lid Material | Expected Condensation | Practical Tip |
|---|---|---|
| Thick glass | Fine, delayed droplets | Preheat briefly |
| Vented glass | Light, steady escape | Tilt 10–15° |
| Thin metal/plastic | Heavy runoff | Use cloth or lower heat |
Tempered Glass Seal Guidelines
Want a lid that seals well without trapping steam? You’ll prefer temperate glass with a snug silicone gasket: it keeps heat even and slows sudden cooling so droplets form less. Feel the slight warmth on the lid; it tells you vapor diffusion is working, not leaking.
Check the seal each use: no gaps, no brittle edges. Wipe away beads before they run back. Small adjustments change results: lower heat, brief tilts, or a quick wipe after heavy simmering.
You’ll trust a solid seal that feels reassuring in your hand. You’ll notice reduced dripping and cleaner edges. You’ll dislike any creak or gap that hints at failure. You’ll take pride in a lid that protects flavor and finish.
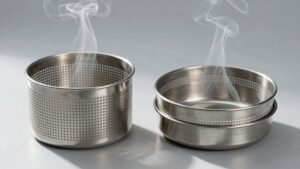
Venting Hole Size Specs
When you pick vent sizes, aim for holes that let steam escape without turning the skillet into a simmering chimney. Typically, the size is 2–6 mm per opening depending on whether you want more retention or faster venting.
Place vents near the rim and opposite the handle. Use two to four openings to balance flow, and choose corrosion-resistant stainless or coated metals to avoid pitting. Those choices affect heat retention noticeably: smaller or fewer vents keep temperature steady, while larger or more vents speed evaporation and cool the pan quicker.
Optimal Hole Diameters
How big should vent holes be to let steam escape without splattering your stovetop or drying out food? You want an optimal diameter around 3–6 mm: small enough to break large droplets into fine mist, large enough to prevent clogging with food particles.
Feel the soft hiss as steam threads through; that sound tells you evaporation is controlled, not violent. Aim for multiple small holes rather than one large opening; this diffuses flow and reduces spatter.
Position vents so they catch rising steam without blasting directly onto food surfaces: vent placement matters for even moisture loss. Test by simmering water: if droplets shower, increase diameter slightly or add an extra hole. If food dries, reduce total open area or lower heat.
Placement Relative To Rim
Where should you place vent holes relative to the rim to keep steam controlled and mess-free? Aim vents about 10–20 mm from the lid edge so escaping steam hits the rim clearance zone, runs back, and drips predictably away from food. You will feel warm, steady airflow rather than sudden gushes that splatter.
Position vents on the side opposite the handle to direct condensate toward the skillet lip, not onto counters. With glass lids, closer placement works because the surface stays warmer; with thin plastic, give a bit more clearance to avoid warping and trapped droplets.
Check lid placement after a few minutes of cooking. If you see erratic dripping, nudge vents farther from the rim until runoff is steady and contained.
Number Of Vent Openings
Why pick one or several vent holes for your lid? You’ll control steam release and the way droplets form on the interior surface. A single large hole gives a focused exit; multiple small holes create a gentle vent pattern that spreads steam and lowers concentrated dripping.
Visualize tiny beads sliding toward the rim or a steady trickle from one port. Match hole count and diameter to your cooking: high-moisture vegetables benefit from several small vents; sauces may do fine with one. Check lid clearance so vents aren’t blocked by the skillet edge or food.
Position vents opposite handles to avoid splatter. Clean openings regularly to maintain flow and inspect for warping that narrows holes and alters condensation behavior.
Impact On Heat Retention
You’ve already seen how the number and size of vents shape steam behavior; those same choices also change how well your skillet holds heat. Small vent holes keep the interior warm, letting a gentle hiss escape while the pan surface stays shimmering. Large holes let heat bleed, making edges feel cooler to the touch.
You’ll want mid-sized vents when you need steady simmering: enough escape to prevent boil-over but limited loss so soups and sauces stay glossy. Don’t treat vent sizing as an irrelevant topic or confuse it with an unrelated concept like lid color.
Match vent diameter to cooking pace: fine for low, steady heat; larger when rapid evaporation matters. Adjust and feel the difference.
Material And Corrosion Resistance
Materials and venting hole size together determine how well a lid resists corrosion and holds up over time. So pay attention to both when you choose or modify a skillet. You’ll feel the difference: a heavier glass or stainless lid with small, well-placed vents limits rapid steam escape and reduces pitting, improving material durability and corrosion resistance.
Too-large vents let aggressive steam blast metal edges; this undermines lid edge sealing and causes rough, rusty rims. Too-small vents trap moisture, which also harms seals and finish. Balance vents to preserve heat transfer performance while preventing condensate buildup. Aim for controlled airflow rather than open flow.
Inspect seals and vent edges regularly; wipe dry after use, and replace compromised lids to protect longevity.
Frequently Asked Questions
How Do I Prevent Water Dripping Onto Stovetop Controls?
Tilt the lid slightly and offset it to stop lid condensation from dripping onto controls. You’ll see steam escape instead of pooling. Lower heat and preheat lids briefly to reduce sudden steam production.
Place a folded dry cotton cloth between lid and pan rim to catch run-off, or use a vented silicone lid. Wipe edges regularly and keep ventilation going: you’ll notice less moisture and no drips on your stovetop controls.
Can Condensation Cause Electrical Damage to My Skillet?
Yes, condensation risks can cause electrical damage and compromise electrical safety. You’ll notice dripping, corrosion, or shorting if moisture reaches controls, heating elements, or connectors.
Smell or heat irregularities warn you. Avoid tilt or vent lids, wipe surfaces, and keep vents and seals dry. Unplug and dry components thoroughly after exposure.
Replace cloudy or cracked plastic lids to prevent repeated moisture contact and electrical failure.
Is It Safe to Use Dishwasher on Plastic Lids?
Yes, you can usually use the dishwasher, but check the manufacturer’s label first. For dishwasher safety, place the plastic lid on the top rack to avoid high heat and warping. You’ll smell detergent and warm steam; that’s normal.
For plastic lid care, avoid repeated high-temperature cycles and replace lids that show cloudiness, odor, or cracks. Hand-wash when in doubt to preserve coatings and seals longer.
Do Silicone Lids Impart Flavors or Odors to Food?
No, silicone lids rarely cause silicone odor or flavor transfer when they’re food-grade and clean. You’ll notice a faint new smell at first with fresh silicone; wash, air out, or boil briefly to remove it.
During cooking, high heat or old degraded silicone can release faint odors that cling to delicate foods. Replace warped, stained, or cloudy lids to avoid persistent smells and any subtle flavor transfer.
How Often Should Seals Be Professionally Replaced?
You should schedule seal replacement every 2–3 years, or sooner after a professional inspection flags wear. Trust your senses: If lids smell musty, feel sticky, or leaks cause drips and increased condensation safety risks, act immediately.
Arrange professional inspection annually if you cook frequently or notice steam buildup. Technicians will verify integrity, recommend replacement, and ensure seals meet safety standards so you avoid odor transfer, leaks, and mold.
Conclusion
You’ll notice less dripping and clearer cooking when you match lid type and venting to your skillet. Pick a tempered glass lid with a snug silicone seal, add one or two small vents (3–6 mm) near the rim, and position them opposite the handle to channel steam away.
Use corrosion‑resistant parts; check seals regularly; and avoid oversized holes that cool the pan. These small choices keep heat steady, reduce condensation, and make food look and taste better.