Electric Griddle Hot Spot Management
You should map surface temperature with an IR thermometer in a grid after a 10–15 minute warm-up, flagging any ±20–50°F deviations and repeating post-cleaning. Aim setpoints: 300–350°F for gentle sear; 350–375°F for general use; 375–400°F for high-heat tasks, verifying at three points.
Adjust element placement, staggered patterns, watt density and insulation to spread heat. Add independent controls to limit hotspots. Follow the procedure below to correct hotspots and confirm fixes.
Quick Overview
- Map surface temperatures with a calibrated IR thermometer grid after 10–15 minutes preheat to identify hotspots and cold zones.
- Design element layout with staggered placement and varied watt density to spread heat and reduce concentrated hotspots.
- Use thermal isolation and insulation barriers between elements and independent control loops to limit lateral heat transfer.
- Adjust element placement (center vs edge) and staggered activation timing to match typical load patterns; this will lower peak center temps.
- Set target surface ranges (300–400°F) per task and verify setpoints at multiple locations. Flag ±20–50°F deviations for action.
Temperature Uniformity Map
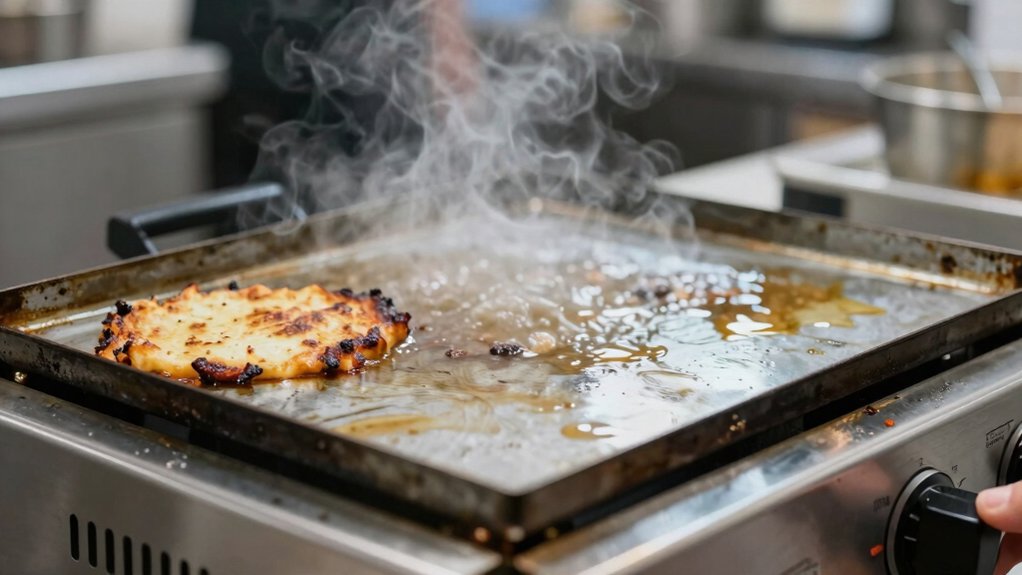
How do you confirm your griddle heats evenly? You’ll create a temperature uniformity map using an infrared thermometer, scanning a grid across the surface to reveal temperature nonuniformity. Record readings, note hotspots over elements, and compare to expected power distribution patterns. Flag any ±20–50°F deviations for action.
| Location | Temp (°F) |
|---|---|
| Center | 400 |
| Left edge | 360 |
| Right edge | 350 |
| Front | 370 |
| Back | 355 |
Procedure: Preheat 10–15 minutes; test empty surface; repeat after cleaning. Risk focus: Significant nonuniformity indicates element failure, carbon buildup, or warped metal. Don’t cook high-risk foods until variance is reduced by cleaning, adjusting burner use, or selecting a better-distributing model.
Target Surface Temp Ranges
Which surface temperatures should you aim for to balance food quality and hotspot risk? You’ll target ranges that prevent burning while limiting thermal stress that causes material fatigue and warping. Maintain safety clearances and monitor deviations. Use a calibrated IR spot thermometer to confirm setpoints before service.
- 300–350°F: gentle searing, minimal hotspot risk, lower fatigue.
- 350–375°F: versatile cooking, controlled browning, increased vigilance.
- 375–400°F: high-heat tasks only, frequent checks, greatest risk.
Procedure: Preheat gradually to desired band. Verify three locations across the plate and adjust controls incrementally. Log readings and inspect for early signs of material fatigue. Enforce safety clearances to prevent external heat loads that amplify hotspots.
Power Element Placement
You’ll start by mapping element layout patterns to match your cooking zones, ensuring watt density aligns with center versus edge needs to avoid concentrated hotspots.
Use staggered element design and controlled thermal isolation strategies so heat spreads evenly and local thermal stress is minimized. Verify placement with spot-temperature checks; adjust spacing or wattage where differential exceeds safe cooking tolerances.
Element Layout Patterns
Element layout patterns determine where power elements sit beneath the griddle and directly affect hotspot formation. Therefore, inspect and plan placement to manage thermal risk. You’ll map element positions to avoid concentrated heat lines. Staggered arrays reduce repeated hotspot cycling and lower thermal stress.
Place elements to support intended burner sequence; ensure adjacent elements don’t activate in patterns that create steady hot bands. Use thermal imaging during test cycles to verify uniformity. Adjust element spacing or add baffles where readings show persistent peaks. Prioritize redundancy so a single element failure won’t produce an extreme local hotspot.
Document layout, control wiring, and activation logic so operators follow safe burner sequences. Regularly recheck after maintenance or resurfacing to confirm pattern integrity and mitigate hotspot escalation.
Center Versus Edge
Why place power elements toward the center or the edges of a griddle surface? You decide element placement based on desired heat profile and risk mitigation. Place elements toward the center to concentrate heat where heavy searing is required. You must monitor for central hotspots and adjust cook time to avoid burning.
Place elements near the edge to widen usable cooking area and reduce peak center temperature. However, watch for cooler center zones that cause undercooking. In either layout, verify surface temperatures with an infrared thermometer and map center edge gradients before operation.
Prioritize energy efficiency by matching element placement to typical load patterns; avoid powering unused zones. Document placement, test routinely, and adjust controls to minimize thermal stress and safety hazards.
Watt Density Distribution
Watt density determines how much power you concentrate per square inch of griddle surface. Placing higher-density elements where you need rapid searing will create intentional hot zones; lower-density areas provide gentler, more consistent cooking. You should start by creating a distribution mapping of element locations versus intended cooking tasks. Mark high-watt-density zones for sear tasks and low-watt-density zones for hold or gentle cook.
Install elements so thermal gradients are gradual. Avoid abrupt watt density transitions that produce uncontrolled hotspots. Verify placement with spot temperature checks after calibration and adjust element spacing or shielding if persistent hot spots appear.
Prioritize redundancy and protection: failed high-density elements concentrate risk. Design for even load sharing and safe, replaceable modules.
Staggered Element Design
Having mapped watt‑density zones, you should stagger power elements to spread heat more evenly and limit concentrated thermal stress that creates hotspots and warping. Position elements offset from one another so adjacent heating paths don’t align; this reduces peak temperatures and extends plate life.
Sequence activation during startup: alternate zones rather than energize contiguous elements to allow gradual, predictable thermal rise. Monitor surface temps at predefined points; if readings diverge, adjust element spacing or duty cycles.
Design for serviceability: allow element relocation or replacement without disturbing adjacent circuits. Communicate layout rationale to operators with clear procedures to prevent misuse. This staggered empathy toward the griddle’s thermal limits yields counterintuitive efficiency: slightly lower peak power, but far fewer failures, less warping, and more consistent cooking zones over time.
Thermal Isolation Strategies
How can you limit thermal crosstalk between elements to protect the plate and control hotspots? Place power elements with deliberate spacing and staggered offsets so adjacent coils don’t create overlapping peak zones. Install targeted thermal insulation barriers between elements to reduce lateral conduction and protect the plate from localized overstress.
Use separate sensors and independent control loops per element so you can detect and cut power to a failing zone before damage occurs. Prioritize element placement that balances load for energy efficiency, avoiding clustered high-output units. During design validation, run thermal mapping under worst-case loads to confirm isolation effectiveness. Document safe maximum duty cycles and interlock thresholds to prevent runaway heating.
Regularly inspect insulation integrity and sensor calibration to sustain protection.
Frequently Asked Questions
How Often Should I Recalibrate My Infrared Thermometer?
You should recalibrate your infrared thermometer at least annually. You should recalibrate more often if you depend on precise readings for safety. Check thermometer accuracy monthly with a known-temperature source (ice bath or blackbody reference).
You should also check accuracy after any shock, drop, or exposure to extreme heat. Document recalibration frequency and results. Perform immediate recalibration if readings deviate beyond manufacturer tolerances. Follow a risk-based schedule for high-use or regulatory environments.
Can Seasoning Type Affect Hotspot Development?
Yes, seasoning composition can affect hotspot development. You should inspect and choose oils that promote even oil polymerization to form a uniform, hard seasoning layer. If the composition favors soft, uneven polymer layers or carbonized buildup, you’ll get localized insulating spots that alter heat transfer.
Clean, reapply thin coatings and polymerize gradually at controlled temperatures to reduce thermal gradients and minimize hotspot-related risks.
Is It Safe to Use Metal Spatulas on Heated Electric Griddles?
Yes, you can use metal spatulas on heated griddles, but you should proceed cautiously to avoid damage and injury. Use thin, flat metal spatulas for scraping and turning. Avoid heavy gouging or levering that strips seasoning or exposes metal.
Keep handles insulated, wear heat-resistant gloves, and scrape at shallow angles. After use, clean immediately to remove residue and reapply a light oil coat to protect the surface and reduce hotspot risk.
How Do Outdoor Winds Alter Electric Griddle Performance?
Outdoor wind increases griddle cooling, forcing you to raise heat or preheat longer to maintain set temperatures. Check surface temps with an infrared thermometer, preheat 5 to 10 minutes, and use all burners to counter wind-driven heat loss.
Wind can create uneven zones and thermal stress; avoid sudden high-temperature jumps. Monitor for warping or hotspots, adjust controls gradually, and shelter the griddle when possible to reduce cooling and safety risks.
What’s the Best Way to Store Griddles to Prevent Warping?
Store griddles flat on a stable surface in storefront storage to prevent warping. Don’t stand them on edges. A cool, dry environment reduces wind effects and thermal shock. Lightly coat with oil for seasoning impact protection, then cover.
Use a metal spatula safety wrap or sleeve to avoid scratching. Avoid stacking heavy items atop the griddle. Inspect periodically for deformation and re-season if you detect surface irregularities.
Conclusion
You’ll use the temperature map and target ranges to pinpoint and correct hotspots. Then, adjust element placement and watt density to spread heat evenly. Stagger elements and apply thermal isolation where needed. Prioritize the highest-risk zones: center and edge transition.
Verify results with measurements and iterate until readings stay within safe tolerances. Document changes and risks. Follow maintenance checks to prevent drift or component overload.